15
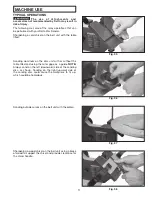
Fig. 27
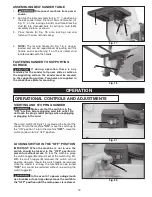
The table can be tilted 45 degrees to the front, as shown
in Fig. 27, by loosening lock lever (B). Use a combination
square (E) check to set the table at 45 degrees to the belt
and tighten lock lever (B).
To avoid trapping the work or fingers
between the table and sanding belt, the table edge
(C) should be positioned a maximum of 1/16 inch from
sanding belt (D) when the table is tilted.
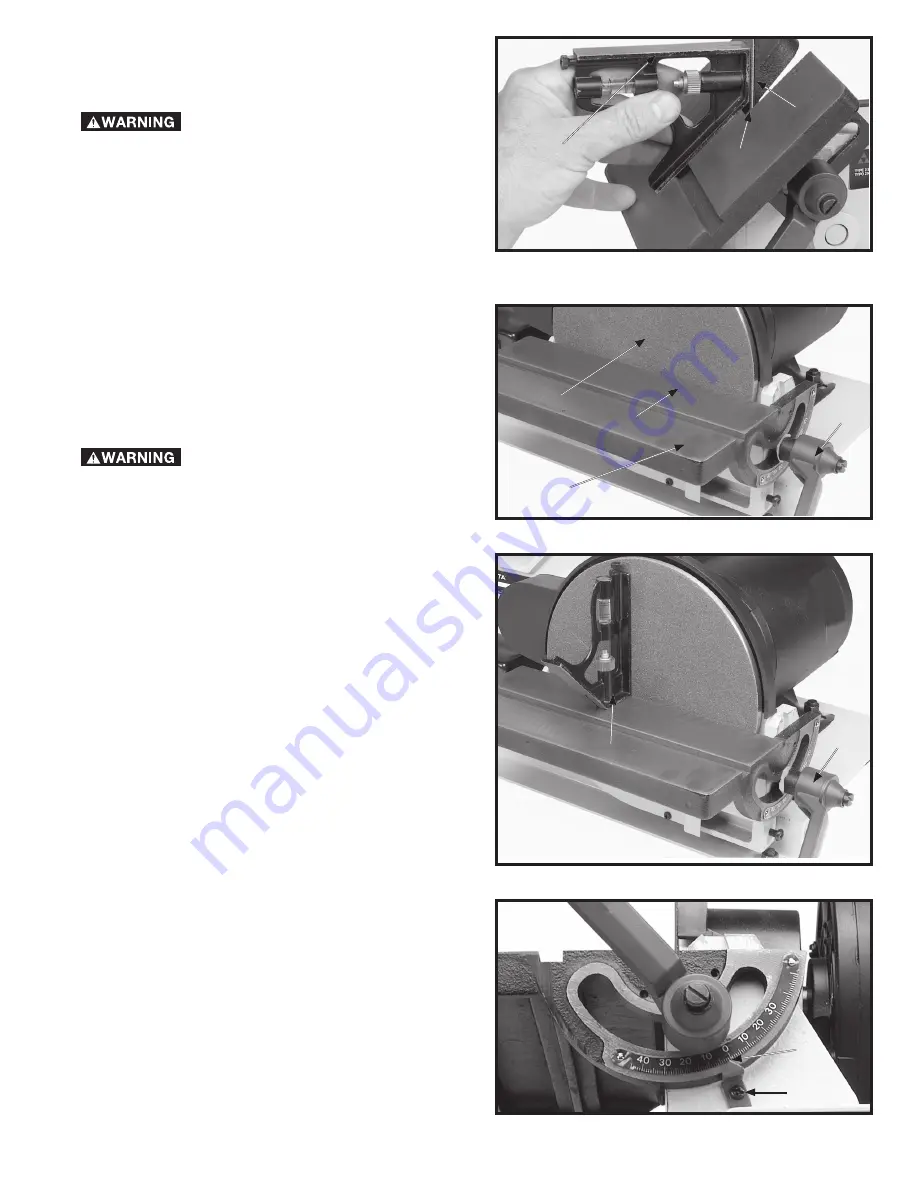
DISC TABLE ADJUSTMENTS
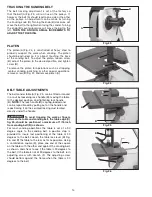
The disc table (A) Fig. 28, can be tilted 45 degrees up or
down, by loosening lock handle (B), tilting the table, and
tightening lock handle (B).
NOTE:
The lock handle (B) is
spring-loaded and can be repositioned by pulling out the
handle (B) and repositioning it on the serrated locking
stud located directly underneath the handle.
To avoid trapping the work or fingers
between the table and sanding disc, the sanding disc
(C) should be adjusted so it is a maximum of 1/16 inch
from edge of table (D).
This can be accomplished by moving the sanding disc in
or out on the motor shaft.
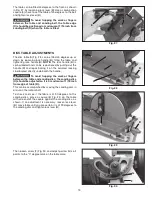
To check and see if the table is at 90 degrees to the
sanding disc, place a square (E) Fig. 29, on the table
with one end of the square against the sanding disc, as
shown. If an adjustment is necessary, loosen lock lever
(B), move table until you are certain it is at 90 degrees to
the sanding disc and tighten lock lever (B).
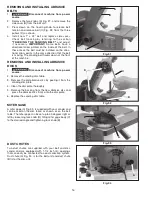
Then loosen screw (F) Fig. 30, and adjust pointer (g) so it
points to the "0" degree mark on the table scale.
Fig. 28
Fig. 29
Fig. 30
E
D
C
E
B
G
F
B
D
C
A
Summary of Contents for SA180
Page 21: ...21 FRANÇAIS ...
Page 41: ...41 ESPAÑOL ...


