background image


11 


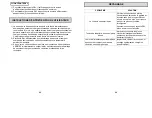
TROUBLE SHOOTING


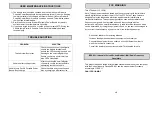
USER MAINTENANCE INSTRUCTIONS 


1)  The battery level should be checked and the Vehicle Jump Starter & 

Portable Power Bank should be charged every three (3) months. Keeping 
the internal battery fully charged will ensure the Vehicle Jump Starter & 
Portable Power Bank in ready to use when needed. This will also extend 
the life of the internal battery. 

2)  Store the Vehicle Jump Starter & Portable Power Bank in a clean dry 

environment at room temperature if possible. 

3)  If you see a bulge in the case or notice a chemical smell STOP using the 

Vehicle Jump Starter & Portable Power Pack immediately and seek 
technical help. 


PROBLEM 

SOLUTION 

The vehicle will not start 

Check the connection of the alligator 
clips to the battery terminals and 
ensure the LED is solid green and not 
flashing on the smart alligator clips. 
Ensure you have a minimum of two 
blue LED’s illuminated. 

Vehicle battery voltage to low 

After connecting the smart alligator 
clips wait a couple of minutes before 
attempting to start the vehicle. 

Vehicle Jump Pack & Portable Power 
Bank will not charge 

Check the cable and connection and 
also try charging a different device. 


12 


FCC WARNING


Title 47 Subpart, 15.105(b) 

Note: This equipment has been tested and found to comply with the limits for a 
class B digital device, pursuant to part 15 of the FCC Rules. These limits are 
designed to provide reasonable protection against harmful interference in 
residential installation. This equipment generates, uses and can radiate radio 
frequency energy and, if not installed and used in accordance with the 
instructions, may cause harmful interference to radio television reception, which 
can be determined by tuning the equipment off and on, the user is encouraged to 
try to correct the interference by one or more of the following measures: 


-  Reorient or relocate the receiving antenna. 

-  Increase the separation between the equipment and receiver. 

-  Connect the equipment into an outlet on a circuit different from that to 

which the receiver is connected. 

-  Consult the dealer or an experienced radio/TV technician for help.


ICES-001: Industrial, Scientific, and Medical (ISM) Radio Frequency 

Generators 


This product has been tested with the listed standards and found to be compliant 
with the Code of Industry Canada ES-001 and the measurement Procedure 
according to CISPR 11.  

CAN ICES-1/NMB-1 


Summary of Contents for Battery Tender 030-1010-CA

Page 1: ...duct Failure to do so can result in serious injury Save this manual 392 0424 RA 2 CONTENTS Important Safety Instructions Warnings Product Specifications Product Overview Operating Instructions User Ma...

Page 2: ...ttery manufacture and manufacture of any equipment you intend to use in the vicinity of the battery Review all cautionary marking on these products and on engine 4 PERSONAL PRECAUTIONS 1 Consider havi...

Page 3: ...STARTER to severe physical shock 6 Do not attempt to modify the VEHICLE JUMP STARTER in any way 7 Do not place the VEHICLE JUMP STARTER in a microwave oven or pressurized container 8 Do not use the VE...

Page 4: ...the Jump Pack 4 Connect the RED positive clip to the positive post on the battery then the BLACK negative clip to the negative post on the battery 5 CAUTION Ensure the Vehicle Jump Pack and smart all...

Page 5: ...LED 1 2 solid LED 3 flashing d 75 99 LED 1 2 3 solid LED 4 flashing e 100 Charged all of the LED s are solid and will go into sleep mode after 10 seconds 4 The battery level should be checked and cha...

Page 6: ...ge Check the cable and connection and also try charging a different device 12 FCC WARNING Title 47 Subpart 15 105 b Note This equipment has been tested and found to comply with the limits for a class...

Page 7: ...ecommendations for safe and effective use 2 The product is disassembled or repaired by anyone who is not an authorized service representative of Battery Tender 3 The product was purchased from an unau...

Page 8: ...duire le risque d endommagement de la prise lectrique tirez sur la prise et non pas sur les cordons lors du d branchement du bloc d alimentation 7 N utilisez pas de bloc batterie ou d appareil endomma...

Page 9: ...la charge d une batterie interne travaillez dans une zone bien ventil e et ne limitez pas la ventilation d une mani re quelconque 2 Dans des conditions abusives du liquide pourrait tre ject de la batt...

Page 10: ...atterie ou bloc d alimentation 20 CARACT RISTIQUES DU PRODUIT Bloc d alimentation pour d marrage de secours et chargeur nomade de v hicules Port de sortie USB standard 5 V c c 2 4 amp res Type Port US...

Page 11: ...c d alimentation pour d marrage de secours 4 Connectez la pince positive ROUGE la borne positive sur la batterie puis la pince n gative NOIRE la borne n gative sur la batterie 5 MISE EN GARDE Assurez...

Page 12: ...a Voyant DEL 1 0 24 restant clignote b Voyant DEL 1 fixe 25 49 voyant DEL 2 clignotant c Voyant DEL 1 et 2 fixes 50 74 voyant DEL 3 clignotant d Voyant DEL 1 2 et 3 fixes 75 99 voyant DEL 4 clignotant...

Page 13: ...eur nomade de v hicules dans un environnement sec et temp rature ambiante si possible 3 Si vous voyez une bosse dans le bo tier ou si sentez une odeur chimique ARR TEZ imm diatement d utiliser le bloc...

Page 14: ...ence industriels scientifiques et m dicaux ISM Ce produit a t test selon les normes num r es et jug conforme au Code de l industrie Canada ES 001 et la proc dure de mesure selon la norme CISPR 11 CAN...

Reviews: