


3
Fig. 3 & Fig. 4
Fig. 6
Fig. 7
Fig. 8
Fig. 5
info@delviro.com | 1.877.502.3434
94 Brockport Drive, Toronto, Ontario M9W 7J8
www.delviro.com
delviro energy
1
UPPER
LOW
ER
LOWER
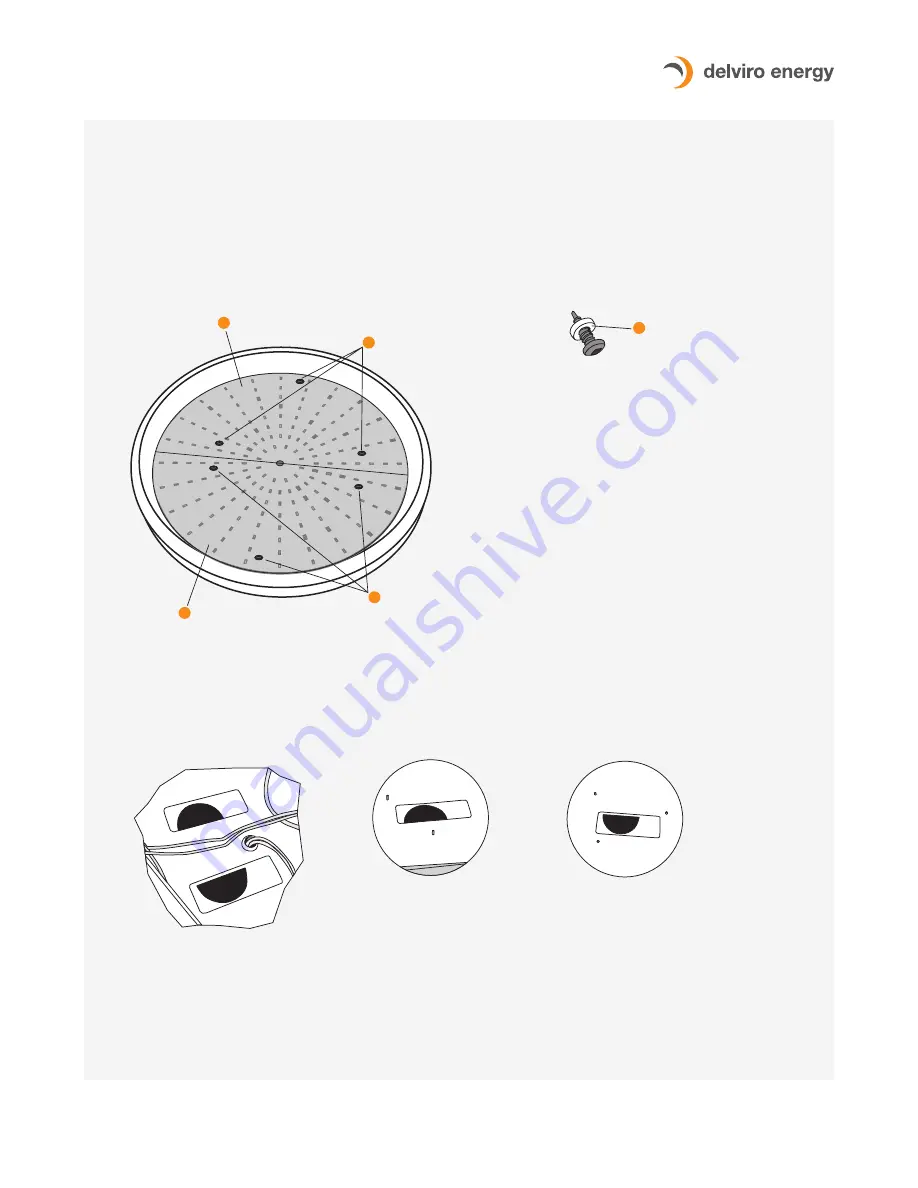
5.
Remove the 3 black head screws in the upper part (Fig. 3) and also in the lower part (Fig. 4). There are nylon washers
which help to prevent electrical shorting of the metal screw head with the metal board. Ensure one has removed 6 black
head screws and nylon washers in Fig. 5.
6.
There is a label on the fixture inside body showing
UPPER
and
LOWER
(Fig. 6) and corresponding labels on the back of
the LED panels (Fig. 7 and Fig. 8). The labels are on the fixture and on the back of the panels to ensure no confusion
when disassembling and assembling the fixture.
Zip Cloud Flush Mount
Installation Instructions
Mounting screws
Upper part (Fig. 3)
Lower part (Fig. 4)
Mounting screws
Screws with washers (x 5)
INSTALLATION
UPPER


