background image


WARNING: 

In all cases where the fuel line has been cut, it is essential that it be clean to ensure that no metal 
particles enter the fuel bowl after the new carburetor installation.  Remove the fuel line at the 
pump and blow the line clean with compressed air.  DO NOT use the procedure where the coil 
wire is disconnected, the engine cranked for a few revolutions, and the fuel collected in a 
container.  This procedure is unsafe because sparking can occur either at the coil or at the 
distributor end of the coil wire and ignite any fuel spilled in the engine compartment. 

 
MAINTENANCE WARNING:  Fuel system components, including fuel lines and the carburetor, should be 
inspected periodically to assure no fuel leakage a

nd to ensure the soundness of the hoses.  Today’s clean 

emissions engines provide higher temperatures in the engine compartment.  These high temperatures promote 
faster aging of non-metallic materials. 
 
Hoses that exhibit surface cracks, when bent to 180°, should be replaced.  The presence of liquid fuel demands 
tightening of fittings, hose replacement, and re-torquing of the fuel system component flange nuts.   
 

Connecting the Throttle Linkage 


NOTE:     Before connecting the linkage, operate the throttle lever to assure the correct travel (no sticking or 

binding), by opening to wide-open throttle and back to closed throttle several times.  Correct any 
sticking or binding conditions before proceeding. 

 
NOTE:     If installing on a GM vehicle where the throttle cable needs to utilize the large hole in the top of the 

throttle lever, a part # 1952 GM throttle linkage cable attachment bracket will be needed.  


With the pedal held firmly against a stop or the floorboard, pull the carburetor to its wide open position. Adjust the linkage 
rod or cable to the proper length, and then attach it to the baseplate linkage. Remember, the pedal should make contact 
with a positive stop, just as the carburetor gets to wide open throttle. With the linkage rod or cable attached to the 
baseplate, make sure the carburetor can return to its curb idle position. Install your return spring(s) to the bottom of the 
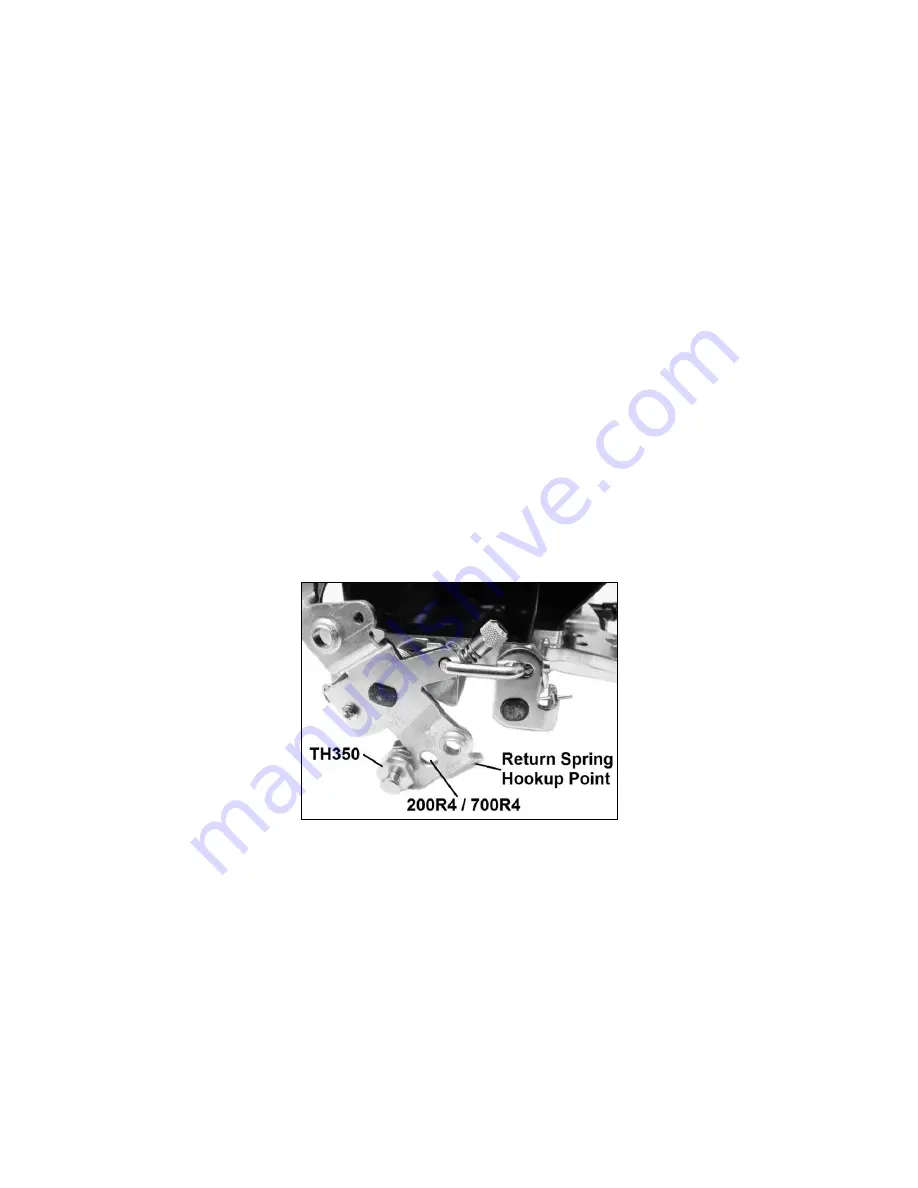
throttle lever as shown in Figure 2, and check again for smooth operation to wide open throttle, and then closed again


Figure 2 


Connecting the Transmission Linkage 


GM TH350, 200R4 /700R4 


Attach the transmission kickdown stud (supplied) into the proper hole location on the throttle lever as seen in (Fig. 2). 
Attach the TV cable to the stud and adjust per transmission manu

facturer’s specifications, using Chilton®, Motor®, or 

other repair manual designed for your specific transmission.  
  

WARNING:


 If you are unfamiliar with overdrive transmission TV cable adjustments, consult a qualified 

transmission expert. Failure to properly adjust the TV cable on overdrive transmissions can lead 
to poor shifting and / or transmission failure.  Demon Carburetion assumes no responsibility for 
transmission damage or failure caused by improperly adjusted TV cables. 


Summary of Contents for 625 Street Demon Carburetor 1900

Page 1: ...1 625 STREET DEMON Part Numbers 1900 1901 1902 INSTRUCTION MANUAL LIT701 US Patent D648746S www demoncarbs com ...

Page 2: ...ixture Adjustments 8 Fuel Pressure 9 PERFORMANCE TUNING AND ADJUSTMENT 10 Secondary Air Valve Tuning 10 Accelerator Pump Tuning and Adjustment 10 Main Metering Tuning 11 Theory of Operation 11 Tuning 12 Steady State Cruise Tuning 13 Part Throttle Acceleration Tuning 25 to 75 throttle 13 Choosing the Correct Metering Rod and Step Up Springs 13 Wide Open Throttle Tuning 13 Long Duration Camshaft Tun...

Page 3: ...up solenoid and bracket 1951 Street Demon TPS kit for use with electronic transmissions requiring a TPS signal 1952 GM throttle linkage cable attachment bracket 1953 Throttle cable and transmission kickdown bracket 1954 Ford kickdown spring and perch kit 1958 Billet Throttle Cable Bracket 1959 Billet Detent Bracket for 1958 Throttle Cable Bracket 160049 Universal carburetor installation kit 124007...

Page 4: ...or cracked carburetor throttle body WARNING Any sticking binding or other interference in the throttle linkage could result in uncontrolled engine speed This could result in engine damage or personal injury 5 In some cases the existing fuel line will have to be cut and connected with a length of rubber fuel hose and a clamp The Street Demon carburetor comes with three fuel fittings 5 16 hose barb ...

Page 5: ...g or binding conditions before proceeding NOTE If installing on a GM vehicle where the throttle cable needs to utilize the large hole in the top of the throttle lever a part 1952 GM throttle linkage cable attachment bracket will be needed With the pedal held firmly against a stop or the floorboard pull the carburetor to its wide open position Adjust the linkage rod or cable to the proper length an...

Page 6: ... a spring and perch kit Part 1954 is required NOTE Street Demon Carburetors will not work with a Ford AOD transmission 1 Press the screw retainer into position Fig 3 2 Remove shipping screw Fig 4 3 Install adjustment screw and locknut Fig 5 Consult the Ford Service Manual for proper setting 4 Install the mounting bracket and return spring Fig 6 Figure 3 Figure 4 Figure 5 Figure 6 WARNING Install t...

Page 7: ... cap The other end must be connected to a good ignition activated 12 volt source Hookup of this wire is not optional WARNING Connecting the choke cap to the ignition or ignition coil could result in unacceptable choke operation poor fuel economy and possible engine misfiring since the voltage delivered to the spark plugs will be severely reduced by the drain imposed by the choke cap Suitable ignit...

Page 8: ...dy to start with a minimal amount of cold cranking Ladies and Gentlemen Start Your Engines Get a helper Unless your car can be started from the engine compartment starting your engine for the first time should always be performed with an assistant A second set of eyes to watch for fuel leaks can be invaluable Before engaging the ignition depress the throttle fully and release once or twice Now att...

Page 9: ...rtially closed It controls how fast the engine will idle during cold engine warm up The fast idle adjustment screw is located on the bracket that is screwed to the throttle shaft behind the choke housing Fig 11 Fast idle can be increased by turning the fast idle screw clockwise or decreased by turning it counter clockwise It is important to note that when the choke butterfly is open completely ver...

Page 10: ... screw then loosen the lock nut If the locknut is loosened before engaging the adjustment screw the spring tension will be released Fig 14 turn the adjusting screw counter clockwise to increase spring tension on the door and delay opening Turn the screw clockwise to decrease tension and allow the door to open sooner It is not recommended to go beyond one turn more than the factory setting torque t...

Page 11: ...pump discharge nozzle Fig 17 Using a pair of needle nose pliers the discharge nozzle and screw can be removed from the choke tower area There are two gaskets used one under the screw head and the other under the discharge nozzle Use extreme caution so the gasket or nozzle is not dropped into the venturii Re assemble in the reverse order of removal Main Metering Tuning Theory of Operation Unlike a ...

Page 12: ...he step up piston is in the top of the bore and the rich step of the metering rod is in the jet Figure 18 Figure 19 Tuning Tuning is best completed by using a wide band oxygen sensor to monitor air fuel ratios however tuning can be performed by reading spark plugs and taking vacuum readings Manifold vacuum will increase the closer you get to an ideal calibration it will fall off once you get past ...

Page 13: ...ntially restricting fuel flow So to richen the mixture a smaller rod step is needed to allow more fuel to pass through the jet and to lean the mixture a larger rod step is needed to restrict the fuel passing through the jet If the desired result cannot be achieved by changing metering rods a larger or smaller jet can then be used to richen or lean the mixture in combination with the metering rods ...

Page 14: ...Tuning for Elevation Street Demon carburetors are calibrated at sea level When going up in elevation the air is thinner and the carburetor may run rich As a general rule of thumb for every 2 000 ft in elevation the metering rod diameter should be increased 002 on the lean and rich steps Removal and Installation of Metering Rods Step Up Springs and Jets Metering Rod and Step Up Spring Replacement 1...

Page 15: ...3 Figure 22 Figure 23 6 Remove the six Phillips head screws from the bottom of the carburetor as circled in Fig 24 7 The carburetor air horn may now be carefully removed from the main body fuel bowl assembly 8 Invert the air horn to access the primary and secondary metering jets Fig 25 Check and adjust the float level Fig 26 9 Re assemble in reverse order of removal Figure 24 Figure 25 Figure 26 ...

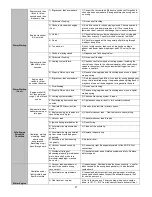
Page 16: ... and water will bring it back to new condition Troubleshooting PROBLEM CONDITION POSSIBLE CAUSE CORRECTION Cold Starting Engine cranks but will not start 1 Choke not closing 1 Inspect choke adjustment and for something binding Adjust if necessary 2 Choke linkage binding 2 Lube with WD 40 and check for something bent Adjust if necessary 3 No gas in carb 3 Check fuel delivery Look for plugged filter...

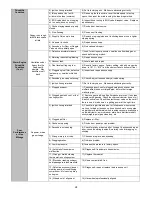
Page 17: ...gh Lots of black smoke 1 Slow flooding 1 Fix cause of flooding 2 Step Up Piston up in bore 2 Remove step up piston and fix sticking issue or use a lighter step up spring 3 Venting system problem 3 Check entire venting system repair 4 Fuel dripping from secondary nozzles 4 Tighten secondary air door turn counterclockwise Cold Engine Drivability Condition Engine stalls when transmission is put into ...

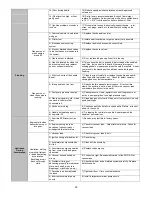
Page 18: ...e sure advancing correctly Poor Performance or Gas Mileage No power or bad gas mileage 1 Plugged exhaust 1 Check exhaust Look for plugged catalytic converter bad muffler baffle kinked or crimped pipe dirt or other foreign matter in pipe 2 Clogged gas tank vent or fuel venting system 2 Remove gas cap see if performance improves If so clean or replace the gas cap Check the charcoal canister hoses to...

Page 19: ...f it will not idle slowly the mixture is set too lean or there is a vacuum leak somewhere usually not in the carb 3 Fuel pump pressure too high 3 Check pressure Use a regulator to control the pressure or put on a new pump don t use high pressure type 4 Gas is very gummy old or has too much alcohol or other chemicals in it 4 Clean bad gas out of carb Clean out of fuel system Use only good quality g...

Page 20: ...any product of Demon Carburetion To initiate the warranty process the consumer must return the alleged defective product to the place of purchase with a dated receipt and completed applicable warranty claim tag Warranty claims will be rejected if the date of purchase cannot be established by the consumer Do not send products directly to Demon Carburetion Demon Carburetion assumes no responsibility...

Reviews: