Operating Instructions
1. Charging the battery pack.
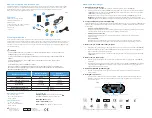
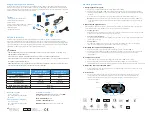
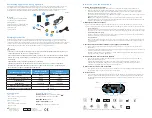
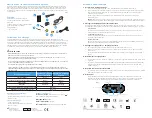
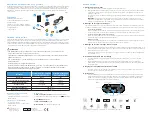
a. Plug charger cord (FIG. 1, ITEM 2) into the charger adapter (FIG. 1, ITEM 1).
b. Plug the charger adapter (FIG. 1, ITEM 1) into a power outlet and connect to the battery pack (FIG. 1, ITEM 3)
charging port (FIG. 2, ITEM 1). The green charging status light (FIG. 2, ITEM 6) will blink to indicate that charging
has begun.
c. Once the battery pack is fully charged, the green charging status light (FIG. 2, ITEM 6) will stay solid.
NOTE: When the battery pack has 10% or less of full power, the red low battery indicator (FIG. 2, ITEM 4) will
turn on. The low battery indicator turns off when the battery pack is charging and has reached more than 10%
of full power.
2. Mounting the Light to Loupes
Attach the lamp head to loupes using the supplied mount and hardware if purchased with loupes. If your light was
purchased after loupes, contact DenMat to order the appropriate mount and hardware.
a. Flip-Up Style Loupes:
Slide clip onto front of interpupillary cross bar of loupes, with one circular cut-out on top and one cut-out on the
bottom of the cross bar. The clip should securely snap into place.
b. Through-The-Lens (TTL) Loupes:
Line the screw holes of the mount to the drilled holes on the frame. Use the phillips screwdriver provided and
tighten screws until secure.
c. Universal Mount:
Open the clip and slide down over the top of the nose bridge. The padded arms of the clip should grasp
each side of the eyeglass lenses. Tighten thumb screw to secure clip to frame.
3. Installing the lamp head and battery pack
a. Attach the lamp head cable to the loupe frames with the small elastic strap. (FIG. 1, ITEM 6).
b. Use the shirt clip (FIG. 1, ITEM 7) on the lamp head cable to position the cord on your shirt or lab coat as desired.
c. Clip the battery pack to your waist band or pocket, install the lamp head cable to the lamp head port
(FIG. 2, ITEM 3).
4. Lamp head operation
a. To turn on/off the lamp head, press and hold the power button (FIG. 2, ITEM 2) for 2 seconds.
b. Adjust the lamp head intensity by tapping the power button (FIG. 2, ITEM 2). The intensity indicators
(FIG. 2, ITEM 5) indicate the intensity of the lamp head. Each intensity indicator light represents 25% of full intensity.
5. Adjust the direction of the LED beam.
a. To adjust the tension of the lamp head position, use the supplied phillips screwdriver to tighten or loosen the
two small link screws as needed.
6. Precautions
a. The use of charger adapters and cords other than those provided for use with the device may result in
increased emissions or decreased immunity and may cause the system to be non-compliant with the
requirements of IEC 60601-1-2. Only the power supply that ships with your device should be used to
power the lamp heads.
For definitions of symbols visit denmat.com/symbols
3
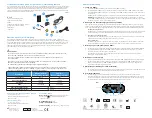
Lamp head port
2
Soft-touch
1
Charging port
6
Charging status
4
Low battery indicator
5
Intensity indicator
FIG. 2
32°F
0°C
40 °C
104 °F
Valymo instrukcijos
Tinkamas valymas ir priežiūra yra būtini, taip pat ir apsauga nuo šiurkštaus naudojimo bei netinkamo laikymo.
Rekomenduojama valyti mažos koncentracijos (<25 %) alkoholio tirpalu. Jei naudojate purškiamąjį valiklį, nepurkškite
skysčio tiesiai ant įrenginio. Verčiau purkškite ant švelnaus nebraižančio audinio (tokio, kaip pateiktas) ir nuvalykite gaminį
pagal tirpalo naudojimo instrukcijas. Naudojant popieriaus gaminius galima subraižyti lęšius. Jei turite kokių nors klausimų,
skambinkite į „DenMat“ klientų aptarnavimo skyrių telefonu 800-433-6628.
DĖMESIO
• GAMINIO NEMERKITE Į JOKĮ SKYSTĮ ARBA ULTRAGARSO VALIKLĮ, TAIP PAT SAUGOKITE NUO JŲ PAVIRŠIŲ. JŪSŲ
GAMINYS NĖRA ATSPARUS VANDENIUI.
• NAUDOKITE TIK SU „DENMAT“ MAITINIMO ADAPTERIU, KROVIKLIO LAIDU ARBA AKUMULIATORIUMI.
• NEGALIMA STERILIZUOTI AUTOKLAVE, CHEMIKLAVE, TAIKANT GLUTARALDEHIDO, JODOFORO ARBA KITOKĮ METODĄ.
• ŠIOS ĮRANGOS NEGALIMA MODIFIKUOTI.
• ŠIAME ĮRENGINYJE YRA LIČIO JONŲ AKUMULIATORIUS. NELAIKYKITE NEĮKRAUTO ĮRENGINIO ILGĄ LAIKOTARPĮ, NES
GALI IŠSIKRAUTI AKUMULIATORIUS IR SUTRUMPĖTI JO EKSPLOATAVIMAS.
Įrenginio aprašymas ir paskirtis
„PeriOptix“ galvos lempos yra nešiojamosios operatoriaus apšvietimo sistemos, skirtos darbo vietai apšviesti. Jos gali
būti nešiojamos ant galvos juostos arba tvirtinamos prie įvairių tipų didinamųjų stiklų. Maitinimas joms tiekiamas iš mažo
ir lengvo akumuliatoriaus, kuris prisegamas prie operatoriaus juosmens. Įkraunamas ličio jonų akumuliatorius viena įkrova
suteikia 8–10 valandų trukmės ryškią, koncentruotą šviesą.
Naudojimo aplinka
• 10–30 °C (50–86 °F)
• 95 % arba mažesnė santykinė drėgmė
• 70–106 kPa
Transportavimas / laikymas
• 0–40 °C (32–104 °F)
• 95 % arba mažesnė santykinė drėgmė
• 70–106 kPa
Pakaitinės dalys
„MicroLine Mini“
galvos lempos sistema
„LumiPro“ galvos
lempos sistema
Galvos lempa
LED4-2
LED6
Pakaitinės galvos lempos kabelis
LED4-C
LED6-C
Kietinimo filtras
LED4-F4
LED6-F
Akumuliatorius
LED4-BP1A
LED6-BP1A
Akumuliatoriaus kroviklio laidas
LED-BP-CC
Akumuliatoriaus kroviklio adapteris
LED-BP-CA
7
3
1 PAV.
„Den-Mat Holdings, LLC“
1017 W. Central Avenue
Lompoc, CA 93436 USA
MDSS GmbH
Schiffgraben 41
30175 Hannover, Germany
2
5a
Turinys
1. Akumuliatoriaus kroviklio adapteris
2. Akumuliatoriaus kroviklio laidas
3. Akumuliatorius
4. Galvos lempa su kabeliu (a. „Mini“ b. „LumiPro“)
5. Kietinimo filtras (a. „Mini“ b. „LumiPro“)
6. Elastinga juostelė
7. Marškinėlių spaustukas
6
1
4a
5b
4b
Techniniai duomenys
Galvos lempos sistema
Vidinis 3,7 Vdc maitinimas ( ),
6700 mAH įkraunamas ličio jonų akumuliatorius
„Mini“ (LED4-BP1A)
540 mA
„LumiPro“ (LED6-BP1A)
470 mA
Maitinimo šaltinis
100–240 Vac(
~
), 50/60 Hz, 0,5 A

