The Operating Manual for DENON AV Receiver/Amplifier firmware update. Page 9 / 18
D&M Holdings, INC.
3.2
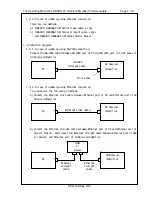
In case of direct connection without hub using cross cable.
3.2.1
Setup the IP address PC and the AV Receiver/Amplifier
Setup the IP Address.
1) Setup the fixed IP address of PC.
IP Address:192.168.0.2, Subnet Mask:255.255.255.0
2) Setup the fixed IP address of the AV Receiver/Amplifier.
Refer to 3.2.2.
IP Address:192.168.0.1, Subnet Mask: 255.255.255.0
3.2.2
How to setup the fixed IP address of the AV Receiver/ Amplifier.
1) Keep to push the ' STANDARD ' button and the '9CH STEREO ' button on the AV
Receiver/Amplifier simultaneously. And turn on the power switch of
the AV Receiver /Amplifier.
2) Confirm the power indicator is green. If the power indicator is red, Make the power
indicator green pushing the ON/STANDBY button.
3) Push the ʻSYSTEM SETUPʼ button. You can see the “System Setup” menu.
4) Select the “Option Setup” using cursor UP/DOWN button.
5) Push the “CH SEL ENTER” button. Select the "Network Setup" using cursor UP/DOWN button.
6) Push the “CH SEL ENTER” button. You can see the "IP Address".
7) Push the “CH SEL ENTER” button. Setup the "DHCP : < ON >" to <OFF> using cursor LEFT/RIGHT
button.
8) Push the cursor DOWN button. Push the cursor RIGHT button at “IP Address” indication.
9) Setup the IP Address using cursor LEFT/RIGHT/UP/DOWN button.
Push the “CH SEL ENTER”. Then set the IP address.
10) Also, Setup the "Subnet Mask".
11) Finish the “System Setup” using the “SYSTEM SETUP” button.
3.2.3
Power on the AV Receiver/Amplifier.
It is not necessary using the firmware update mode.
1) Turn on the power switch of the AV Receiver/Amplifier.
2) Confirm the power indicator is green. If the power indicator is red, Make the power
indicator green pushing the ON/STANDBY button.


