background image

31

Playback (Basic operation)

Setup 

(

v

page 24

)


n

Turning the power on 

(

v

page 31

)


n

Selecting the input source 

(

v

page 31

)


n

Adjusting the master volume 

(

v

page 32

)


n

Turning off the sound temporarily 

(

v

page 32

)


n

Playing a Blu-ray Disc player/DVD player 

(

v

page 32

)


n

Playing a CD player 

(

v

page 32

)


n

Playing an iPod 

(

v

page 33

)


n

Playing a USB memory device 

(

v

page 36

)


n

Listening to FM broadcasts 

(

v

page 39

)


n

Listening to internet radio 

(

v

page 47

)


n

Playing back files stored on a PC and NAS 

(

v

page 50

)


n

Using online services 

(

v

page 54

)


n

Convenient functions 

(

v

page 62

)


n

AirPlay function 

(

v

page 66

)

Selecting a listening mode (Sound Mode) 

(

v

page 68

)

Playback (Advanced operation) 

(

v

page 87

)

Important information

Before starting playback, make the connections between the different 
devices and the settings on the unit.

NOTE

Also refer to the operating instructions of the connected devices 
when playing them.

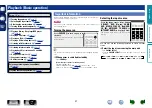
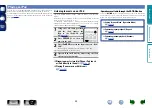
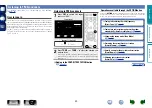
Turning the power on

Press

 POWER 

X

 to turn on power to 

the unit.

The power indicator flashes green and the 
power turns on.

You can also switch the power to standby by pressing 

X

 on the main 

unit.


n

When power is switched to standby

Press 

POWER 

X

.

G

Power indicator status in standby mode

H

• 

Normal standby : Off

• 

When “HDMI Control” (

v

page 106

) is set to “On” : Red

• 

When “IP Control” (

v

page 119

) is set to “Always On” : Red

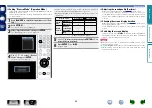
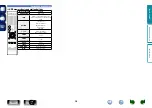
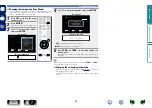
Selecting the input source

Press the input source select button 

(

CBL/SAT

DVD

Blu-ray

GAME

AUX

MEDIA PLAYER

iPod/USB

CD

FM

NETWORK

TV AUDIO

 or 

INTERNET RADIO

) to be played back.

The desired input source can be selected 
directly.

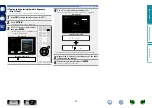
You can also use the following operation to select an input 
source.


n

Select the input source using the main unit

Turn 

SOURCE SELECT

.

• 

Turning 

SOURCE SELECT

 switches the input source, as shown 

below.

GAME

AUX

MEDIA PLAYER

iPod/USB

FM

NETWORK

CD

TV AUDIO

Blu-ray

DVD

CBL/SAT

Basic v

ersion

A

dv

anced v

ersion

Inf
or

mation

Basic v

ersion

DVD

Summary of Contents for AVR-2113CI

Page 1: ...AVR 2113CI INTEGRATED NETWORK AV RECEIVER Owner s Manual Basic version Advanced version Information DVD ...

Page 2: ...s been spilled or objects have fallen into the apparatus the apparatus has been exposed to rain or moisture does not operate normally or has been dropped 15 Batteries shall not be exposed to excessive heat such as sunshine fire or the like FCC INFORMATION For US customers 1 COMPLIANCE INFORMATION Product Name Integrated Network AV Receiver Model Number AVR 2113CI This product complies with Part 15...

Page 3: ...oths or curtains Naked flame sources such as lighted candles should not be placed on the unit Observe and follow local regulations regarding battery disposal Do not expose the unit to dripping or splashing fluids Do not place objects filled with liquids such as vases on the unit Do not handle the mains cord with wet hands When the switch is in the OFF STANDBY position the equipment is not complete...

Page 4: ...ecting a listening mode Sound Mode 68 Selecting a listening mode 68 Advanced version 74 Installation connection setup of speakers Advanced 75 Speaker installation 75 Speaker connection 77 Set up speakers 85 Playback Advanced operation 87 HDMI control function 87 Sleep timer function 88 Quick select function 89 Web control function 90 Various memory functions 91 Playback in ZONE2 Separate room 92 A...

Page 5: ...easy to see Graphical User Interface that uses menu displays and levels The use of level displays increases operability of the this unit HDMI connectors enable connection to various digital AV devices input 6 output 1 The unit is equipped with 6 HDMI input connectors for connecting devices with HDMI connectors such as a Blu ray Disc player game machine HD digital camcorder etc Supports HDMI 3D ARC...

Page 6: ...it sit for an hour or two with the power turned off and wait until there is little difference in temperature before using the unit Cautions on using mobile phones Using a mobile phone near this unit may result in noise If that occurs move the mobile phone away from this unit when it is in use Moving the unit Turn off the power and unplug the power cord from the power outlet Next disconnect the con...

Page 7: ...ngs vpage 24 F Playback Basic operation vpage 31 F Selecting a listening mode Sound Mode vpage 68 Basic version Here we explain the connections and basic operation methods for this unit Basic version Advanced version Information Basic version DVD ...
Page 8: ...a HDMI If your TV is connected to this unit via other video output connectors perform menu operations while seeing the display on this unit Do not plug in the power cord until all connections have been completed However when the Setup Assistant is running follow the instructions in the Setup Assistant C page 7 screen for making connections During Setup Assistant operation the input output connecto...

Page 9: ...need to switch the video input on the TV Furthermore this unit converts the input analog video signals such as video and component video signals to high resolution digital HDMI video signals for output improving the quality of the video If your TV does not support HDMI connections connect this unit to TV with analog video connectors This unit can not convert HDMI input signals to analog video sign...

Page 10: ... a home theater system which tend to be complicated to be more organized Mutual control through the HDMI control function vpage 87 This unit and the HDMI device connected via HDMI can be linked to perform operations such as power control volume control and input source switching Other video and audio functions such as 3D video playback Content Type the ARC function are supported vpage 11 There is ...

Page 11: ... When the ARC function is used connect a device with a Standard HDMI cable with Ethernet or High Speed HDMI cable with Ethernet for HDMI Refer to the owner s manual for your TV for details about TV connection and settings GConnection to a TV with the ARC functionH IN OUT Audio signals from the TV Audio from the TV This unit Speakers TV GConnection to a TV without the ARC functionH IN OUT IN OUT Au...

Page 12: ...red in addition to the HDMI cable In this case refer to Connecting a TV vpage 13 for the connection method For the ARC function see About ARC Audio Return Channel function vpage 8 Connecting to a device equipped with a DVI D connector The DVI D Digital Visual Interface method is also used for video transmission via digital signals This is developed mainly for computers and some AV devices such as ...

Page 13: ...ot match the monitor s resolution In this case switch the Blu ray Disc DVD player s resolution to a resolution with which the monitor is compatible Connecting this unit to video devices via HDMI connections Cables used for connections Audio and video cable sold separately HDMI cable This interface allows transfer of digital video signals and digital audio signals over a single HDMI cable OUT HDMI ...

Page 14: ...ports the following HDMI functions n nAbout 3D function This unit supports input and output of 3D 3 dimensional video signals of HDMI To play back 3D video you need a TV and player that provide support for the HDMI 3D function and a pair of 3D glasses NOTE When playing back 3D video refer to the instructions provided in the manual of your playback device together with this manual When playing back...

Page 15: ...e Changing the source assigned to connectors This unit can change the source that is assigned to the DIGITAL AUDIO IN and COMPONENT VIDEO IN connectors Here a connection to the Blu ray disc player is taken as an example for explanation The rear panel video input and digital audio input connectors do not have the input connector indication for Blu ray disc players Blu ray However DIGITAL AUDIO IN a...

Page 16: ...en a multichannel audio digital bit stream audio is input this unit decodes the audio to play back surround sound z z When making this type of connection you must change the settings on this unit v Input connector setting n nVideo connection The following methods are available for connecting to the unit a VIDEO OUT MONITOR connector This makes an analog video connection When making the following c...

Page 17: ...tor setting s AUDIO IN CBL SAT connector This makes an analog audio connection This type of connection converts digital audio to analog audio so the output audio may be degraded compared to connections a n nVideo connection The following methods are available for connecting to this unit Use either of the methods to make a connection The numbers prefixed with connectors indicate the recommendation ...

Page 18: ...ing methods are available for connecting to this unit Use either of the methods to make a connection The numbers prefixed with connectors indicate the recommendation order The smaller the number is the higher playback quality is achieved a COMPONENT VIDEO IN connector This makes an analog video connection This connection method separates video signals into 3 signals for transmission based on color...

Page 19: ...o analog audio so the output audio may be degraded compared to connections a n nVideo connection The following methods are available for connecting to this unit a COMPONENT VIDEO IN connector This makes an analog video connection This connection method separates video signals into 3 signals for transmission based on color components achieving the best quality video playback among analog video conn...

Page 20: ...mber is the higher playback quality is achieved a COMPONENT VIDEO IN connector This makes an analog video connection This connection method separates video signals into 3 signals for transmission based on color components achieving the best quality video playback among analog video connections with less signal degradation When making this type of connection you must change the settings on this uni...

Page 21: ...not possible to use this unit by connecting the unit s iPod USB port to a PC via a USB cable Do not use an extension cable when connecting a USB memory device This may cause radio interference with other devices When connecting an iPhone to this unit keep the iPhone at least 20 cm away from this unit If the iPhone is kept closer to this unit and a telephone call is received by the iPhone noise may...

Page 22: ...surround sound When making this type of connection you must change the settings on this unit v Input connector setting s AUDIO IN CD connector This makes an analog audio connection This type of connection converts digital audio to analog audio so the output audio may be degraded compared to connections a When making the following connection you must change the input connector settings a DIGITAL AU...

Page 23: ...where the noise level becomes minimal NOTE Do not connect two FM antennas simultaneously If you are unable to receive a good broadcast signal we recommend installing an outdoor antenna For details inquire at the retail store where you purchased the unit Connecting an HDMI incompatible device FM outdoor antenna Direction of broadcasting station 75 Ω coaxial cable FM indoor antenna supplied Basic ve...

Page 24: ...uipped with a REMOTE CONTROL IN jack Infrared retransmitter Infrared sensor Output Input RS 232C connector When you connect an external control device you can control this unit with the external control device such as power supply operation volume adjustment and input source switching External serial controller Perform the operation below beforehand q Turn on the power of this unit w Turn off the ...

Page 25: ...speed of 100 Mbps or greater n nEthernet cable CAT 5 or greater recommended Use only a shielded STP or ScTP LAN cable which is available at retailer The normal shielded type Ethernet cable is recommended If a flat type cable or unshielded type cable is used other devices could be affected by noise If you have an Internet provider contract for a line on which network settings are made manually make...

Page 26: ...ower outlet To household power outlet AC 120 V 60 Hz Power cord NOTE Do not plug in the power cord until all connections have been completed Do not bundle power cords together with connection cables Doing so can result in humming or noise Basic version Advanced version Information Basic version DVD ...
Page 27: ...es before performing Audyssey Setup Setup Here we explain Audyssey Setup which allows you to automatically make the optimal settings for your speakers and Network which allows you to connect this unit to a home network LAN This unit lets you play via your home network LAN music files stored on a computer and music content such as that from Internet radio n n Speaker connection vpage 77 n n Set up ...

Page 28: ...If you do not have a tripod or stand set up the microphone on for example a seat without a back NOTE Do not hold the setup microphone in your hand during measurements Avoid placing the setup microphone close to a seat back or wall as sound reflections may give inaccurate results Set up speakers Audyssey Setup 4Connect the setup microphone to the SETUP MIC jack of this unit Audyssey Setup Amp Assig...

Page 29: ...ress o to select Yes and then press ENTER Setting up the speakers again Repeat the operation from step 4 This step automatically checks the speaker configuration and speaker size and calculates the channel level distance and crossover frequency It also corrects distortion in the listening area 7Select Begin Test and then press ENTER When measuring begins a test tone is output from each speaker Mea...

Page 30: ... other than the main listening position Just one position can be measured but measuring multiple positions increases the accuracy of the correction of acoustic distortion within the listening area 10Move the setup microphone to position 2 select Continue and then press ENTER The measurement of the second position starts Measurements can be made in up to eight positions Audyssey Setup Calculation R...

Page 31: ...without any loss in the dynamism and clarity of the sound when for example the volume suddenly increases for commercials shown during television programs n n When turning Dynamic Volume on Press u to select Yes and then press ENTER The unit automatically enters Medium vpage 104 mode n n When turning Dynamic Volume off Press i to select No and then press ENTER NOTE After performing Audyssey Setup d...

Page 32: ...y Caution Ambient noise is too high or level is too low There is too much noise in the room for accurate measurements to be made Speaker or subwoofer sound is too low for accurate measurements to be made Either turn off any device generating noise or move it away Perform again when the surroundings are quieter Check the speaker installation and the direction in which the speakers are facing Adjust...

Page 33: ...ver frequency Equalizers Check the equalizer If Equalizers is selected press ui to select equalizing curve Audyssey or Audyssey Flat to be checked Use ui to switch the display between the different speakers 3 Press o or BACK The confirmation screen reappears Repeat step 2 Retrieving Audyssey Setup settings If you set Restore to Yes you can return to Audyssey Setup measurement result value calculat...

Page 34: ...to the operating instructions of the connected devices when playing them Turning the power on Press POWER X to turn on power to the unit The power indicator flashes green and the power turns on You can also switch the power to standby by pressing X on the main unit n nWhen power is switched to standby Press POWER X GPower indicator status in standby modeH Normal standby Off When HDMI Control vpage...

Page 35: ...volume Important information Playing a Blu ray Disc player DVD player The following describes the procedure for playing Blu ray Disc player DVD player 1 Prepare for playback q Turn on the power of the TV subwoofer and player w Change the TV input to the input of this unit e Load the disc in the player 2 Press POWER X to turn on power to the unit 3 Press Blu ray or DVD to switch an input source for...

Page 36: ...Pod connect the iPod to the iPod USB port vpage 18 2 Press POWER X to turn on power to the unit 3 Press iPod USB to switch the input source to iPod USB Remote iPod is displayed on the display of this unit Nothing is displayed on the TV screen 4 Operate iPod itself directly while seeing the iPod screen to play back music n nStreaming music stored in iPhone iPod touch or iPad directly to the unit vp...

Page 37: ...o select the item then press ENTER or p to select the file to be played 6 Press ENTER p or 1 3 Playback starts n nAdjusting the sound quality Restorer Make this setting at Restorer vpage 102 in the menu You can use the Restorer function to restore to a state close to the audio before compression while correcting the bass feel to enjoy a richer playback experience The default setting is Mode 3 Low ...

Page 38: ...ION iPod Title Now Playing Artist Album 00 06 100 Previous Option Pause Next Back Repeat Option Random Operation Mode 3 Use o p to select random playback mode OPTION iPod Title Now Playing Artist Album 00 06 100 Previous Option Pause Next Back Random Off Each time o p is pressed the setting is changed as shown below Off On Off Disable random playback On Enable random playback 4 Press ENTER The dis...

Page 39: ...ion bit rate 16 or 24 bits z2 Copyright protected files can be played on certain portable players compatible with MTP z3 Only files that are not protected by copyright can be played on this unit Content downloaded from pay sites on the Internet are copyright protected Also files encoded in WMA format when ripped from a CD etc on a computer may be copyright protected depending on the computer s set...

Page 40: ...f the USB memory device is divided into multiple partitions only the first partition is played back NOTE Note that DENON will accept no responsibility whatsoever for any problems arising with the data on a USB memory device when using this unit in conjunction with the USB memory device USB memory devices will not work via a USB hub DENON does not guarantee that all USB memory devices will operate ...

Page 41: ...uch as the source name volume and sound mode name OPTION Text Search Repeat playback Random playback Picture View Slideshow uio p Cursor operation Auto search cue ui ENTER Press and release Enter ENTER Press and hold Stop BACK Return SETUP Setup menu 8 9 Auto search cue 1 3 Playback Pause Basic version Advanced version Information Basic version DVD ...

Page 42: ...UNE or TUNE to select the station you want to hear Scanning is performed until it finds an available radio station When it finds a radio station it stops the scan automatically and tunes in n nAdding to the FAVORITES STATION button vpage 64 Operations available through the OPTION button Press the OPTION button to display a menu of functions that can be used on the TV screen Select the function you...

Page 43: ...this unitH Tune Mode 4 Use o p to select tuning mode then press ENTER GTV ScreenH TUNE STEREO AUTO CH OPTION FM CH 1 FM 87 50MHz Now Playing Tune Preset Option Tune Mode Auto GDisplay of this unitH Mode Auto Auto Automatically tune to the station Manual Manually tune to the station 5 Press TUNE or TUNE to select the station you want to hear The frequency changes in steps each time the button is pr...

Page 44: ... Tune Preset Option Direct Tune Option Preset Memory Tune Mode Auto Preset Memory Preset Name Preset Skip GDisplay of this unitH Direct Tune 4 Use ui to select a number and press p The screen that lets you enter the frequency is displayed GTV ScreenH STEREO AUTO FM FM MHz DIRECT TUNE Now Playing Input Enter GDisplay of this unitH Direct Tune FM MHz If o is pressed the immediately preceding input i...

Page 45: ... GTV ScreenH TUNE STEREO AUTO CH OPTION FM CH 1 FM 87 50MHz Now Playing Tune Preset Option Direct Tune Option Preset Memory Tune Mode Auto Preset Memory Preset Name Preset Skip GDisplay of this unitH Auto Preset 4 Press ENTER The unit starts to tune in to radio stations automatically and preset them GTV ScreenH TUNE STEREO AUTO CH OPTION FM CH 1 FM 87 50MHz Now Playing Tune Preset Option Start Aut...

Page 46: ... Playing Tune Preset Option 1 FM 87 50MHz Preset Memory 2 FM 89 10MHz 3 FM 98 10MHz 4 FM107 90MHz 5 FM 90 10MHz 6 FM 90 10MHz 7 FM 90 10MHz 8 FM 90 10MHz GDisplay of this unitH 01 FM 87 50MHz Stored The channel numbers of broadcast stations set as Preset Skip vpage 45 are grayed out but these stations can be preset When grayed out channel numbers are preset these are highlighted and the Preset Ski...

Page 47: ... 17 24 41 48 49 56 33 40 GTV ScreenH TUNE STEREO AUTO CH OPTION FM CH 1 FM 87 50MHz Now Playing Tune Preset Option Preset Name 1 FM 87 50MHz Preset Group 1 8 2 FM 89 10MHz 3 FM 98 10MHz 4 FM 107 90MHz 5 FM 90 10MHz 6 FM 90 10MHz 7 FM 90 10MHz 8 FM 90 10MHz GDisplay of this unitH Group 1 8 5 Use ui to select the broadcast station you want to name then press ENTER GTV ScreenH TUNE STEREO AUTO CH OPT...

Page 48: ...M 89 10MHz On 3 FM 98 10MHz On 4 FM 107 90MHz On 5 FM 90 10MHz On 6 FM 90 10MHz On 7 FM 90 10MHz On 8 FM 90 10MHz On Set 1 8 to Skip TUNE STEREO AUTO CH OPTION FM CH 1 FM 87 50MHz Now Playing Tune Preset Option Preset Skip 1 FM 87 50MHz On Preset Group 1 8 2 FM 89 10MHz On 3 FM 98 10MHz On 4 FM 107 90MHz On 5 FM 90 10MHz On 6 FM 90 10MHz On 7 FM 90 10MHz On 8 FM 90 10MHz On Set 1 8 to Skip GDispla...

Page 49: ...90 10MHz On 7 FM 90 10MHz On 8 FM 90 10MHz On Set 1 8 to Skip GDisplay of this unitH 1 87 50M On 3 Use o p to select On The skip is cancelled NOTE You cannot cancel the skip for each group n nFM operation buttons Operation buttons Function FAVORITE STATION 1 3 Add call up favorites CH PAGE df Preset channel selection INFO Display of information such as the source name volume and sound mode name OP...

Page 50: ...er Network 4 Use ui to select the item you want to play then press ENTER or p Internet Radio 1 7 zzzzz Search Stations Search Podcasts Recommended Stations radiodenon com Recently Played Search by Keyword zzzzz Country name Displays typical Internet radio stations your country Search Stations Displays all Internet radio stations that this unit can tune in to Search Podcasts Displays Internet radio...

Page 51: ...Inversely lower bit rates mean a lower sound quality but less tendency for the sound to be interrupted Radio station server full or Connection down is displayed if the station is busy or not broadcasting On this unit folder and file names can be displayed as titles Any characters that cannot be displayed are replaced with period NOTE The radio station database service may be suspended without noti...

Page 52: ...d and you can now log in 5 Enter your account information E mail address and password and log in The top menu of vTuner is displayed 6 Select the search criteria genre region language etc of your choice The list of radio stations matching the criteria is displayed You can also enter a keyword to search for a station you want to hear 7 Select the radio station of your choice from the list and then ...

Page 53: ...embedded by using MP3 ID3 Tag Ver 2 3 or 2 4 This unit is compatible with WMA META tags If the image size pixels of an album artwork exceeds 500 500 WMA MP3 WAV FLAC or 349 349 MPEG 4 AAC then music may not be played back properly WAV format Quantization bit rate 16 or 24 bits FLAC format Quantization bit rate 16 or 24 bits z2 Only files that are not protected by copyright can be played on this un...

Page 54: ...options 3 Select Allowed in the drop down list for AVR 2113CI 4 Select Allowed in the drop down list for Media programs on this PC and remote connections 5 Click OK to finish When using Windows Media Player 11 1 Start up Windows Media Player 11 on the PC 2 Select Media Sharing in the Library 3 Click the Share my media check box select AVR 2113CI and then click Allow 4 As you did in step 3 select t...

Page 55: ... playback experience The default setting is Mode 3 Low n nSwitching the screen display Press STATUS on the main unit The display switches between track title artist name and album title each time the button is pressed n nGoing back to the previous screen Press o or BACK n nChanging the screen display duration Make this setting at Audio Display vpage 109 in the menu The default setting is 30s Press...

Page 56: ...ry vpage 64 n n Playing back music and a favorite picture at the same time Picture View vpage 65 n n Playing back still images in sequential order Slideshow vpage 65 n nMedia server operation buttons Operation buttons Function FAVORITE STATION 1 3 Add call up favorites CH PAGE df Page search INFO Display of information such as the source name volume and sound mode name OPTION Text Search Repeat pl...

Page 57: ...he Music Genome Project To listen to Pandora you will need a free Pandora account If you do not have a Pandora account you can create one at www pandora com or from the Pandora smartphone application It is necessary to associate this machine with a Pandora account by visiting http www pandora com denon from your PC n nAbout SiriusXM vpage 60 Enjoy anywhere access to the unparalleled content of Sir...

Page 58: ...u entered in Step 5 is displayed on the top screen of Flickr If you enter a screen name that does not exist The Flickr Contact you entered could not be found is displayed Check and enter the correct screen name 7 Use ui to select the folder and then press ENTER or p Favorites Displays the favorite photographs of the specified user Photostream Displays a list of shared photographs PhotoSets Display...

Page 59: ...ecently added photographs Search by text Search for photographs by keyword 3 Use ui to select the file and then press ENTER or p The selected file is displayed NOTE Depending on the file format some photographs cannot be viewed n nFlickr operation buttons Operation buttons Function CH PAGE df Page search INFO Display of information such as the source name volume and sound mode name OPTION Slidesho...

Page 60: ... Pandora and activation code are displayed Access the Pandora web page from your PC and register the displayed activation code and account information Then press ENTER BACK Please go to http www pandora com denon and follow the instructions there to create a new account Your activation code is zzzzzz Pandora I have a Pandora account I am new to Pandora Cancel Continue This is an identification cod...

Page 61: ... 5 G T 6 H U 7 I V 8 J W 9 K X L Y M Z D M2 a A SPACE INSERT DELETE O K Search by Artist Search by Track 4 Press ui select a file e g D M2 from the list and press ENTER or p Radio is added to the end of a filename and your new station is created e g D M2 Radio BACK My Station 4 4 Sign out Exit New Station Quick Mix D M1 Radio D M2 Radio Your new station will play music with similar qualities to th...

Page 62: ... page Bookmark this track Bookmarks the track currently being played You can check on a computer or iPhone etc For details see the Pandora web page I m tired of this track Press when you don t like the track that is being played The track will not be played for 1 month Delete this station Press when you want to delete the station that is being played NOTE You can Skip up to 6 Tracks that are being...

Page 63: ... SiriusXM account 2 Press NETWORK 3 Useuioptoselect SiriusXM then press ENTER Favorites Internet Radio Media Server Network 4 Select Sign in then press ENTER BACK Please set your SiriusXM username and password You can go to www siriusxm com to sign up for an account Or select Start Trial below to start the one time free trial SiriusXM Sign in Sign in Start Trial Cancel Enter 5 Input the Username a...

Page 64: ... R B Country Chirisitan Jazz Standards Sign Out Exit Are you sure you want to sign out Yes No n nSiriusXM operation buttons Operation buttons Function FAVORITE STATION 1 3 Add call up favorites CH PAGE df Page search INFO Display of information such as the source name volume and sound mode name uio p Cursor operation ENTER Press and release Enter ENTER Press and hold Stop BACK Return SETUP Setup m...

Page 65: ...USB Internet Radio Media Server 1 While content is playing press OPTION The option menu screen is displayed 2 Use ui to select Text Search then press ENTER The keyboard input screen is displayed OPTION USB 1 9 D M1 D M2 D M3 Music1 Music2 Music3 Music4 Option Text Search Option Repeat Random Slideshow 3 Enter the first character of the Internet radio station or file you want to search for and then...

Page 66: ... 4 Press ENTER The display returns to the playback screen Performing random playback Random USB Media Server 1 While content is playing press OPTION The option menu screen is displayed 2 Use ui to select Random then press ENTER OPTION USB Title Now Playing Artist Album 00 06 100 Previous Option Pause Next Back MP3 128kbps Repeat Option Random Picture View 3 Use o p to select random playback mode O...

Page 67: ...n You can add up to three types of content NOTE Please note that if you add new content to a number that already contains content the older content is deleted The following operations update the database on the media server which may make the added music files unplayable When you quit the media server and then restart it When music files are deleted or added on the media server When using an ESCIE...

Page 68: ...rs and the picture you were viewing is shown on the screen OPTION USB Title Now Playing Artist Album 00 06 100 Previous Option Pause Next Back MP3 128kbps Repeat Option Random Picture View Playing back still images in sequential order Slideshow You can play back still image JPEG files stored on a USB memory device or media server and pictures on Flickr website as a slide show The display time can ...

Page 69: ...Tunes volume setting level You should turn down the iPhone iPod touch iPad or iTunes volume prior to playback and then adjust it to a suitable level n nPlaying iTunes music with this unit 1 Install iTunes 10 or later on a Mac or Windows PC that is connected to the same network as this unit 2 Turn this unit ON Set IP Control vpage 119 to Always On for this unit NOTE When IP Control is set to Always...

Page 70: ... Backup Device backups Forget All Remotes Reset Sync History of the data on this computer will be changed Prevent iPods iPhones and iPads from syncing automatically Allow iTunes control from remote speakers Devices is displayed on the menu screen while AirPlay is being operated Source input will be switched to NETWORK when AirPlay playback is started You can stop AirPlay playback by pressing the o...

Page 71: ...able sound modes Each time MOVIE MUSIC or GAME is pressed the listening mode is switched Switches to the listening mode suitable for enjoying movies and TV programs Switches to the listening mode suitable for enjoying music Switches to the listening mode suitable for enjoying games Pressing MOVIE MUSIC or GAME displays a list of the listening modes that can be selected Each time you press MOVIE MU...

Page 72: ...BY DIGITAL Plus PLgx Cinema DOLBY DIGITAL Plus PLgz DTS DTS SURROUND DTS ES DSCRT 6 1 DTS ES MTRX 6 1 DTS 96 24 DTS NEO 6 DTS PLgx Cinema DTS PLgz Operation button Input signal Listening mode DTS HD DTS Express DTS HD HI RES DTS HD MSTR DTS Express DTS HD NEO 6 DTS HD PLgx Cinema DTS HD PLgz PCM multi channel MULTI CH IN MULTI CH IN 7 1 MULTI IN Dolby EX MULTI IN PLgx Cinema MULTI IN PLgz Multi ch...

Page 73: ... EX DOLBY DIGITAL PLgx Music DOLBY DIGITAL PLgz Dolby TrueHD DOLBY TrueHD DOLBY TrueHD EX DOLBY TrueHD PLgx Music DOLBY TrueHD PLgz Dolby Digital Plus DOLBY DIGITAL Plus DOLBY DIGITAL Plus EX DOLBY DIGITAL Plus PLgx Music DOLBY DIGITAL Plus PLgz DTS DTS SURROUND DTS ES DSCRT 6 1 DTS ES MTRX 6 1 DTS 96 24 DTS NEO 6 DTS PLgx Music DTS PLgz z1 2 channel also includes analog input z2 This mode plays b...

Page 74: ...TAL PLgz Dolby TrueHD DOLBY TrueHD DOLBY TrueHD EX DOLBY TrueHD PLgz Dolby Digital Plus DOLBY DIGITAL Plus DOLBY DIGITAL Plus EX DOLBY DIGITAL Plus PLgz DTS DTS SURROUND DTS ES DSCRT 6 1 DTS ES MTRX 6 1 DTS 96 24 DTS NEO 6 DTS PLgz DTS HD DTS Express DTS HD HI RES DTS HD MSTR DTS Express DTS HD NEO 6 DTS HD PLgz PCM multi channel MULTI CH IN MULTI CH IN 7 1 MULTI IN Dolby EX MULTI IN PLgz Multi ch...

Page 75: ...ng sources recorded in Dolby TrueHD DOLBY DIGITAL Plus This mode can be selected when playing sources recorded with Dolby Digital Plus z1 This can be selected when Speaker Config Surr Back is not set to None z2 This can be selected when Speaker Config Front Height is not set to None DTS listening mode Listening mode type Description DTS NEO 6 This mode can be selected when a DTS NEO 6 decoder is u...

Page 76: ...ls VIDEO GAME This mode is suited for achieving surround sound with video games MATRIX This mode lets you add a spacious feel to stereo music sources VIRTUAL This mode is for enjoying surround effects using only the front speakers or headphones STEREO listening mode Listening mode type Description STEREO This is the mode for playing in stereo The tone can be adjusted Sound is output from the front...

Page 77: ... Playback Advanced operation vpage 87 F Playback in ZONE2 Separate room vpage 92 F How to make detailed settings vpage 94 Advanced version Here we explain functions and operations that let you make better use of this unit Basic version Advanced version Information Advanced version DVD ...

Page 78: ...om the sideH Front height speaker Point slightly downwards At least 3 3 ft 1 m Surround back speaker Point slightly downwards Front speaker z z Recommended for Dolby Pro Logic gz When 7 1ch speakers are installed using surround back speakers FL FR C SBL SBR SL SR SW z1 z2 z3 Listening position z1 22 30 z2 90 110 z3 135 150 NOTE You cannot have audio output from the surround back speakers and front...

Page 79: ... Front height speaker L C Center speaker FHR Front height speaker R SW Subwoofer SL Surround speaker L SR Surround speaker R When 6 1ch speakers are installed FL FR C SB SL SR SW z1 z2 Listening position z1 22 30 z2 90 110 When 5 1ch speakers are installed FL FR SW C SL SR z1 z2 Listening position z1 22 30 z2 120 When Front A B speakers are installed FR A FR B SW FL B FL A Listening position Basic...

Page 80: ...t Never touch the speaker terminals while the power supply is connected Doing so could result in electric shock When the Setup Assistant is running follow the instructions in the Setup Assistant screen for making connections Power is not supplied to the speaker terminals while the Setup Assistant is running Use speakers with the speaker impedances shown below Speaker terminals Speaker impedance FR...

Page 81: ...is played back by automatically switching the speakers in accordance with the sound mode or input signals To perform 7 1 channel playback using the surround back speakers set Assign Mode to Surround Back in steps 3 to 5 for Set up Amp Assign vpage 85 Cables used for connections Audio cable sold separately Speaker cable Subwoofer cable NOTE For speaker cable connections see page 77 For speaker impe...

Page 82: ...audio is played back by automatically switching the speakers in accordance with the sound mode or input signals To perform 7 1 channel playback using the front height speaker set Assign Mode to Front Height in steps 3 to 5 for Set up Amp Assign vpage 85 Cables used for connections Audio cable sold separately Speaker cable Subwoofer cable NOTE For speaker cable connections see page 77 For speaker i...

Page 83: ...perform 6 1 channel playback using the surround back speaker set Assign Mode to Surround Back in steps 3 to 5 for Set up Amp Assign vpage 85 Also use the Speaker Config setting vpage 116 to set Surr Back to 1spkr Cables used for connections Audio cable sold separately Speaker cable Subwoofer cable NOTE For speaker cable connections see page 77 For speaker impedance see page 77 FL FR C SL SR SW SB ...

Page 84: ... Assign Mode to Surround Back in steps 3 to 5 for Set up Amp Assign vpage 85 Cables used for connections Audio cable sold separately Speaker cable Subwoofer cable NOTE For speaker cable connections see page 77 For speaker impedance see page 77 Basic version Advanced version Information Advanced version DVD ...

Page 85: ... Speaker cable Subwoofer cable For multichannel playback connect center surround surround back and front speakers and a subwoofer Front speakers can be used separately depending on the speaker s specifications or playback source such as front speakers A for multichannel playback and front speakers B for 2 channel playback vpage 117 Front Speaker Setup NOTE For speaker cable connections see page 77...

Page 86: ...channel speakers Cables used for connections Audio cable sold separately Speaker cable Subwoofer cable NOTE For speaker cable connections see page 77 For speaker impedance see page 77 Basic version Advanced version Information Advanced version DVD ...

Page 87: ...mpatible with the bi amp function This prevents the back electromotive force returned force without output of the woofer sent to the tweeter which affects the sound quality of the tweeter and you can enjoy playback with higher quality sound Cables used for connections Audio cable sold separately Speaker cable Subwoofer cable For multichannel playback connect front center surround and surround back...

Page 88: ...output from the SURROUND BACK speaker terminal of this unit can be switched to match your speaker environment vpage 85 Set up Amp Assign Setting the channels to be used Channel Select If channels that are not to be used are set in advance measurement for the set channels is skipped and measuring time can be reduced You can also change the number of surround back speakers vpage 86 Set up Channel Se...

Page 89: ... not a subwoofer channel is measured and then press ENTER Measure Set for measuring a subwoofer Skip Set for no measuring of a subwoofer 11Use o p to set whether or not a surround back channel is measured and then press ENTER Measure 2spkrs Set for measuring two surround back speakers Measure 1spkr Set for measuring a surround back speaker Skip Set for no measuring of a surround back speaker 12Pre...

Page 90: ... are output to the television or other device connected to the HDMI output connector even if the power of this unit is in standby pass through function To use this unit to play the audio of a TV that does not support the ARC function connect the TV with an optical digital or analog connection vpage 8 To use the pass through function connect an HDMI connection device that is compatible with HDMI co...

Page 91: ... the power automatically switched to standby once a set time has elapsed This is convenient for viewing and listening while going to sleep The sleep timer function can be set for each zone vpage 93 Sleep timer function The MAIN ZONE setting method is explained here 1 Press MAIN to switch the zone mode to the MAIN ZONE MAIN lights 2 Press SLEEP and display the time you want to set The indicator on ...

Page 92: ...K SELECT 1 CBL SAT 40 STEREO QUICK SELECT 2 Blu ray 40 STEREO QUICK SELECT 3 GAME 40 STEREO QUICK SELECT 4 NETWORK 40 STEREO Changing the Quick Select Name On this unit you can change the Quick Select name displayed on the menu to the name that you prefer For the name change method see Quick Select Names vpage 123 n nChanging the settings 1 Set the items below to the settings you want to save q In...

Page 93: ...CI Web Controller Web Controller Config MAIN ZONE ZONE2 40 0 CBL SAT Blu ray Setup Menu w e r w Click when you select the zone to operate vGExample 1H e Click when you operate the setup menu r Click to change the Web control screen setting vGExample 3H 6 Operate GExample 1H MAIN ZONE control screen 40 0 DIRECT STEREO STANDARD SIMULATION ZONE CONTROL NETWORK iPod USB FM QUICK SELECT RELOAD Add To Y...

Page 94: ...tting GExample 3H Web configuration screen Top Menu Link Setup ON OFF Web Controller Config Back Top Menu W1 W2 W1 Click ON when performing Top Menu Link Setup When set up return to the top menu from each operation screen Default setting OFF W2 Click this item to return to the top menu GExample 4H Network audio operating screen ZONE CONTROL NETWORK iPod USB FM QUICK SELECT RELOAD 40 0 NETWORK MAIN...

Page 95: ...r on the display lights Also press input source select button when in standby mode the power turns on When POWER X is pressed ZONE2 turns off Power in ZONE2 can be turned on or off by pressing ZONE2 ON OFF on the main unit 3 Press the input source select button to select the input source to be played The audio signal of the selected source is output to ZONE2 To perform an operation with the main u...

Page 96: ...0 110 120 To confirm the countdown time before putting the unit to sleep Press SLEEP Z2 Sleep zmin appears on the display z z Countdown time To cancel the sleep timer Press SLEEP to set Off The sleep timer is also cancelled when this unit is set to the standby mode or the ZONE2 power is turned off NOTE The sleep timer function cannot turn off the power of devices connected to this unit To turn of ...

Page 97: ...arily when the sound mode is changed or input source is switched You can set whether or not to show each of these status displays 108 Audio Display Sets how long each menu is displayed when the input source is NETWORK iPod USB or FM 109 TV Format Set the video signal format to be output for the TV you are using 109 Setting items Detailed items Description Page Inputs Input Assign Changes input con...

Page 98: ...his unit automatically enters the standby mode Before it enters the standby mode Auto Standby is displayed on the display of this unit and the menu screen 123 Front Display Adjust the display brightness of this unit 124 Information Show information about receiver settings input signals etc 124 Firmware Set whether or not to check for firmware update update the firmware and display update and upgra...

Page 99: ...ation of there being following pages y Selected setup item u Guide text for the currently selected setup item GExample 2H Audyssey Setup screen with illustration Channel Select Audyssey Setup Amp Assign Channel Select Start Your AV receiver can automatically measure the acoustics of your room then optimize your speakers using the included microphone Set the following items if necessary o Q1 Q0 i C...

Page 100: ...CBL SAT COAX e CBL SAT COAX Press ENTER q TV screen Displays the selected line Display Displays the selected item Use ui to move to the item you want to set w Press ENTER to set to the mode in which the setting can be made e 0 1 is displayed at the sides of items whose setting can be changed Use o p to change to the desired setting Display when returning to the settings in effect at time of purcha...

Page 101: ...n r Uppercase and lowercase switch key t Space key y Cursor keys u Insert key i Delete key o OK key n nInput method 1 Display the screen for inputting characters vpage 94 Menu map 2 Select a character to be changed qUse uio p to select or wPress ENTER to place the cursor at the character to be changed Each time ENTER is pressed the cursor moves by one character 3 Select a character to be input wit...

Page 102: ...r the setting To return to the previous item press o or BACK Exiting the Menu press SETUP while the menu is displayed The menu display disappears Items that can be set with the Audio procedure Surround Parameter vpage 100 Tone vpage 102 Dialogue Level vpage 102 Subwoofer Level vpage 102 Restorer vpage 102 Audio Delay vpage 103 Volume vpage 103 Audyssey vpage 103 Graphic EQ vpage 104 Basic version ...

Page 103: ...can adjust the surround audio sound field effects to match your preferences The items parameters that can be adjusted depend on the signal being input and the currently set sound mode For details on the adjustable parameters see Sound modes and surround parameters vpage 135 NOTE Some setting items cannot be set while playback is stopped Make the settings during playback When the sound mode is PURE...

Page 104: ...e size of acoustic environment You can set this when the sound mode is original listening mode Small Simulate acoustics of a small room Medium small Simulate acoustics of a medium small room Medium Simulate acoustics of a medium room Medium large Simulate acoustics of a medium large room Large Simulate acoustics of a large room NOTE Room Size does not indicate the size of the room in which sources...

Page 105: ...ost for all compressed sources 96 kbps and under Mode 3 Low Optimized mode for compressed sources with normal highs 96 kbps and over This item can be set with analog signals or PCM signal Sample Rate 44 1 48 kHz is input Restorer settings are stored for each input source This item default setting for NETWORK and iPod USB is Mode 3 Low All others are set to Off This cannot be set when the sound mod...

Page 106: ...dyssey technology please see page 141 NOTE If you have not performed Auto Setup or if you change the speaker settings after performing Auto Setup you may not be able to select Dynamic EQ Dynamic Volume In this case either perform Audyssey Setup over again or perform Restore vpage 30 to return to the settings after Audyssey Setup was run When HD Audio for which the sampling frequency exceeds 96 kHz...

Page 107: ...ges and loud passages etc by automatically adjusting to the user s preferred volume setting Heavy Most adjustment to softest and loudest sounds Medium Medium adjustment to loudest and softest sound Light Least adjustment to loudest and softest sounds Off Do not use Dynamic Volume is displayed when set to Heavy Medium or Light If Dynamic Volume is set to Yes in Audyssey Setup vpage 28 the setting i...

Page 108: ...ER or p to enter the setting To return to the previous item press o or BACK Exiting the Menu press SETUP while the menu is displayed The menu display disappears Items that can be set with the Video procedure Picture Adjust vpage 106 HDMI Setup vpage 106 Output Settings vpage 107 Volume Display vpage 108 Info Display vpage 108 Audio Display vpage 109 TV Format vpage 109 Basic version Advanced versi...

Page 109: ... compensated HDMI Audio Out Select HDMI audio output device AVR Play back through speakers connected to the unit TV Play back through TV connected to the unit The audio signal input from the HDMI input connector can be output as an output signal from the HDMI output connector by setting the HDMI audio output destination to TV Audio signals input via the Analog Coaxial Optical input connectors cann...

Page 110: ... source is played in both MAIN ZONE audio and video and ZONE2 audio only modes in the same room audio in MAIN ZONE and ZONE2 modes may sound out of synchronization but this is not malfunction In this case setting to Game mode may improve audio synchronization Setting items Setting details Video Conversion The input video signal is converted automatically in conjunction with the connected TV vpage ...

Page 111: ...z Auto The video signal is automatically detected and the appropriate mode is set Video Select mode suitable for video playback Video and Film Select mode suitable for video and 30 frame film material playback This item can be set when i p Scaler is set to anything other than Off Setting items Setting details Aspect Ratio Set the aspect ratio for the video signals output to the HDMI CBL SAT DVD Bl...

Page 112: ...he TV you are using Setting items Setting details Format NTSC Select NTSC output PAL Select PAL output Format can also be set by the following procedure However the menu screen is not displayed 1 Press and hold the main unit s ZONE2 SOURCE and STATUS for at least 3 seconds V Format NTSC appears on the display 2 Use the main unit s TUNER PRESET CH and set the video signal format 3 Press the main un...

Page 113: ...nu press SETUP while the menu is displayed The menu display disappears Important information n nAbout the display of input sources In this section the configurable input sources for each item are shown as follows CBL SAT DVD Blu ray GAME AUX MEDIA PLAYER iPod USB CD FM NETWORK TV AUDIO NOTE Input sources that have been set to Hide at Hide Sources vpage 112 cannot be selected Items that can be set ...

Page 114: ...t Assign This unit has certain input sources such as CBL SAT assigned to audio and video connectors by default By making the default connections you can simply press an input source select button to play back audio or video from the connected device with ease When making connections other than the default settings you must change settings in this section Examples of Input Assign menu screen displa...

Page 115: ...Do not reset to the defaults If you select Set Defaults and press ENTER the message Reset to the default values is displayed Select Yes or No and then press ENTER Inputs Source Rename Change the display name of the selected input source This is convenient when the input source name of your device and the input source name of this unit are different You can change the name to suit your needs When t...

Page 116: ... light check Input Assign vpage 112 and the connections If HDMI Control is set to On and a TV compatible with the ARC is connected via the HDMI MONITOR connectors the input mode whose input source is TV is fixed to ARC Setting items Setting details Decode Mode Set the audio decode mode for input source CBL SAT DVD Blu ray GAME AUX MEDIA PLAYER CD TV AUDIO Auto Detect type of digital input signal a...

Page 117: ...ion 1 Press MAIN to switch the zone mode to the MAIN ZONE MAIN lights 2 Press SETUP The menu is displayed on the TV screen 3 Use ui to select the menu to be set or operated 4 Press ENTER or p to enter the setting To return to the previous item press o or BACK Exiting the Menu press SETUP while the menu is displayed The menu display disappears Items that can be set with the Speakers procedure Audys...

Page 118: ...r that has inadequate playback capacity for low frequencies When Subwoofer is set to No Front is automatically set to Large When Front is set to Small Center Surround Surr Back and Front Height can not be set to Large Center Set the presence and size of the center speaker Large Use a large speaker that can adequately play back low frequencies Small Use a small speaker that has inadequate playback ...

Page 119: ...Speakers Setting items Setting details Speaker Config Continued Front Height Set the presence and size of the front height speakers Large Use a large speaker that can adequately play back low frequencies Small Use a small speaker that has inadequate playback capacity for low frequencies None Select when the front height speakers are not connected NOTE When Assign Mode setting vpage 115 is Front He...

Page 120: ...ssover setting is set to Individual Front Center Surround Surr Back Front Height Select speaker for setting of crossover frequency 40Hz 60Hz 80Hz 90Hz 100Hz 110Hz 120Hz 150Hz 200Hz 250Hz Set the crossover frequency Crossovers can be set when the Bass Subwoofer Mode vpage 116 setting is LFE Main or when you have a speaker that is set to Small Always set the crossover frequency to 80Hz When using sm...

Page 121: ... the gateway address and subnet mask Menu operation 1 Press MAIN to switch the zone mode to the MAIN ZONE MAIN lights 2 Press SETUP The menu is displayed on the TV screen 3 Use ui to select the menu to be set or operated 4 Press ENTER or p to enter the setting To return to the previous item press o or BACK Exiting the Menu press SETUP while the menu is displayed The menu display disappears Items t...

Page 122: ...On it consumes more standby power Network Friendly Name The Friendly Name is the name of this unit displayed on the network You can change the Friendly Name according to your preferences Setting items Setting details Edit Name Edits Friendly Name The default Friendly Name on first use is DENON AVR 2113CI Up to 63 characters can be input For character input see page 98 Set Defaults Restores Friendl...

Page 123: ... mask indicated in the documentation supplied by your provider Normally input 255 255 255 0 Default Gateway When connected to a gateway router input its IP address Primary DNS Secondary DNS If there is only one DNS address indicated in the documentation supplied by your provider input it at Primary DNS If there are two or more DNS addresses input the first one at Secondary DNS u Press o or BACK Th...

Page 124: ...s ENTER e Press ENTER again r Use o p to select On and press ENTER t Press i to select Proxy then press ENTER y Use o p to select Address or Name and then press ENTER Address Select when inputting by address Name Select when inputting by domain name u Press i to select Address or Name then press ENTER When Address is selected in step y Use uio p to enter the proxy server address and press ENTER Wh...

Page 125: ...e setting To return to the previous item press o or BACK Exiting the Menu press SETUP while the menu is displayed The menu display disappears Items that can be set with the General procedure Language vpage 123 ZONE2 Setup vpage 123 Zone Rename vpage 123 Quick Select Names vpage 123 Auto Standby vpage 123 Front Display vpage 124 Information vpage 124 Firmware vpage 125 Setup Lock vpage 127 Basic ve...

Page 126: ...is turned on Last Use the memorized setting from the last session Mute Always mute when power is turned on 1 98 79dB 18dB The volume is adjusted to the set level This is displayed from 79 dB to 18 dB when Scale vpage 103 is set to 79 5dB 18 0dB Mute Level Set the amount of attenuation when muting is on Full The sound is muted entirely 40dB The sound is attenuated by 40 dB down 20dB The sound is at...

Page 127: ...at The number of input signal channels presence of front surround LFE Sample Rate The input signal s sampling frequency Offset The dialogue normalization correction value Flag This is displayed when inputting signals including a surround back channel MATRIX is displayed with Dolby Digital EX and DTS ES Matrix signals DISCRETE with DTS ES Discrete signals Dialogue normalization function This functi...

Page 128: ...deo contents is being played Firmware Default settings are underlined Set whether or not to check for firmware update update the firmware and display update and upgrade notifications Setting items Setting details Update Update the firmware of the receiver NOTE In cases where it is not possible to connect to the network after doing a firmware update connect to the network again using Network vpage ...

Page 129: ...ecomes green and normal status is resumed If the upgrade is not successful an error message identical to those in Firmware Update will appear on the display Check the settings and network environment and then perform the upgrade again See the DENON website for details about upgrades When the procedure is complete Registered is displayed in this menu and upgrades can be carried out If the procedure...

Page 130: ...n Turn protection on Off Turn protection off When canceling the setting set Lock to Off NOTE When Lock is set to On the settings listed below can no longer be changed Also SETUP LOCKED is displayed if you attempt to operate related settings Setup menu operations Levels Basic version Advanced version Information Advanced version DVD ...

Page 131: ...information vpage 134 F Troubleshooting vpage 144 F Specifications vpage 149 F Index vpage 150 Information Here we list various information related to this unit Please refer to this information as needed Basic version Advanced version Information Information DVD ...

Page 132: ...ger be output from the connected speakers NOTE To prevent hearing loss do not raise the volume level excessively when using headphones Q0Display 130 Q1Remote control sensor 133 Q2SOURCE SELECT knob 31 148 Q3Tuner preset channel buttons TUNER PRESET CH 43 Q4ZONE2 ON OFF button 92 Q5ZONE2 SOURCE button 92 Q6DIMMER button 124 Q7STATUS button 34 48 52 124 Q8QUICK SELECT buttons 89 rAUX HDMI connector ...

Page 133: ...er reception mode indicators These light according to the reception conditions when the input source is set to FM STEREO In FM mode this lights up when receiving analog stereo broadcasts TUNED Lights up when the broadcast is properly tuned in oAudyssey indicator This indicator lights when the MultEQ XT vpage 103 Dynamic EQ vpage 104 or Dynamic Volume vpage 104 setting is set to On Q0Decoder indica...

Page 134: ...4 tComponent video connectors COMPONENT VIDEO 14 15 16 17 yPower cord 23 uHDMI connectors 9 10 iDigital audio connectors DIGITAL AUDIO 13 14 15 16 17 19 oNetwork connector NETWORK 22 Q0REMOTE CONTROL jacks 21 Q1Video connectors VIDEO 13 14 15 Q2RC 232C connector 21 NOTE Do not touch the inner pins of the connectors on the rear panel Electrostatic discharge may cause permanent damage to the unit Ba...

Page 135: ...Cursor buttons uio p 97 99 105 110 114 118 122 iBACK button 99 105 110 114 118 122 oSystem buttons 35 38 53 59 Skip buttons 8 9 Play pause button 1 3 Tuning up Tuning down buttons TUNE 39 40 Q0SOUND MODE buttons 68 MOVIE button MUSIC button GAME button PURE button Q1Remote control signal transmitter 133 Q2SLEEP button 88 93 Q3POWER button X 31 Q4VOLUME buttons df 32 92 Q5OPTION button 33 37 39 48 ...

Page 136: ...e remote control unit if it will not be in use for long periods Used batteries should be disposed of in accordance with the local regulations regarding battery disposal The remote control unit may function improperly if rechargeable batteries are used Operating range of the remote control unit Point the remote control unit at the remote sensor when operating it 30 30 Approx 23 ft 7 m NOTE The set ...

Page 137: ...ition Multimedia Interface are trademarks or registered trademarks of HDMI Licensing LLC in the United States and other countries Made for iPod and Made for iPhone mean that an electronic accessory has been designed to connect specifically to iPod or iPhone respectively and has been certified by the developer to meet Apple performance standards Apple is not responsible for the operation of this de...

Page 138: ... Sz8 S S DOLBY DIGITAL Plus S D D D Dz7 D Sz8 S S DOLBY TrueHD S D D D Dz7 D Sz8 S S S DTS SURROUND S D D D Dz7 D Sz8 S S DTS 96 24 S D D D Dz7 D Sz8 S DTS HD S D D D Dz7 D Sz8 S DTS Express S D D D Dz7 D Sz8 S MULTI CH STEREO S D D D D D S S S ROCK ARENA S D D D D D S S S JAZZ CLUB S D D D D D S S S MONO MOVIE S D D D D D S S S VIDEO GAME S D D D D D S S S MATRIX S D D D D D S S S S VIRTUAL S D S...

Page 139: ...6 24 S S S S S S DTS HD S S S S S S DTS Express S S S S S S MULTI CH STEREO S S S S S S ROCK ARENA S S S Sz16 S S S S JAZZ CLUB S S S S S S S S MONO MOVIE S S S S S S S S VIDEO GAME S S S S S S S S MATRIX S S S S S S VIRTUAL S S S S S S z1 During playback in PURE DIRECT mode the surround parameters are the same as in DIRECT mode z5 Only when Subwoofer Mode is set to LFE Main vpage 116 sound is out...

Page 140: ...S S S S S S S DTS EXPRESS F DTS HD NEO 6 z1z2 S S S S S DTS NEO 6 CINEMA S S S DTS NEO 6 MUSIC S S S DOLBY SURROUND DOLBY TrueHD F DOLBY DIGITAL F DOLBY DIGITAL EX z1z2 S S S DOLBY D HD EX z1z2 S S DOLBY DIGITAL S F F DOLBY D D HD PLgx CINEMA z1z3 S S F S S DOLBY D D HD PLgx MUSIC z1z2 S S S S S DOLBY D D HD PLgz z4 S S S S S DOLBY PRO LOGIC gx CINEMA z1z2 S S S DOLBY PRO LOGIC gx MUSIC z1z2 S S S...

Page 141: ...ATION MULTI CH STEREO S S S S S S S S S S S S S S S S ROCK ARENA S S S S S S S S S S S S S S S S JAZZ CLUB S S S S S S S S S S S S S S S S MONO MOVIE S S S S S S S S S S S S S S S S VIDEO GAME S S S S S S S S S S S S S S S S MATRIX S S S S S S S S S S S S S S S S VIRTUAL S S S S S S S S S S S S S S S S STEREO STEREO F S F S S S S S S S S S S S S S z1 This sound mode can be selected when Assign Mod...

Page 142: ...VIDEO Off S S A A A Off S S S S VIDEO S VIDEO S Video signal input present A No video signal input S The input signal between the marks is output A No video signal output S Superimposed on the picture indicated in A Only the picture in is output A Neither the picture nor the menu is output The main zone video conversion function is compatible with the following formats NTSC PAL SECAM NTSC4 43 PAL ...

Page 143: ...is set to Auto and a television that does not support 1080p 24Hz video signals is connected z4 The resolution set in Resolution vpage 108 in the menu is set to Auto and a television that supports 1080p 24Hz video signals is connected z5 Output at the same resolution as the input video signal resolution NOTE Video output is output at the same resolution as the input video signal resolution The 4K 3...

Page 144: ...bility in response to the source signal and the conditions of the playback device Dolby Pro Logic g Dolby Pro Logic g is a matrix decoding technology developed by Dolby Laboratories Regular music such as that on CDs is encoded into 5 channels to achieve an excellent surround effect The surround channel signals are converted into stereo and full band signals with a frequency response of 20 Hz to 20...

Page 145: ...ING BUT NOT LIMITED TO PROCUREMENT OF SUBSTITUTE GOODS OR SERVICES LOSS OF USE DATA OR PROFITS OR BUSINESS INTERRUPTION HOWEVER CAUSED AND ON ANY THEORY OF LIABILITY WHETHER IN CONTRACT STRICT LIABILITY OR TORT INCLUDING NEGLIGENCE OR OTHERWISE ARISING IN ANY WAY OUT OF THE USE OF THIS SOFTWARE EVEN IF ADVISED OF THE POSSIBILITY OF SUCH DAMAGE H HDCP When transmitting digital signals between devic...

Page 146: ...ft may in conjunction with such license also download revocation list onto your device on behalf of Secure Content Owners Windows Media Player Ver 11 or later This is a media player distributed free of charge by Microsoft Corporation It can play playlists created with Ver 11 or later of Windows Media Player as well as WMA DRM WMA WAV and other files WMA Windows Media Audio This is audio compressio...

Page 147: ...re has come loose from the terminal or a core wire is touching the rear panel of this unit After unplugging the power cord take corrective action such as firmly re twisting the core wire or taking care of the terminal and then reconnect the wire 77 77 After turning on the power the power indicator is blinking red in intervals of approximately 0 5 seconds This unit amplifier circuit has failed Turn...

Page 148: ...eakers Set Speaker Config Front Height on the menu to something other than None 115 116 Symptom Cause Solution Page No sound is produced from subwoofer Check the subwoofer connections Turn on the subwoofer s power Set Speaker Config Subwoofer on the menu to Yes If Front and Center for Speaker Config are set to Large and Subwoofer Mode is set to LFE no sound may be output from the subwoofers depend...

Page 149: ...annot be played Ethernet cable is not properly connected or network is disconnected Check the connection status Program is being broadcast in non compatible format Only Internet radio programs in MP3 and WMA can be played on this unit The firewall of the PC or router has been activated Check the firewall settings of the connected PC or router Radio station is not currently broadcasting Choose a ra...

Page 150: ...ad is set to the minimum setting Adjust the volume to the optimum level This unit is not selected in the screen that is displayed when iTunes or the iPhone iPod touch iPad is started Start iTunes or switch on the iPhone iPod touch iPad click the AirPlay icon in the displayed screen and select this unit AirPlay playback has not started Click the 1 button in iTunes or press the 1 button on the iPhon...

Page 151: ...ault values X TUNER PRESET CH TUNER PRESET CH 1 Turn off the power using X 2 Press X while simultaneously pressing TUNER PRESET CH and TUNER PRESET CH 3 Once the display starts flashing at intervals of about 1 second release the two buttons If in step 3 the display does not flash at intervals of about 1 second start over from step 1 Basic version Advanced version Information Information DVD ...

Page 152: ...RECT mode S N 100 dB IHF A weighted DIRECT mode n n Video section Standard video connectors Input output level and impedance 1 Vp p 75 Ω Frequency response 5 Hz 10 MHz 0 3 dB n n Tuner section FM Note μV at 75 Ω 0 dBf 1 x 10 15 W Receiving Range 87 5 MHz 107 9 MHz Usable Sensitivity 1 2 μV 12 8 dBf 50 dB Quieting Sensitivity MONO 2 8 μV 20 2 dBf S N MONO 70 dB IHF A weighted DIRECT mode STEREO 67 ...

Page 153: ...1 Dolby Digital EX 72 141 Dolby Digital Plus 72 141 Dolby Pro Logic 72 Dolby Pro Logic II 72 141 Dolby Pro Logic IIx 72 141 Dolby Pro Logic IIz 72 141 Dolby TrueHD 72 141 Downmix 141 DTS 141 DTS 96 24 72 141 DTS Digital Surround 141 DTS ES Discrete 6 1 72 141 DTS ES Matrix 6 1 72 142 DTS Express 72 142 DTS HD 72 142 DTS HD High Resolution Audio 142 DTS HD Master Audio 142 DTS NEO 6 Surround 72 142...

Page 154: ...rocessor 148 Resolution 108 Restorer 102 Room Size 101 v v S Sampling frequency 142 Saturation 106 Scale 103 Selecting the input source 31 Settings 120 Setup Lock 127 SiriusXM 54 60 Sleep timer 88 93 Slideshow 65 Sound Mode 68 135 Source Level 113 Source Rename 112 Speaker Connect 77 Install 75 Set up 24 85 Speaker Config 115 Speaker impedance 77 142 Speakers 114 Speaker Selection 104 Standby Sour...

Page 155: ...329 0 6 15 32 164 5 2 1 8 54 0 2 47 64 69 5 37 64 14 5 6 152 5 6 37 64 167 0 17 3 32 434 0 13 35 64 344 0 2 23 64 60 0 1 49 64 45 0 1 49 64 45 0 47 64 18 5 57 64 22 5 Weight 20 lbs 15 oz 9 5 kg Basic version Advanced version Information Information DVD ...

Page 156: ...D M Holdings Inc 3520 10076 00AD V00 www denon com ...

Reviews: