(6) When the firmware update (3-5min) completes correctly, the unit restarts and enters standby mode.
(7) Remove the AC power cord.
(8) Remove the USB flash drive device.
(9) The firmware update finishes.
(7) Turn on the power again and check the new firmware version.
2.4. Displays
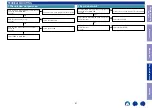
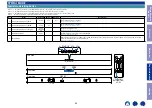
(1) The update begins automatically, and the LEDs light as shown below.
Function
LED 1
LED 2
LED 3
LED 4
Plug in USB memory and loading file
○ (White)
Check update file
○ (White)
○ (White)
Success entry USB update, please wait.
○ (White)
○ (White)
○ (White)
Update success
○ (White)
○ (White)
○ (White)
○ (White)
(2) After updating the firmware, check the version.
See "
"
---Cautions on Firmware Update---
• Do not turn off the power until updating is completed.
• Initialize after the update is complete.
3. Updating via USB
The latest firmware can be downloaded to a USB memory for updates.
2.1. Connecting to the USB Memory
(1) Preparation
• Use a memory that supports USB2.0.
• Save the update file on a blank USB flash drive for use.
• USB format : Prepare a USB memory formatted in FAT16 or FAT32.
• Do not run the USB flash drive through a hub.
• Do not connect a computer to the USB port of this unit using a USB cable.
• Do not use an extension cable when connecting the USB flash drive unit.
• If a USB flash drive cannot be updated, replace it with a different USB flash drive and perform the
update again.
2.2. Unzipping the Downloaded File
Create a new folder, "update_gva", in the root of the USB and copy the downloaded file there.
File name
SU_CAST_0008.zip
Note : Do not unzip the zip file. Copy it as it is.
2.3. Starting up
(1) Press the "
Power
" button for 5 seconds or more to enter Deep Standby mode.
Press the "
Power
" button to turn on the unit.
• Do not connect anything to the unit.
(2) Press the "
TV
" or "
SOURCE
" button on the remote control and switch the source to OPTICAL.
• LEDs 1 and 2 light up in white.
(3) Remove the cover of the USB port on the rear panel.
(4) Insert the USB flash drive on which the firmware has been stored and the update begins automati-
cally.
(5) The firmware update begins. During the update, the LEDs will display as shown below.
The firmware type is automatically detected, and LEDs 1 to 4 light up.
Firmware
LED
SOC(MTK)
White
See "
" for information on checking the update progress
LED1 LED2
61
Before Servicing
This Unit
Electrical
Mechanical
Repair Information
Updating

