ENGLISH
10
!8
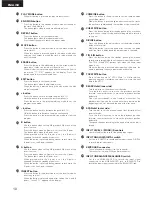
PLAY MODE button
•
When this button is pressed, the play mode switches.
!9
END MON button
•
Press this button in the standby mode to monitor the end of
the track. (End Monitor)
•
The button lights when the end monitor mode is set.
@0
REPEAT button
•
Press this button to set the repeat mode.
•
The button lights when the repeat mode is set.
•
Press the button again to cancel the repeat mode.
@1
MOVE button
•
Press this button in the edit mode to set the move mode (to
move tracks).
•
When this button is pressed again in the move mode after
selecting the number to which the track is to be moved, the
track is moved.
@2
ERASE button
•
Press this button in the edit mode to set the erase mode (to
erase discs, tracks, cue points or A-B sections.)
•
When this button is pressed again after selecting the item to
be erased, “*** OK?” appears on the display. Press the
button again to erase the selected item.
@3
EDIT button
•
Press this button to set the edit mode.
•
The button lights when the edit mode is set.
•
When the button is pressed during the edit mode, the edit
mode is canceled.
@4
+ button
•
Press this button once to increase the pitch by 0.1%.
•
Hold the button in to increase the pitch continuously.
•
Press the button in the program editing mode to set the
program insert mode.
@5
– button
•
Press this button once to decrease the pitch by 0.1%.
•
Hold the button in to decrease the pitch continuously.
•
Press the button in the program editing mode to clear the
program.
@6
B button
•
Use this button when setting A-B playback, A-B erase or the
insert function.
•
Press this button when no B point is set to set the B point.
•
The button lights when the B point is set.
•
When pressed while the B point is set, the B point is
searched for and the standby mode is set.
•
When the button is pressed during manual search while the
B point is set, the B point changes.
@7
A button
•
Use this button when setting A-B playback, A-B erase or the
insert function.
•
Press this button when no A point is set to set the A point.
•
The button lights when the A point is set.
•
When pressed while the A point is set, the A point is
searched for and the standby mode is set.
•
When the button is pressed during manual search while the
A point is set, the A point changes.
@8
INSERT button
•
Press this button in the edit mode to set the insert mode (to
insert any section).
•
When the button is pressed again after setting the A and B
points, “Insert PT ?” appears on the display.
@9
COMBINE button
•
Press this button in the edit mode to set the combine mode
(to combine tracks).
•
When the button is pressed again after checking the tracks,
the tracks are combined and the combine mode is canceled.
#0
CUE WRITE button
•
Press this button during the standby, pause, play, or manual
search. When the edit mode and recording mode to record a
cue signal.
#1
DIVIDE button
•
Press this button in the edit mode to set the divide mode (to
divide a track in two)
•
When the button is pressed again after checking the divide
point, the track is divided and the divide mode is canceled.
#2
TITLE IN button
•
Press this button during the standby, pause, play, manual
search or recording mode to set the name input (edit) mode.
•
The TITLE IN and EDIT buttons light when the name input
mode is set.
•
When the button is pressed after inputting the name, the
name is input and the name input mode is canceled.
#3
TOC WRITE button
•
Press this button while “UTOC Write” is lit after editing,
inputting names or recording cue signals to write the new
data in the UTOC.
#4
SEARCH dial (inner side)
•
Turn this dial to set the manual search mode.
•
Turn the dial clockwise to move the playback position
forward, counterclockwise to move the playback position
backward.
•
One click corresponds to one frame of movement. The
playback position can be moved anywhere between the
beginning of the first track and the end of the last track.
#5
SCAN dial (outer side)
•
Turn this dial to set the manual search (fast forward or fast
reverse) mode.
•
Turn the dial clockwise to move the playback position
forward, counterclockwise to move the playback position
backward.
•
The speed changes according to the angle at which the dial is
turned.
#6
INPUT LEVEL L (MONO)/R controls
•
Use this to adjust the level of the analog input signal.
#7
INPUT ANALOG/DIGITAL switch
•
Set this to ANALOG to record analog input signals, DIGITAL
to record digital input signals.
#8
KEYBOARD connector
•
To use a keyboard, connect it to this connector.
•
The connector is a mini DIN type 6-pin connector.
#9
INPUT UNBALANCED/BALANCED switch
•
Set this to UNBALANCED to record the input signal
connected to the UNBALANCED jack, to BALANCED to
record the input signal connected to the BALANCED jack.


