background image

4

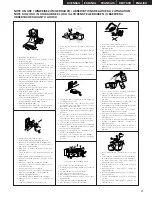
NOTE ON USE / HINWEISE ZUM GEBRAUCH / OBSERVATIONS RELATIVES A L’UTILISATION
NOTE SULL’USO / NOTAS SOBRE EL USO / ALVORENS TE GEBRUIKEN / OBSERVERA
OBSERVAÇÕES QUANTO AO USO

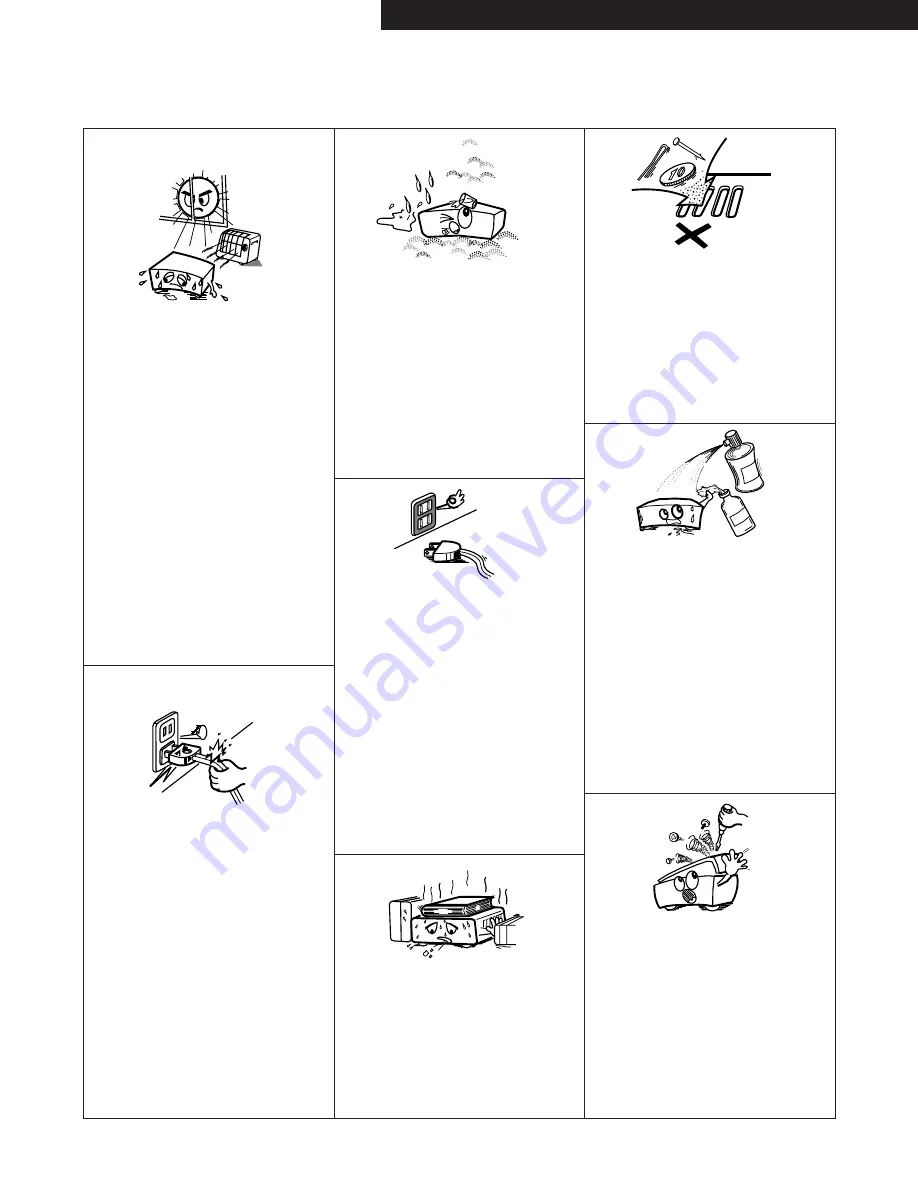
• Avoid high temperatures.

Allow for sufficient heat dispersion when
installed on a rack.

• Vermeiden Sie hohe Temperaturen.

Beachten Sie, daß eine ausreichend
Luftzirkulation gewährleistet wird, wenn das
Gerät auf ein Regal gestellt wird.

• Eviter des températures élevées.

Tenir compte d’une dispersion de chaleur
suffisante lors de l’installation sur une étagère.

• Evitate di esporre l’unità a temperature alte.

Assicuratevi che ci sia un’adeguata dispersione
del calore quando installate l’unità in un mobile
per componenti audio.

• Evite altas temperaturas.

Permite la suficiente dispersión del calor
cuando está instalado en la consola.

• Vermijd hoge temperaturen.

Zorg voor een degelijk hitteafvoer indien het
apparaat op een rek wordt geplaatst.

• Undvik höga temperaturer.

Se till att det finns möjlighet till god
värmeavledning vid montering i ett rack.

• Evite temperaturas altas.

Conceda suficiente dispersão de calor quando
o equipamento for instalado numa prateleira.

• Keep the set free from moisture, water, and

dust. 

• Halten Sie das Gerät von Feuchtigkeit, Wasser

und Staub fern.

• Protéger l’appareil contre l’humidité, l’eau et

lapoussière.

• Tenete l’unità lontana dall’umidità, dall’acqua e

dalla polvere.

• Mantenga el equipo libre de humedad, agua y

polvo.

• Laat geen vochtigheid, water of stof in het

apparaat binnendringen.

• Utsätt inte apparaten för fukt, vatten och

damm.

• Mantenha o aparelho livre de qualquer

umidade, água ou poeira.

• Do not let foreign objects in the set.
• Keine fremden Gegenstände in das Gerät

kommen lassen.

• Ne pas laisser des objets étrangers dans

l’appareil.

• E’ importante che nessun oggetto è inserito

all’interno dell’unità.

• No deje objetos extraños dentro del equipo.
• Laat geen vreemde voorwerpen in dit apparaat

vallen.

• Se till att främmande föremål inte tränger in i

apparaten.

• Não deixe objetos estranhos no aparelho.

• Do not let insecticides, benzene, and thinner

come in contact with the set.

• Lassen Sie das Gerät nicht mit Insektiziden,

Benzin oder Verdünnungsmitteln in Berührung
kommen.

• Ne pas mettre en contact des insecticides, du

benzène et un diluant avec l’appareil.

• Assicuratevvi che l’unità non venga in contatto

con insetticidi, benzolo o solventi.

• No permita el contacto de insecticidas,

gasolina y diluyentes con el equipo.

• Laat geen insektenverdelgende middelen,

benzine of verfverdunner met dit apparaat in
kontakt komen.

• Se till att inte insektsmedel på spraybruk,

bensen och thinner kommer i kontakt med
apparatens hölje.

• Não permita que inseticidas, benzina e

dissolvente entrem em contacto com o
aparelho.

• Never disassemble or modify the set in any

way.

• Versuchen Sie niemals das Gerät auseinander

zu nehmen oder auf  jegliche Art zu verändern.

• Ne jamais démonter ou modifier l’appareil

d’une manière ou d’une autre.

• Non smontate mai, nè modificate l’unità in

nessun modo.

• Nunca desarme o modifique el equipo de

ninguna manera.

• Nooit dit apparaat demonteren of op andere

wijze modifiëren.

• Ta inte isär apparaten och försök inte bygga

om den. 

• Nunca desmonte ou modifique o aparelho de

alguma forma.

• Unplug the power cord when not using the set

for long periods of time.

• Wenn das Gerät eine längere Zeit nicht

verwendet werden soll, trennen Sie das
Netzkabel vom Netzstecker.

• Débrancher le cordon d’alimentation lorsque

l’appareil n’est pas utilisé pendant de longues
périodes.

• Disinnestate il filo di alimentazione quando

avete l’intenzione di non usare il filo di
alimentazione per un lungo periodo di tempo.

• Desconecte el cordón de energía cuando no

utilice el equipo por mucho tiempo.

• Neem altijd het netsnoer uit het stopkontakt

wanneer het apparaat gedurende een lange
periode niet wordt gebruikt.

• Koppla ur nätkabeln om apparaten inte

kommer att användas i lång tid.

• Desligue o fio condutor de força quando o

aparelho não tiver que ser usado por um longo
período.

* (For sets with ventilation holes)

• Do not obstruct the ventilation holes.
• Die Belüftungsöffnungen dürfen nicht verdeckt

werden.

• Ne pas obstruer les trous d’aération.
• Non coprite i fori di ventilazione.
• No obstruya los orificios de ventilación.
• De ventilatieopeningen mogen niet worden

beblokkeerd.

• Täpp inte till ventilationsöppningarna.
• Não obstrua os orifícios de ventilação.

• Handle the power cord carefully.

Hold the plug when unplugging the cord.

• Gehen Sie vorsichtig mit dem Netzkabel um.

Halten Sie das Kabel am Stecker, wenn Sie
den Stecker herausziehen.

• Manipuler le cordon d’alimentation avec

précaution.
Tenir la prise lors du débranchement du
cordon.

• Manneggiate il filo di alimentazione con cura.

Agite per la spina quando scollegate il cavo
dalla presa.

• Maneje el cordón de energía con cuidado. 

Sostenga el enchufe cuando desconecte el
cordón de energía.

• Hanteer het netsnoer voorzichtig.

Houd het snoer bij de stekker vast wanneer
deze moet worden aan- of losgekoppeld.

• Hantera nätkabeln varsamt.

Håll i kabeln när den kopplas från el-uttaget.

• Manuseie com cuidado o fio condutor de

energia.
Segure a tomada ao desconectar o fio.

ENGLISH

DEUTSCH

FRANCAIS

ESPAÑOL

SVENSKA

Summary of Contents for DN-M991R

Page 1: ...TUNG MODE D EMPLOI INSTRUCCIONES DE OPERACION BRUKSANVISNING FOR ENGLISH READERS PAGE 006 PAGE 041 F R DEUTSCHE LESER SEITE 042 SEITE 078 POUR LES LECTEURS FRANCAIS PAGE 077 PAGE 114 PARA LECTORES DE...

Page 2: ...es exigences du R glement sur le mat riel brouilleur du Canada CLASS 1 LASER PRODUCT LUOKAN 1 LASERLAITE KLASS 1 LASERAPPARAT ADVARSEL USYNLIG LASERSTR LING VED BNING N R SIKKERHEDSAFBRYDERE ER UDE AF...

Page 3: ...likely to be walked on or pinched by items placed upon or against them paying particular attention to cords at plugs convenience receptacles and the point where they exit from the appliance 14 Cleani...

Page 4: ...dunner met dit apparaat in kontakt komen Se till att inte insektsmedel p spraybruk bensen och thinner kommer i kontakt med apparatens h lje N o permita que inseticidas benzina e dissolvente entrem em...

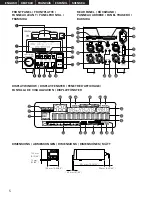
Page 5: ...ERE PANEL TRASERO BAKSIDA DISPLAY WINDOW DISPLAY FENSTER FENETRE D AFFICHAGE PANTALLA DE VISUALIZACION DISPLAYF NSTER DIMENSIONS ABMESSUNGEN DIMENSIONS DIMENSI NES M TT 133 mm 5 15 64 13 mm 33 64 144...

Page 6: ...at which the flashing begins can be set within a range of 5 to 35 seconds 7 steps prior to the end of the track Pitch Control Preset 8 0 to 8 0 0 1 step Instant Start Playback starts less than 0 01 se...

Page 7: ...cks Move function 33 9 Pitch on the disc Disc s pitch function 33 10 Inputting Changing Names Title function 34 11 Exit the Edit Mode or Undoing Editing Undo functions 35 CONNECTING AND OPERATING A KE...

Page 8: ...change the play start position and for program operations 0 END MON CLEAR button END MON Normal mode Press this button in the standby mode to monitor the end of the track End Monitor The button light...

Page 9: ...ame NC NC T x D NC R x D NC NC NC S GROUND I O O I I O O O I I Signal name NC S GROUND T x D RETURN T x D R x D R x D RETURN NC NC NC RS422A 2 Rear Panel RS232C 8 TERMINATOR switch When set to the ON...

Page 10: ...0 mA HCMOS li 3 mA TTL lol 20 mA HCMOS li 3 mA TTL lol 20 mA HCMOS li 3 mA TTL lol 20 mA HCMOS li 3 mA HCMOS li 3 mA HCMOS li 3 mA HCMOS li 3 mA TTL lol 20 mA HCMOS li 3 mA TTL lol 20 mA PHOTO COUPLER...

Page 11: ...LEL REMOTE 1 HOT START OFF Preset 36 To control the DN M991R remotely refer to the example of remote control connections given below The rating of REMOTE connector pin 22 TALLY POWER SUPPLY is 5 V 80...

Page 12: ...iniDiscs in places exposed to direct sunlight or high temperatures Cleaning Use a dry cloth to gently wipe dirt or dust off the cartridge Do not apply excessive force TOC Section in which audio signal...

Page 13: ...ement level setting IncDet 60dB Auto increment Auto increment selection AutoInc OFF Pre UTOC Pre UTOC on off setting Pre UTOC OFF Recording start level Recording start level setting RecLv 60dB Recordi...

Page 14: ...is the last preset item displayed the last time the presettings were made Character display Character display The character display changes as shown below Before change After change The preset mode i...

Page 15: ...5 End Mon OFF Do not use the end monitor function 7 E O M sec Output EOM tally signal to remote pint 24 E O M sec Set the EOM time 5 10 15 20 25 30 E O M OFF Do not use the EOM function 8 Delay ms Del...

Page 16: ...DISP button pressed DateDisp ON Date displayed when DISP button pressed 25 FR Disp ON OFF FR Disp ON The frames are displayed on the time display during playback FR Disp OFF The frames are not display...

Page 17: ...ON Store the contents of program 3 when on Initial setting OFF 36 HotStart OFF ON HotStart OFF The parallel remote is set up the Hot start off mode HotStart ON The parallel remote is set up the Hot s...

Page 18: ...the play start position and the standby mode is set BACK CUE Lit Lit Flashing orange Lit Playback is interrupted and the pause mode is set at that point Flashing 4 2 Starting playback from the middle...

Page 19: ...iscs which are already recorded and have little free space left or on playback only discs Disc for recording Method of recording on disc 1 Discs on which nothing is recorded Recording starts from the...

Page 20: ...is unlocked If this is the case recording is not possible Lit 4 5 6 Recording starts and the indicator lights TOC Start recording Press the PLAY PAUSE button To change the track number during recordi...

Page 21: ...cording Press the PLAY PAUSE button Recording starts when an input signal with a level at or above the set level is detected NOTE If the LEVEL START button is pressed while the button is flashing the...

Page 22: ...t ID or the CD s sub codes will not work if the digital input is in professional format AES EBU Input digital signals of the consumer format SPDIF Copy Track number Track A Track B Track X Track Y Tra...

Page 23: ...want to set the cue point 3 1 Set the cue point Press the CUE WRITE button EDIT MODE MODE 3 2 Press the CUE WRITE button again while Cue Write OK is displayed 4 To continue setting other cue points Re...

Page 24: ...1 Search for the cue point Press the STANDBY CUE button The Cue1 point is searched for and the standby mode is set at that position Press the STANDBY CUE button again to search as follows 3 2 Cue poin...

Page 25: ...erial remote is to be used contact your store of purchase 2 1 Instantaneous play Hot Start Disc Example Track 4 is set to pause NOTE When the stop operation is set during data loading and the data loa...

Page 26: ...ashes Flashing Flashing Selected track number When track 3 is selected Lit The number of the next step in the program is displayed Flashing The time display shows the total playing time for the progra...

Page 27: ...te that track from the program Press the SEARCH 6 button To continue deleting tracks from the program repeat steps 6 1 and 6 2 7 Exit the program editing mode Press the PROGRAM IN button 1 Set the pro...

Page 28: ...the program See Page 26 2 1 Set the preset mode Follow the instructions under 2 Presetting Procedure to set the preset mode See Page 14 2 2 Select the preset item Turn the select knob to select Progra...

Page 29: ...certain play speed on the disc then play the disc at that speed When the presetting is set to PitchAuto ON and this disc is loaded the disc is played at the written pitch Combine function used Move fu...

Page 30: ...the cue signal you want to erase Press the CUE SERCH button The cue direct search mode is set 1 2 Press the STANDBY CUE button NOTE Press the CUE button again to search for Cue2 Cue3 etc and set the c...

Page 31: ...ect track Press the REC button The track is erased and the mode returns to the edit mode Lit 2 All the tracks are erased and the mode returns to the edit mode Lit 2 Select the erase track The track to...

Page 32: ...cannot be combined 1 When cued at the first track 2 A stereo track with a monaural track 3 Tracks containing cue signals Lit 6 Dividing Tracks into Two Parts Divide function 1 Use manual search etc t...

Page 33: ...ng 8 Moving Tracks Move function 1 Select the move edit function see page 30 Select Move and press the SELECT knob 2 Use the SELECT knob to choose where to move which track 3 Move the track Press the...

Page 34: ...hing cursor Flashing 4 Continue inputting the name Repeat steps 2 1 2 2 and 3 to input the name Press the SEARCH 6 or 7 button to move the cursor to change or correct a name When the SEARCH 6 or 7 but...

Page 35: ...tton 3 2 Cancel the undo mode Press the MODE button before press the REC button Return to step 1 The editing is undone and the mode returns to the edit mode NOTES The undo operation can be used to und...

Page 36: ...n as follows When the key is held in while pressing keys to the keys function as follows Shift F12 F1 F12 F1 Track search reverse 10 tracks Track search forward 10 tracks Manual search reverse Manual...

Page 37: ...election Decrements track selection Enter Set track PUSH ENTER operation Ins Del Enter Ins Del Del BackSpace Esc Enter Number keys Hot start 1 to 10 Number keys Reload data 1 to 10 Number keys Symbol...

Page 38: ...de and fingerprints may get on the disc Do not bend heat or throw cartridges Water droplets may form on the surface if cartridges are moved suddenly from outside or any cold place to a warm place If t...

Page 39: ...ng the presettings No hot start data Indicates that no track name or disc name has been set Indicates that no program has been input Indicates discs containing disc names but no tracks Data other than...

Page 40: ...the tracks that have been erased The remaining time on the disc may not increase when short tracks less than approximately 8 seconds are erased If there are many emphasis data on off signals or other...

Page 41: ...XLR connector Output Level 18 dBs 600 ohms Monitor Output 20 mW or greater 30 to 40 ohms Analog Input Connector XLR connector Input Level 18 dBs 10 k kohms Digital Output Connector XLR connector Signa...

Reviews: