6
ENGLISH
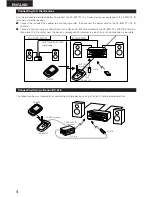
Charging Function
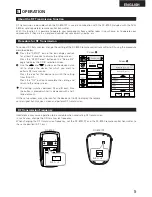
The RC-8000’s nickel cadmium battery can be charged by placing the RC-8000 on the RC-8001ST.
Charge the battery pack if “LOW BATTERY” appears on the remote control unit’s display.
Be sure to charge the nickel cadmium rechargeable battery pack for about 8 hours before connecting it to the remote
control unit and using it to power the remote control unit.
During charging, the charging indicator (“CHARGE”) lights. The indicator turns off once charging is completed.
Approximately 8 hours (at 70 mA) are required to charge the nickel cadmium battery.
Rechargeable battery:
4.8 V nickel cadmium rechargeable battery pack (included with RC-8001ST)
Dimensions:
132 mm (width) x 42 mm (height) x 160 mm (depth)
(5-13/64” x 1-21/32” x 6-19/64”)
Mass:
170 g (6 oz)
Accessories:
Nickel cadmium battery pack.................1
Warranty * ...............................1
AC adapter (AA-25) ................................1
Service station list ...................1
Connection cord.....................................1
Spacer......................................1
Battery holder ........................................2
Operating instructions............................1
* When the RC-8001ST is acquired as an accessory included with the AVR-5800, there is
no separate warranty for the RC-8001ST. (The warranty is only for the AVR-5800.)
✽
For purposes of improvement, specifications and design are subject to change without notice.
6
SPECIFICATIONS
RECYCLING NICKEL-CADMIUM BATTERIES
NICKEL-CADMIUM BATTERIES MUST BE RECYCLED OR DISPOSED OF PROPERLY.
Nickel-cadmium cells are used in the battery pack. Please take your used nickel-cadmium
battery packs to a store that recycles nickel-cadmium batteries.
Cautions:
• Use the specified battery pack.
• Never throw the battery into a fire, disassemble it, or heat it.
• Do not remove or damage the battery casing.
Ni-Cd
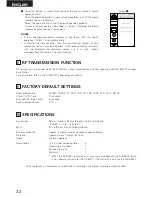
RF Secret Number
When using the RF transmission function with multiple pairs of RC-8000 and RC-8001ST, inadvertent operations could
occur if the same RF transmission frequency is shared.
If so, set different RF secret numbers for the different pairs.
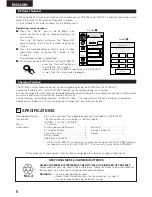
Registering secret numbers
q
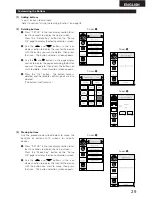
Press the “SETUP” icon in the RC-8000’s icon
display section for at least 3 seconds to display the
setup screen.
Press the “RF Secret” button on the “Setup 4/4”
page to display the RF secret number registration
screen.
w
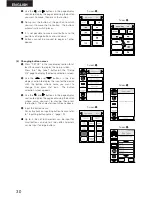
Press the number buttons on the RF secret number
registration screen to register that number in the
RC-8000.
The selected number is highlighted.
e
While pressing the ENTER button on the RC-8001ST,
press the “Transmit” button on
the RC-8000. The number
registered in the RC-8000 is registered in the RC-8001ST
as well, then the setup screen reappears.
Screen
q
Screen
w

