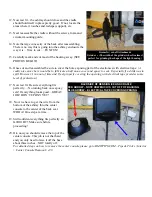
12. Now test fit – the ashtray should close and the cradle
should hold itself in place pretty good. If not, locate the
areas where it touches and reshape (support), etc.
13. Next reassemble the cradle without the screws, foam and
circular mounting guide.
14. Note the large convexity of the back after reassembling.
There is no way this is going into the ashtray enclosure the
way it is…Time to cut … FUN FUN!
Dremel w/ cut-off Attachment
Grinder -- (The width of the grinder wheel is almost
perfect for grinding the shape of the light housing.)
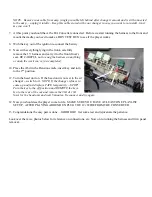
15. Carefully mark and cut most of the backing away. (SEE
PHOTOS BELOW)
BACKSIDE OF DENSION ICELINK CRADLE
RED ARROW – NOTE HOW MUCH IS CUT OFF OF BACKING
BLUE ARROW – ELECTRICAL TAPE COVERING OPENING
16. Once cut and reassembled be sure to cover the hole exposing part of the electronics with electrical tape.
(A
really nice move here would be to fabricate a half moon cover and epoxy to seal. Especially if a drink was to
spill. However, I ran out of time and I feel properly covering the opeining with electrical tape provides some
level of protection.)
17. Now test fit. Be sure everything fits
perfectly … No turning back once epoxy
sets! If everything looks good…GREAT
JOB! DON’T EPOXY YET!
18. Now we have to get the wire from the
bottom of the ashtray thru the center
console to the center of the back seat.
WHOA! One step at a time…
19. Still confident everything fits perfectly so
far RIGHT? Make sure before
proceeding!
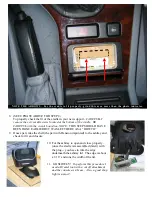
20.
Ok, now you should remove the top of the
center console. This job is not that hard
and you only need to raise it off the base
about three inches – NOT totally off.
For detailed steps on how to remove the center console please go to BMWTIPS.COM – Tips & Tricks / Interior
/ Center Console Removal / e39.
Summary of Contents for ice-Link: Plus
Page 6: ...MISC PHOTOS...
Page 15: ...Miscellaneous Photos...


