18
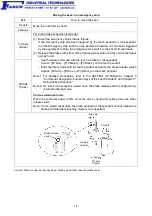
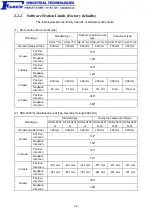
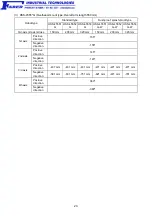
Moving the axes in an emergency stop
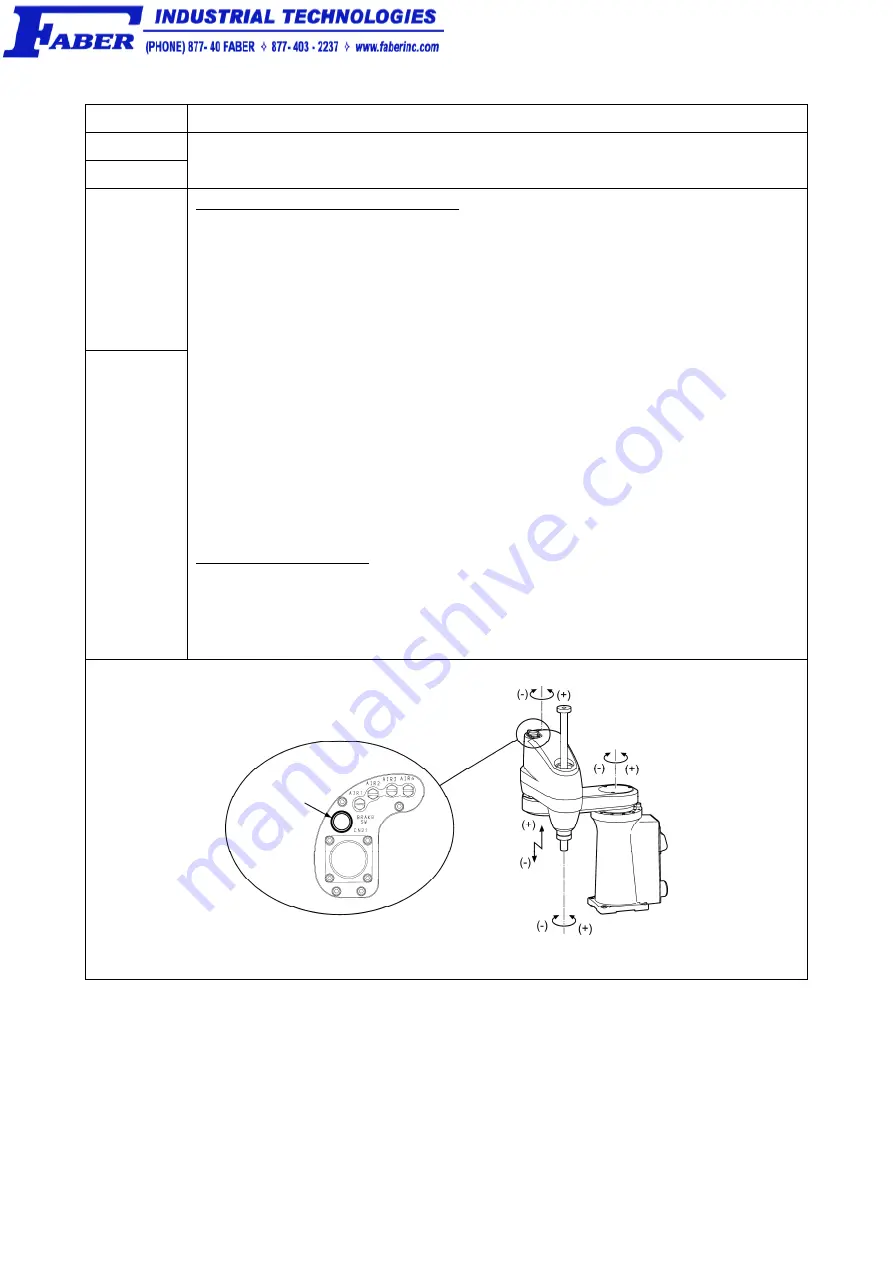
Axis
How to move the axes
1st axis
2nd axis
Move the robot arm by hand.
3rd axis
(Z-axis)
4th axis
(T-axis)
For robot units except UL-Listed ones
(1) Reset the emergency stop state as follows.
If the emergency stop has been triggered by the teach pendant or mini-pendant,
turn the Emergency stop button on the pendant clockwise; if it has been triggered
by the equipment, restore the emergency stop switch to the short-circuited state.
(2) Release the brakes with either of the following procedures and then move the target
axis by hand.
- Use the brake command with the teach pendant or mini-pendant
Access: [F2 Arm]—[F12 Maint.]—[F3 Brake.] on the teach pendant
- Enter the direct mode with the teach pendant and press the brake release switch
Access: [F2 Arm]—[F6 Aux.]—[F3 Direct.] on the teach pendant
Note 1: For detailed procedures, refer to the SETTING UP MANUAL, Chapter 5
"Commands Assigned to Function Keys of the Teach Pendant" and Chapter 6 "
Using the Mini-Pendant."
Note 2: On robot units except UL-Listed ones, the brake release switch is enabled only
in direct teaching mode.
For UL-Listed robot units
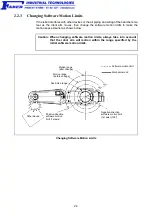
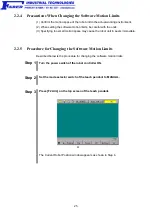
When the controller power is ON,
move the axis by hand while holding down the brake
release switch.
Note: On UL-Listed robot units, the teach pendant or mini-pendant cannot release the
brakes and the direct teaching mode is not supported.
Caution: When moving the robot by hand, hold by a part other than the plastic cover.
2nd axis
1st axis
Brake release
switch
3rd axis
(Z-axis)
4th axis
(T-axis)


