COMFORT STOOL
INSTALLATION
INSTRUCTION
1 of 2
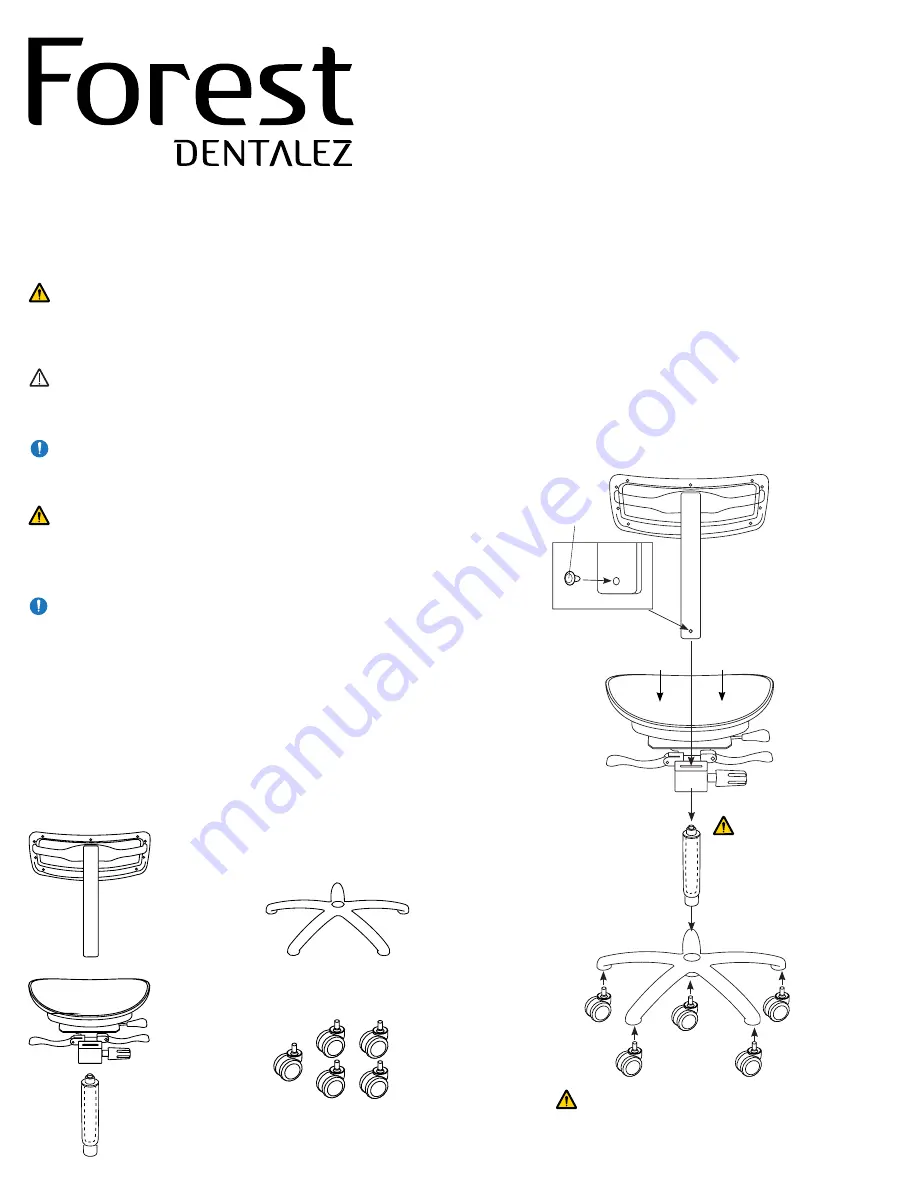
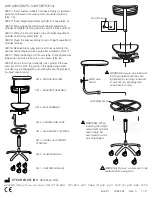
FIG. 2:
ALUMINUM BASE
FIG. 4:
SEAT
ASSEMBLY
FIG. 1:
CASTERS
(WHEELS)
FIG. 5:
BACKREST
ASSEMBLY
WARNING: When
inserting the height
adjustment cylinder,
care should be
exercised to avoid
pinching fingers.
FIG. 3:
HEIGHT
ADJUSTMENT
CYLINDER
WARNING: Be sure casters are firmly
seated before using stool.
BLACK PLUG
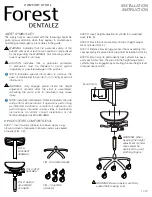
STEP 2:
Insert height adjustment cylinder into aluminum
base (FIG. 3).
STEP 3:
Place the seat assembly on top of height adjust-
ment cylinder (FIG. 4).
STEP 4:
Remove black plug and insert back assembly into
seat assembly. Replace black plug after installation (FIG. 5).
STEP 5:
Sit on stool to permanently lock cylinder into base
and seat. At this time, the piston in the height adjustment
cylinder may be engaged by activating the seat height lever
to adjust seat location.
ALERT SYMBOL KEY
The safety notices associated with the following should be
given special attention when they appear in maintenance,
operating and emergency procedures in the guide.
WARNING indicates that the personal safety of the
patient, end user or technician could be compromised
by disregarding the WARNING. Not following instruc-
tions may result in an injury.
CAUTION indicates that a particular procedure
or precaution must be followed to avoid system
irregularity or possible damage to the product.
NOTE indicates special information to improve the
ease of maintaining the product, or to clarify important
information.
WARNING: Only engage piston inside the height
adjustment cylinder after the stool is assembled.
Activating the piston prior to installation may cause
injury.
NOTE: Installation Verification: Refer to Operator’s Guide
and perform all operations. If operations performing
as intended installation complete. If operations not
performing as intended, review steps in installation
instructions to confirm correct installation or call
Technical Support at 800-423-3555.
6176 DOCTOR’S COMFORT STOOL
STEP 1:
Insert casters (wheels) into base. Apply a sig-
nificant amount of pressure to ensure casters are seated
properly (FIG. 1-2).


