Step by Step Instructions
14
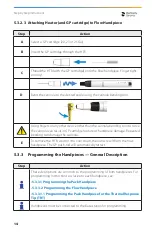
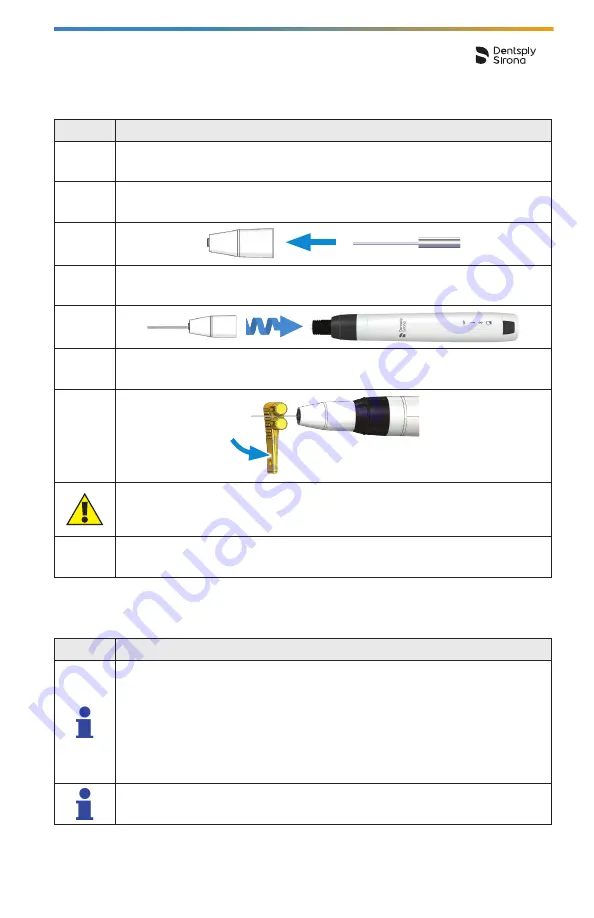
5 .3 .2 .3 Attaching Heater (and GP cartridge) to Flow Handpiece
Step
Action
A
Select a GP cartridge (20, 23 or 25 Ga).
B
Insert the GP cartridge through the HTR.
COLOR AND
MA
TERIALS
JUL
Y 24, 2017
GP
REF
AEU-65
SN
EN19000719-001
REF
AEU-65
SN
EN19000719-001
REF
AEU-65
SN
EN19000719-001
REF
AEU-65
SN
EN19000719-001
C
Thread the HTR (with the GP cartridge) onto the flow handpiece. Finger tight-
en only!
COLOR AND
MA
TERIALS
JUL
Y
24, 2017
GP
REF
AEU-65
SN
EN19000719-001
REF
AEU-65
SN
EN19000719-001
REF
AEU-65
SN
EN19000719-001
REF
AEU-65
SN
EN19000719-001
D
Bend the cannula to the desired angle using the cannula bending tool.
Using fingers or any other device other than the cannula bending tool to curve
the cannula can result in GP cartridge rupture or handpiece damage. Repeated
bending can damage the cannula.
E
To remove the HTR, wait for it to cool down, then unscrew it from the flow
handpiece. The GP push-rod will automatically retract.
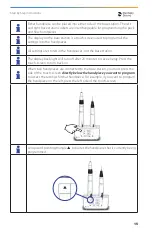
5 .3 .3 Programming the Handpieces — General Description
Step
Action
These descriptions are common to the programming of both handpieces. For
programming instructions exclusive to each handpiece, see:
•
5 .3 .3 .1 Programming the Pack Handpiece
•5 .3 .3 .2 Programming the Flow Handpiece
•
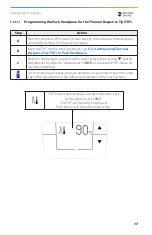
5 .3 .3 .1 .1 Programming the Pack Handpiece for the Thermal Response
Handpieces must be connected to the base station for programming.
Summary of Contents for Gutta-Smart
Page 1: ...Gutta Smart Directions for Use EN...
Page 39: ...39...


