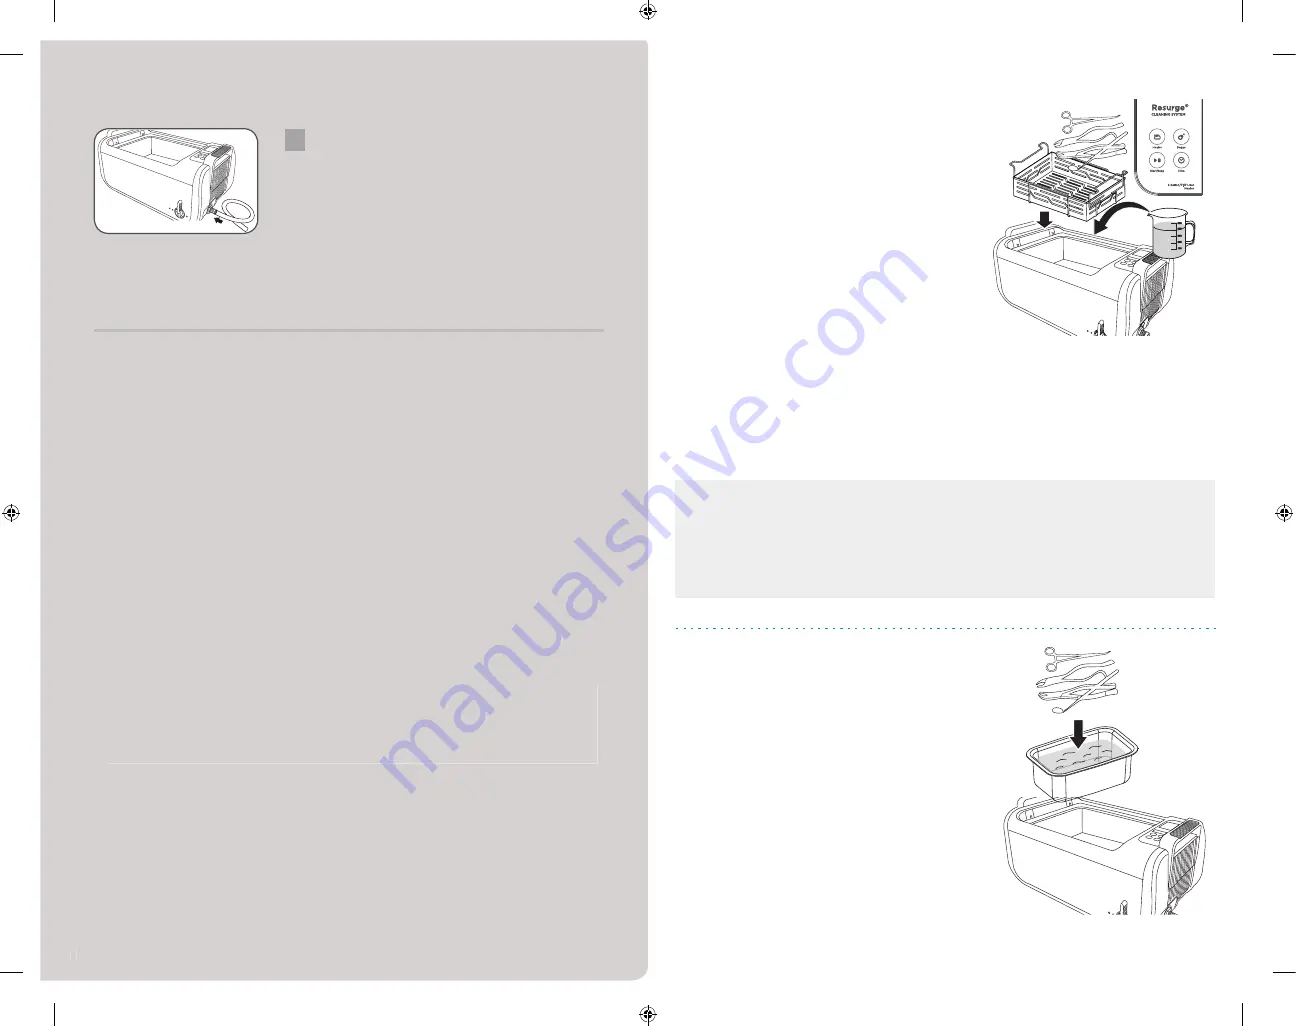
Common Cleaning Methods
Regular Cleaning
Only tap water is needed. You may add an instrument cleaner.
We recommend Resurge Instrument Cleaner. Follow the
manufacturer’s instructions for use.
Suitable Locations:
Dental, medical offi ces and labs.
Cleaning Method:
1. Put the items to be cleaned inside the basket or cassette
and place into the rack.
Do not stack loose instruments as
this can reduce the effectiveness of the ultrasonic cleaner.
Cassettes may be stacked but ensure they are below the MAX
water line.
2. Lower the rack inside the tank.
3. Add warm water to the cleaning tank to a level between “MIN”
and “MAX” lines and above the area to be cleaned.
4. If not already on, turn on the power switch, found on the back
of the unit.Press Time button to set the timer to 5-15 minutes.
Consult your cleaner and/or instrument Directions for Use, for
proper time. Press Start/Stop button twice to start cleaning.
Notes on using the basket:
1. A tray or cassette can reduce the friction between the items and the tank. Stainless steel
basket absorbs approximately 8% of ultrasonic energy, plastic basket absorbs about 35% of
ultrasonic energy. This signifi cantly reduces the cleaning effectiveness.
2. During cleaning, dirt will come off like a cloud and the water will become murky over time.
This is debris being removed from the instruments and indicates the instruments are being cleaned.
Indirect Cleaning
Put the items in a separate container such as a glass
beaker or metal tub both offered as available accessories.
See page 3 for more information. Use ultrasonic waves to
penetrate the container to do the cleaning.
Suitable Locations:
Medical and dental instrument sterilization rooms. Different
applications use different fl uids to be used inside the
container.
1. Small instruments. Keep them separate from the main
instrument cleaning.
2. Multiple patients' dentures or impressions. Disinfect the
container after each patient.
3. Instruments using corrosive solutions, such as a cement
remover.
7
8
Operation Guidelines - Quick Start, cont.
7
7
Operation Guidelines - Quick Start, cont.
Operation Guidelines - Quick Start, cont.
Notes on Operations
This unit is equipped with advanced power off memory capability. It memorizes the last timer
setting once the cleaning cycle is started.
a. 5 seconds after the timer counts down to 00:00, the last timer setting will reappear. Press
the Start/Stop key twice, it will repeat the last cycle with the same timer
setting.
b. Once the timer counts down to 00:00, touch the Start/Stop key within 5 seconds will
recall the last timer setting. Touch it again will repeat the last cycle with the same
timer setting.
c. If power is turned off during the cleaning cycle, once it is powered on again, the last
timer setting will reappear.
d. If the timer setting is changed during the cleaning cycle and the timer counts down
to 00:00, the new timer setting will reappear as in A, B or C.
e. If the timer setting is changed but the cleaning cycle is not started, it will stay until the
cleaning cycle is started. It will not stay if the power is turned off.
f. If the Start/Stop key is touched twice during the cleaning cycle, the cycle will stop and
the timer setting will stop running. It’ll resume the original cycle once the Start/Stop key
is touched twice again.
g. If the power is turned off while degas is running, once it is powered on again, the remaining
degas time will resume.
NOTE:
To prevent accidental lockups of the touch-sensing control panel, please observe the
following:
1. Do not touch two or more keys at the same time.
2. Do not leave water or solution on the control panel.
3. Do not push the control panel with too much force. Only light touch is needed.
If the control panel is locked, do the following to reset it. If the fi rst step does not work, move
on to the next step.
1. Turn off the power switch.
2. Turn off the power switch multiple times.
3. Unplug the power cord and wait for 5-10 minutes.
4. Leave the unit unplugged for several hours.
Draining Tank
At the end of the day, the tank should be
drained and fresh water and cleaning agent
added.
a. Turn off unit.
b. Ensure the drainage hose is connected as
shown.
c. Turn the drainage valve handle clockwise to
open the drain and remove the dirty water.
d. Clean and wipe the tank dry.
e. Close the drainage valve.
6


