background image

~P.1~

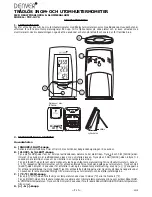
INDOOR & WIRELESS OUTDOOR THERMOMETER

WITH REAL TIME CLOCK & SNOOZE ALARM

MODEL: TRC-1470

INSTRUCTION MANUAL

1 . INTRODUCTION

Thank you for purchasing our In/Outdoor thermometer with wireless thermometer sensor and real time clock. The main unit

is designed to receive temperature signals from maximum 3 remote sensors in different locations, and it is also equipped with

a snooze alarm. To ensure proper operations, please read this instruction manual carefully and save it for future reference.

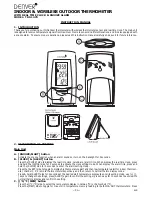
2 . DESCRIPTION OF BUTTONS

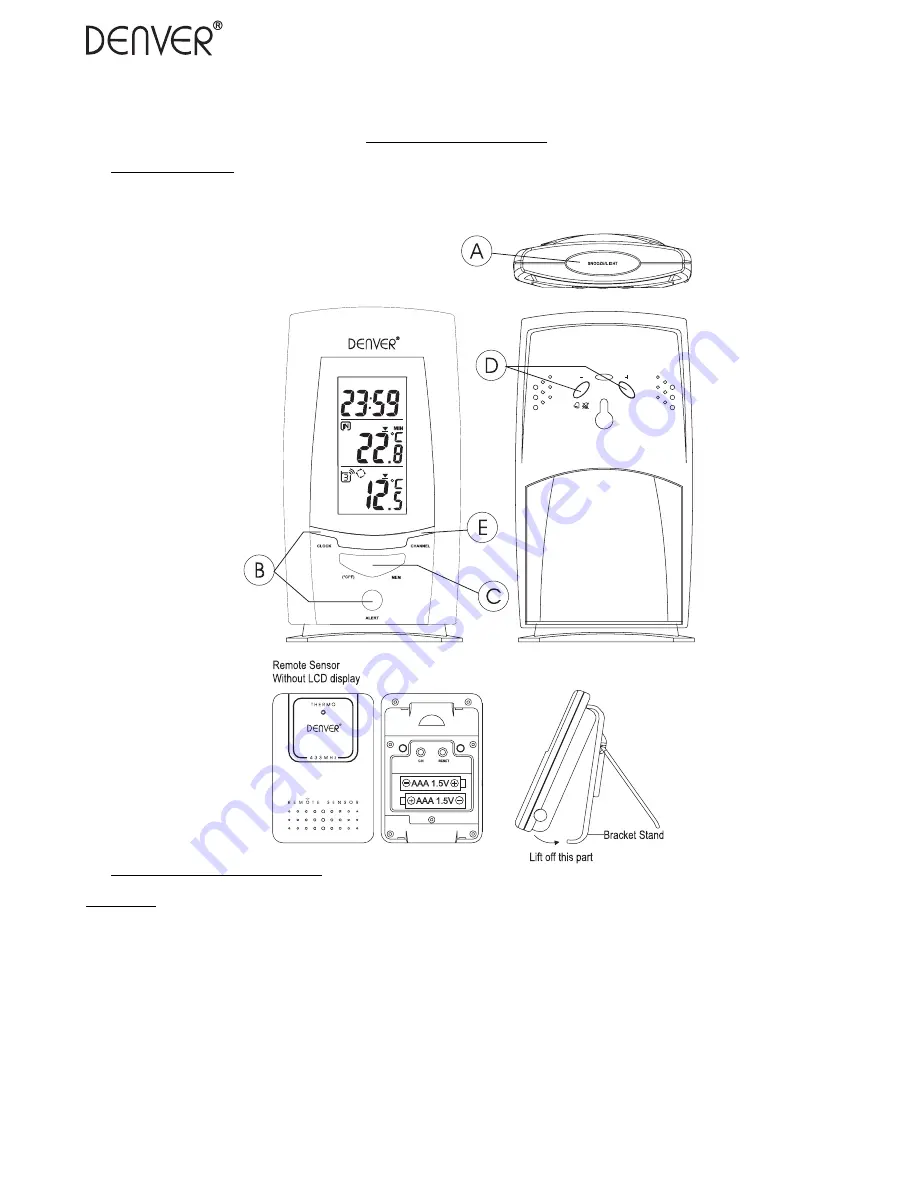
Main Unit

A . [SNOOZE/LIGHT] button

Activate the snooze function when an alarm sounds or turn on the backlight for 5 seconds.

B. [CLOCK] & [ALERT] button

Press the [CLOCK] side to display the real time clock, calendar or alarm time. When display the real time clock, press

and hold the [CLOCK] side for 2 seconds to activate the clock setting mode. When display the alarm time, press and

hold the [CLOCK] side for 2 seconds to enter the alarm setting mode.

Press the [ALERT] side to toggle to display high temperature alert and then low temperature alert for indoor thermom-

eter, channel 1, 2, 3 remote thermometers respectively and then return to normal thermo display mode.

Press & hold [ALERT] side for 2 seconds at the desired alert temperature display to enter its setting mode, use [+] / [-

] keys to change the settings, press [ALERT] again to confirm the setting or press no key for 10 seconds to auto-exit to

normal thermo display and confirm the setting.

C. [(°C/°F) MEM] button

Press the [(°C/°F)] side to select the temperature display in Celsius (°C) or Fahrenheit (°F).

Press the [MEM] side to toggle for max or min temperature memory reading for both IN & OUT thermometers. Press

ENG

Summary of Contents for TRC-1460

Page 1: ...r alarm time When display the real time clock press and hold the CLOCK side for 2 seconds to activate the clock setting mode When display the alarm time press and hold the CLOCK side for 2 seconds to...

Page 2: ...ry compartment and then close the battery door WIRELESS REMOTE SENSOR REGISTRATION PROCEDURE a Insert x2 AAA batteries first to the main unit The temperature display shows C while the wave icon will k...

Page 3: ...t the desirable channel b Press and hold the ALERT key for 2 seconds the corresponding display digits start blinking c Use the keys to change for your desired setting d Press ALERT key to confirm sett...

Page 4: ...minute Snooze 5 minutes Battery Life Time Main Unit 9 months RF Remote Sensor 6 months 16 DISCLAIMER NOTE In order to protect our environment please dispose the old batteries promptly and properly Do...

Page 5: ...CK siden i 2 sekunder for at aktivere indstillingen af uret N r alarmtidspunktet vises tryk p CLOCK siden i 2 sekunder for at aktivere indstillingen af alarmen Tryk p ALERT siden for at vise alarm for...

Page 6: ...under iagtagelse af og polaritetsm rkerne i batterihuset og luk batterid kslet REGISTRERINGSPROCEDURE FOR DE TR DL SE SENSORER a Is t f rst 2 AAA batterier i hovedenheden Temperaturdisplayet viser C i...

Page 7: ...maksimum minimumtemperaturen tryk og hold MEM knappen nede i 3 sekunder 9 INDSTILLING AF TEMPERATURALARM a Tryk p ALERT knappen for at indstille den nskede over Hi eller nedre Lo v rdi for temperatur...

Page 8: ...nedgraves BEM RK Signaler fra andre husholdningsudstyr som f eks d rklokke og sikkerhedssystem kan interferere med dette produkt og for rsage midlertidig afbrydelse af modtagelsen af signaler Modtagel...

Page 9: ...ngen Wenn die Alarmzeit angezeigt wird dr cken und halten Sie die Taste CLOCK f r 2 Sekunden um in den Modus Alarm einstellen zu gelangen Dr cken Sie die Taste ALERT um zuerst den Hochtemperaturalarm...

Page 10: ...en und Polarit t ein und schlie en Sie die Batterieabdeckung DRAHTLOSEN FERNEN SENSOR REGISTRIEREN a legen Sie 2 AAA Batterien zuerst in die Haupteinheit ein Die Temperaturanzeige zeigt C w hrend das...

Page 11: ...e Aufzeichnungen f r Max Mintemperaturen zu l schen dr cken Sie die Taste MEM f r 3 Sekunden und halten sie gedr ckt 9 SO STELLEN SIE DEN TEMPERATURALARM EIN a Dr cken Sie die Taste ALERT auf den von...

Page 12: ...gungsbereich 100 Fu ca 30 m im Freien Batterie Haupteinheit Gleichstrom 3 V 2 x AAA RF ferner Sensor Gleichstrom 3 V 2 x AAA Alarmdauer 1 Minute Schlummerzeit 5 Minuten Batteriestandzeit Haupteinheit...

Page 13: ...dan intryckt i 2 sekunder n r alarmtiden visas om du vill st lla in en temperaturvarning Tryck p ALERT sidan f r att v xla mellan att visa h g och l g temperaturvarning f r inomhustermometern kanal 1...

Page 14: ...s skruvmejsel f r att ta bort skruvarna p batterifacket c S tt i 2 AAA batterier i enlighet med och som visas i batterifacket och st ng batterifacket TR DL ST REGISTRERINGSF RLOPP AV FJ RRSENSORN a S...

Page 15: ...la temperaturerna f r alla 3 fj rrsensorer en efter en c F r att radera den maximala eller minimala temperaturregistreringen tryck och h ll MEM knappen intryckt i 3 sekunder 9 ST LLA IN TEMPERATURVARN...

Page 16: ...r de 30 meter ppen plats Batteri Huvudenhet DC 3V 2 x AAA storlek RF fj rrsensor DC 3V 2 x AAA storlek Larmets tidsl ngd 1 minut Slummertid 5 minuter Batteriets livstid Huvudenhet 9 m nader RF fj rrse...

Page 17: ...haalla n pp int CLOCK Kun n yt ss n kyy her tysaika sit voi vaihtaa painamalla ja pit m ll kahden sekunnin ajan alhaalla n pp int CLOCK Vaihda n pp imell ALERT sis l mp mittarin alimman ja ylimm n l m...

Page 18: ...otelon kuvan mukaisella tavalla LANGATTOMAN SENSORIN REKISTER INTI a Pane laitteeseen kaksi koon AAA paristoa L mp tilan yt ss on teksti C ja aaltokuvake vilkkuu kahden minuutin ajan osoittaen haun ol...

Page 19: ...painamalla n pp int ALERT b Paina ja pid kahden sekunnin ajan alhaalla n pp int ALERT Valintaa vastaava lukema alkaa vilkkua c Valitse asetus n pp imill ja d Vahvista valinta ja poistu asetustilasta...

Page 20: ...voivat h irit laitteen toimintaa ja aiheuttaa v liaikaisen katkoksen signaalin vastaanotossa Signaalin l hetys ja vastaanotto jatkuu normaalisti h irinn n lakattua HUOM l paina taustavalo torkkupaini...

Page 21: ...gio Ao exibir a hora do alarme mantenha o bot o CLOCK premido durante 2 segundos para activar o modo de defini o do alarme Prima o bot o ALERT para mudar para visualizar o alerta de temperatura alta...

Page 22: ...s pilhas c Introduza duas pilhas do tamanho AAA conforme as marcas de polaridade e mostradas no compartimento das pilhas e depois feche a porta do compartimento PROCEDIMENTO DE REGISTO DO SENSOR REMOT...

Page 23: ...temperatura m nima ou m xima dos 3 sensores remotos um por um c Para apagar a grava o da temperatura m x m n prima e mantenha o bot o MEM durante 3 segundos 9 DEFINIR O ALERTA DE TEMPERATURA a Prima...

Page 24: ...sensor remoto RF Sensor com visor LCD 10 C a 50 C 14 F a 122 F Sensor sem visor LCD 20 C a 50 C 4 F a 122 F Sonda exterior destac vel 50 C a 70 C 58 F to 158 F Intervalo de transmiss o 30 metros rea...

Page 25: ...actual presione y mantenga presionado el lado CLOCK durante 2 segundos para activar el modo de configuraci n del reloj Cuando muestre la hora de alarma presione y mantenga presionado el lado CLOCK dur...

Page 26: ...peque o tipo Philips para destornillar los tornillos de la tapa de las pilas c Introduzca 2 pilas AAA seg n las marcas de polaridad y que aparecen en el compartimiento de las pilas y despu s cierre la...

Page 27: ...ma de la temperatura exterior de todos los sensores remotos uno a uno c Para borrar la temperatura m x m n guardada presione y mantenga presionado el bot n MEM durante 3 segundos 9 C MO CONFIGURAR LA...

Page 28: ...0 C 14 F a 122 F Sensor sin pantalla LCD 20 C a 50 C 4 F a 122 F Sonda desmontable exterior 50 C a 70 C 58 F a 158 F Alcance de la Transmisi n 100 pies zonas abiertas Pilas Unidad Principal DC 3V 2 x...

Page 29: ...ay mostra la sveglia mantenete premuto CLOCK per due secondi per attivare la modalit impostazioni sveglia Premete ALERT per cambiare sul display da avviso alta temperature a avviso bassa temperature p...

Page 30: ...mperatura mostra C mentre l icona dell onda continuer a lampeggiare per 2 minuti indicando che l unit principale in modalit ricerca sensore b in un secondo momento inserite 2 batterie AAA nell unit se...

Page 31: ...d Premete ALERT per confermare le impostazioni e uscire dalla modalit o appaiono per indicare Hi or Lo allerta selezionata e Uscite dalla modalit e tornate al display temperatura automaticamente dopo...

Page 32: ...itiere ed accurate In ogni caso n il produttore n il venditore possono essere ritenuti responsabili di inesattezze errori o omissioni contenute In nessun caso il produttore o il venditore possono esse...

Reviews: