
English –2
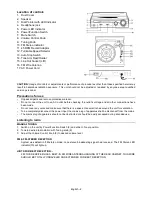
Location of controls
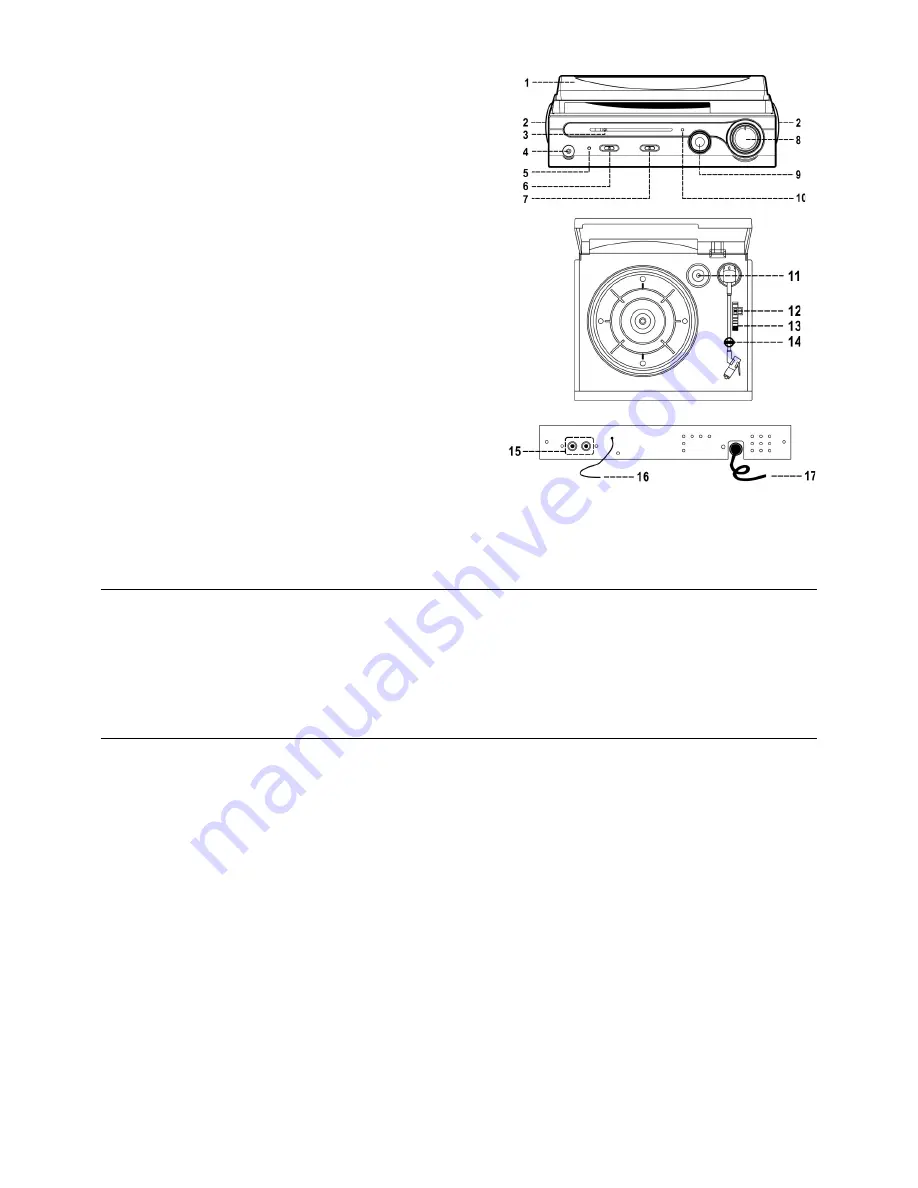
1. Dust Cover
2. Speaker
3. Dial Pointer with LED Indicator
4. Headphone jack
5. Power LED Indicator
6. Power/Function Switch
7. Mute Switch
8. Volume Control Knob
9. Tuning Knob
10. FM Stereo indicator
11. 45 RPM Record Adaptor
12. Turntable Speed Selector
13. Auto Stop Switch
14. Tone Arm Rest/Holder
15. Line Out Socket (L/R)
16. FM Wire Antenna
17.
AC Power Cord
CAUTION:
Usage of controls or adjustments or performance of procedures other than those specified herein may
result in hazardous radiation exposure. This unit should not be adjusted or repaired by anyone except qualified
service personnel.
Precautions for use
-
Unpack all parts and remove protective material.
-
Do not connect the unit to an AC outlet before checking the outlet’s voltage and all other connections have
been made.
-
Do not cover any vents and make sure that there is a space of several inches around the unit for ventilation.
-
To be completely disconnect the power input, the mains plug of apparatus shall be disconnect from the mains.
-
The mains plug of apparatus should not be obstructed or should be easily accessed during intended use.
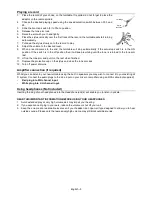
Listening to radio
MANUAL TUNING
1. Switch on the unit by Power/Function Switch (6) and slide to Tuner position.
2. Tune to desired radio station with Tuning knob (9)
3. Adjust the Volume Control Knob (8) to desired volume level.
FM & FM-STEREO RECEPTION
-
System was default in FM stereo mode, once stereo broadcasting signal had received, The FM Stereo LED
indicator(10) will light up.
HINTS FOR BEST RECEPTION:-
-
FM: THE RECEIVER HAS A BUILT-IN FM WIRE ANTENNA HANGING AT THE REAR CABINET. THIS WIRE
SHOULD BE TOTALLY UNRAVELED AND EXTENDED FOR BEST RECEPTION.


