background image


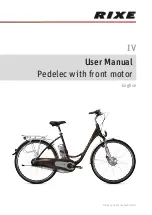
IV User Manual Pedelec with front motor 


  9

3   Charging the battery

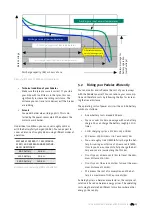
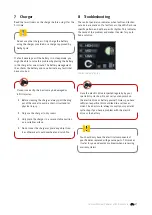
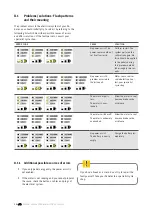
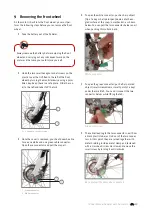
To charge the battery, you have to take it out of the holder 
on the Pedelec. 

Battery charge 

state indicator

Carry handle

Grip the battery by the handle, insert the key into the lock 
and turn it anticlockwise. The battery is now unlocked and 
can be removed from the Pedelec by tilting it sideways. 
In doing so, hold on tight to the battery to prevent it from 
being dropped.

Unlocking the battery

Tilt to remove 

You should now remove the key and keep it in a safe place 
to prevent it from breaking off or being lost.

3.1   Charging  operation

Before charging the battery, read the information on the 
charger carefully.


1.  Take the charger provided out of its packaging 
and plug the mains plug into a socket (230 V, ob-
serve type plate on the charger).

Type plate on charger: Front and back 


2.  Put the battery in the docking station of the 
charger.


3.  The charging operation starts. The battery LEDs 
light up or flash. Once all 5 LEDs have gone out, the 
battery is fully charged. You can leave the battery 
standing in the charger. However, the charger al-
ways draws some current if you leave it plugged in.


4.  To save power, pull the charger plug out of the 
socket once the charging operation is complete.

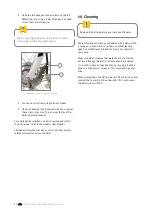
3.2   Fitting the battery 


1.  Insert the battery into the battery holder of 
the Pedelec from the left by tilting it outwards at 
roughly 45°. 


2.  In doing so, you must insert the lateral guides 
at the bottom of the battery into the guides of the 
holder.


3.  Tilt the battery towards the bike until it en-
gages in the locking mechanism. If the key is still 
in the lock, turn it clockwise then pull it out to lock 
the battery in place.


4.  Make sure the battery is firmly in place. 

Summary of Contents for Rixe

Page 1: ...uded in this document I General User Manual II User Manual Fast Pedelec III User Manual Pedelec with centre motor IV User Manual Pedelec with front motor V User Manual Pedelec Impulse VI User Manual Pedelec Groove VII User Manual BionX VIII User Manual Bosch ...

Page 2: ...I General User Manual English Derby Cycle Werke GmbH 2012 ...

Page 3: ...eadset 5 Front light 6 Mudguard 7 Fork 8 Front wheel brake 9 Tyres 10 Wheels 11 Bottom bracket 12 Pedals 13 Chain 14 Rear derailleur 14a Front derailleur 14b Rear derailleur 15 Rear light 16 Reflector 17 Pannier rack 18 Saddle 19 Frame 7 10 10 13 5 4 2 3 6 6 16 15 17 18 8 11 14b 14a 12 19 9 9 1 ...

Page 4: ...sume that you have general knowledge on the handling of bikes Every person who uses cleans maintains or disposes of this bike must have read and understood the entire con tent of this User Manual In addition to texts tables and lists the User Manual con tains the following symbols that denote important infor mation or dangers WARNING about possible physical injury increased risk of falls or other ...

Page 5: ...ting the bike saddle 13 9 2 2 Operating the quick release device 13 9 2 3 Determining the correct saddle height 14 9 2 4 Adjusting the saddle angle 15 9 2 4 1 With a two bolt seatpost 15 9 2 4 2 With a seatpost saddle clamp 15 9 2 4 3 With a suspension seatpost 16 9 3 Adjusting the handlebar position 16 9 3 1 Adjusting aligning the handlebar height with a conventional handlebar stem 16 9 3 2 Adjus...

Page 6: ...nd touring bike 35 19 2 Hub gears 38 19 2 1 Operating the hub gears 38 19 2 1 1 Shimano 7 8 speed shift lever 38 19 2 2 Adjusting gears with Shimano hub gears 39 20 Bike chain 40 20 1 Maintenance of bike chains 40 21 Brake brake levers and brake systems 41 21 1 Important information and precautionary measures 41 21 2 Brake lever 42 21 2 1 Standard brake lever 42 21 3 Hub brakes 42 21 3 1 Drum and ...

Page 7: ... 27 3 Tyres 58 27 4 Rims in conjunction with rim brakes 58 27 5 Brake pads 58 27 6 Brake discs 58 27 7 Bike chains or toothed belts 58 27 8 Chainrings sprocket wheels and jockey wheels 58 27 9 Lamps of lighting set 58 27 10 Handlebar tapes and handle grips 59 27 11 Hydraulic oils and lubricants 59 27 12 Gear shift and brake cables 59 27 13 Paint finishes 59 27 14 Bearings 59 27 15 Sliding bearings...

Page 8: ... your child how to operate all the brakes and also how they work and any special features For further important information on this matter refer to Chapter 21 Brake brake levers and brake systems As the legal guardian you are responsible for the safety of your child and any damage he she may cause when cycling You should therefore make absolutely sure that the bike is in technically sound conditio...

Page 9: ...s are only designed for a specific period of use If this is exceeded there is a consider able risk that components could fail Perform care and maintenance on your bike regularly In doing so check important components particularly the frame fork wheel suspension handlebar handle bar stem seatpost and brakes for warping and dam age If you notice changes such as cracks bulges or warping have your bik...

Page 10: ...y questions once you have read the documentation your specialist cycle shop will be pleased to provide assistance Intended use also includes compliance with the operating maintenance and repair instructions provided in this User Manual The manufacturer and cycle shop will not accept liability claims should the bike not be used as intended 6 2 Trekking bike all terrain bike ATB if equipped in accor...

Page 11: ...elf with the applicable regula tions The bike is exempt from these requirements for the dura tion of officially approved cycling events The manufacturer and cycle shop will not accept liability claims should the bike not be used as intended This par ticularly applies for non observance of the safety informa tion and damage resulting for example from offroad use overloading incorrect repairs or use...

Page 12: ...se yourself with the effects of the brakes on a safe traffic free area If you are using a bike with carbon fibre rims bear in mind that the braking behaviour of this material is much poorer than aluminium rims Make sure that the wheels are securely fastened in the frame and forks Check that the quick release device and all important fastening screws and nuts are se curely fastened Chapter 9 2 2 Op...

Page 13: ...d saddle in the correct position and safely and properly secured If you are not sure whether your bike is in a technical ly sound condition do not ride it and have it checked by a professional bike workshop instead 9 Setting up the bike for the rider Road bikes or mountain bikes can also be supplied with out pedals Proceed as follows if you wish to fit pedals to your bike yourself 9 1 Fitting the ...

Page 14: ...hapter 29 Link list 9 2 Adjusting the seat position 9 2 1 Adjusting the bike saddle The seat position is decisive for your well being and cy cling performance Do not remove or change the seatpost or saddle clamp If you change or modify components this renders the warranty invalid Tighten all screws to the prescribed torque as otherwise screws could shear off and compo nents could come loose or det...

Page 15: ...ng CLOSE When closed quick release levers must lie flat against the frame fork and saddle clamp Make sure that quick release devices for the hubs point backwards when closed as otherwise they could snag on obstructions when the bike is moving and open This could lead to serious accidents 9 2 3 Determining the correct saddle height Sit on the bike saddle Try to reach the pedal with your heel when i...

Page 16: ...ing the saddle angle 9 2 4 1 With a two bolt seatpost Some seatposts have two screws for adjusting the sad dle angle one in front of and one behind the seat tube If you want to tilt the saddle forwards loosen the rear screw with an Allen key and tighten the front screw by the same number of revolutions To tilt the saddle backwards loosen the front screw and tighten the other to the same degree The...

Page 17: ...it on the bike saddle Ask another person to hold the bike steady if required Bend your upper body towards the handlebar until you have found a position that is comfortable for your back Stretch out your arms towards the handlebar Note the approximate position of your hands and set the handlebar at this height 9 3 1 Adjusting aligning the handlebar height with a conventional handlebar stem To relea...

Page 18: ...wheel Tighten the hexagon socket screw by turning it clockwise with an Allen key see Chapter 30 Technical data 9 3 4 Adjusting the handlebar position by turning the handlebar Loosen the hexagon socket screws on the front of the stem Turn the handlebar until you find the position that is comfortable for you Make sure that the handlebar is always exactly in the centre of the stem Now retighten the h...

Page 19: ...o the table of tightening torques in Chapter 30 Technical data In models with an integrated stop notch tighten the screw of the stop notch carefully clockwise In doing so the stop notch must engage with the teeth 10 Frame The form of the frame depends on the bike type and func tion Frames are manufactured from different materials steel or aluminium alloys or carbon carbon fibre for example The fra...

Page 20: ...rk consists of two fork blades the fork crown and steer ing tube Carbon fork Suspension fork The suspension fork is a feature of most mountain bikes trekking bikes and city bikes They can be adjusted in different ways and provide a greater degree of riding com fort For information on the function maintenance and care of suspension elements refer to Chapter 13 Suspension frame and suspension elemen...

Page 21: ...o what you are used to and may also feel different when you are rid ing The spring strut must be tuned so that it has a soft response but does not strike through if you ride over an obstruction It must give slightly when you sit on your bike 13 2 Care and maintenance You can clean your full suspension MTB in the usual man ner Hot water with a little washing up liquid or a gentle detergent which yo...

Page 22: ...of stress due to unevenness of the riding surface and the weight of the rider The wheels are carefully checked and trued prior to de livery However the spokes may settle when you ride the first kilometres on your bike Have the wheels checked again and trued if neces sary after the first 100 kilometres by a specialist cycle shop You should subsequently regularly check the ten sion in the spokes and...

Page 23: ...ng consists of a groove or several points on the rim side wall have the rim replaced as soon as it wears off 17 Tyres and inner tubes 17 1 Tyres A large number of different tyre types exist The bike s offroad capability and rolling resistance depend on tread profile Only inflate the tyre to the maximum permissible tyre pressure as otherwise it may burst Inflate the tyre at least to the specified m...

Page 24: ...tyres are also used particularly on bikes used in sports competitions With this tyre type the inner tube is sewn into the casing and this unit is glued firmly to the designated rim using special adhesive Tubed tyres offer enhanced safety in the event of a puncture and improved emergency running characteristics Only use tubed tyres on the designated rims These do not have turned up edges rim flange...

Page 25: ...ch the brake cable at one of the brake arms 18 1 2 Removing the hydraulic rim brake If quick release brake mechanisms are fitted re move a brake unit see Chapter 9 2 2 Operating the quick release device If no quick release brake mechanisms are fitted deflate the tyre To inflate an inner tube with a Sclaverand or road valve proceed as follows Unscrew the valve cap anticlockwise with your fingers Un...

Page 26: ...ease lever on the brake arm or brake lever If no quick release brake mechanisms are fitted deflate the tyre The wheel can now be pulled out between the brake pads 18 1 4 Releasing the hub gears roller drum or back pedal brakes Undo the cable clamping screw or quick release device on the brake arm With back pedal brakes the screw connection of the brake arm on the chain stay must be released 18 2 R...

Page 27: ...ater force and you will be able to hear more easily where it is coming from Allow the inner tube to dry Carefully roughen the inner tube in the area around the puncture using the sandpaper Coat this area with rubber solution Wait for several minutes until the rubber solution is touch dry Press the rubber patch firmly onto the damaged area Leave the rubber patch to dry for several minutes 2 Pull th...

Page 28: ...itting the tyre and inner tube Make sure that foreign bodies do not enter the inside of the tyre Make sure that the inner tube is crease free and not pinched at all times When fitting the tyre bear in mind the running direction If the tyre has a running direction this will be indicated on the tyre sidewall Make sure that the rim tape covers the spoke nip ples and is undamaged Put the rim with one ...

Page 29: ...ke arm with brake arm clamp correctly onto the frame fork Brake arm Clamp nut Clamp screw Brake arm clamp Frame fork Counter the clamp nut with a 10 mm spanner when tightening the clamp screw for assembly of the brake arm clamp Tightening torque 2 3 Nm Once you have installed the brake arm clamp make sure the clamp screw projects roughly 2 to 3 mm be yond the clamp nut Brake arm clamp Clamp screw ...

Page 30: ... cable through the slit in the cassette joint bracket and then insert the end of the outer casing securely into the outer casing holder CJ 8S20 JAPAN LOCK CJ 8S20 JA PAN Inner cable Bracket Outer casing holder Slit Pulley Bracket 1 2 1 Pass through the slit 2 Insert into the outer casing holder If first inserting the outer casing into the outer casing holder is easier then first insert the outer c...

Page 31: ...anufacturer in the Internet If you have ques tions on installation adjustment maintenance and opera tion please consult a specialist cycle shop If gear shift components are loose worn damaged or adjusted incorrectly this poses a risk of injury to the rider Have the derailleur gears adjusted at a profes sional bike workshop Always contact your specialist cycle shop if the chain jumps off the chainr...

Page 32: ...n extremely sharp angle This does not mean it is defective and does not damage the drive As soon as the chain is at a more shallow angle the noise will disappear Never ride without a spoke protector If a spoke pro tector is not installed you must have one retrofitted Otherwise the bike chain or rear derailleur could land in the gap between the sprocket and the spokes You should therefore select th...

Page 33: ...ever b moves with it How ever you should avoid putting any pressure on lever b in doing so The same applies for lever a when press ing lever b The gear will not change if both levers are operated at the same time Operating the front derailleur lever standard Lever a Shift to a larger chainring Lever a Starting position of lever a Gear shift com plete stroke Actual pull If the lever movement does n...

Page 34: ...hen lever b is operated there is one click where trimming the noise prevention mechanism enagages and a second stronger click when the gear shift stroke is completed After trimming the next push will complete the gear shift stroke Trimming noise prevention Depending on the position of the chain after shifting it may rub against the outer chain guide plate or inner chain guide plate of the front de...

Page 35: ...ore trimming after trimming Front derailleur movement Outer chain guide plate Chain Middle chainring Smaller sprockets Small chainring Smaller sprockets Large chainring Larger sprockets Chain in contact with in ner chain guide plate Lever b Click in position contact Trimming before trimming after trimming Front derailleur movement Inner chain guide plate Chain Middle chainring Larger sprockets Sma...

Page 36: ...tion press the small shifting lever gently inwards until you hear or feel a gentle click Setting the swivel range The range of the shifting and brake lever pivoting move ment can be adjusted individually to suit the size of your hand First set the shifting lever range then adjust the brake lever until the brake lever limit stop makes contact with the shifting lever This ensures that the brake leve...

Page 37: ...ete The noise prevention mechanism no longer clicks once the trimming operation is complete which means that only the click in positions will be heard when shifting between sprockets Chain position Front derailleur movement If the chain is on the large chainring and the large sprock et the chain will rub the front derailleur producing a char acteristic noise When this happens press lever b lightly...

Page 38: ...bs against the third sprocket The adjustment screw may also be on the shifting lever or on the frame A B Adjustment screw Cable housing adjustment screw Optimum adjustment Once the slack in the shifting cable has been taken up by the shifting lever the chain should ideally rub the third sprocket and produce a noise Release the shifting lever in second gear and turn the crank If the chain rubs the ...

Page 39: ...ers are used on one side only or the hub nuts are tightened incorrectly the hub may mal function It could rotate This could cause the shifting cable to pull the handlebar to one side and cause a serious accident The gears can be changed when the pedals are turn ing Very occasionally the hub may produce a harm less noise which is caused by its internal cogs and stop notches If you encounter resista...

Page 40: ...s appear at two points on the cassette joint Use the line which is most clearly visible CJ 8S20 JAPAN L O C K CJ 8S20 JAPAN L O C K Cassette joint pulley Cassette joint pulley Bike in normal position Bike in inverted position line up markings line up markings Bracket Bracket Turn the cable adjustment bolt on the shift lever to align the marking lines Next set the Revo shift lever from position 4 t...

Page 41: ...unt it is worn and must be replaced by a new one With hub gears the chain tension must be adjusted so that vertical play of one to two centimetres is present in the unsupported chain span between the chainring and sprocket wheel To take up the slack in the bike chain proceed as follows Loosen the rear wheel nuts Pull the wheel back into the dropouts until only the permissible amount of play is pre...

Page 42: ...e it To obtain correct friction pairing only use brake pads that are suitable for the rim as otherwise the braking distance would be extended and wear increased With carbon rims in particular only brake pads that are expressly intended for this purpose should be used Rubber brake blocks and brake pads must not come into contact with oil or grease If the rubber brake blocks and brake pads come into...

Page 43: ... If applied continuously for an extended period roller brakes or drum brakes become very hot This reduces the braking performance and can result in complete failure of the brake You should adapt your han dling accordingly The brake lever of roller and drum brakes requires special tuning Check regularly that the screws on the brake lever are tight Turn them clockwise to retighten if necessary For t...

Page 44: ... by pedalling back wards The force applied by the back pedal brake varies depending on the position of your feet pedals If the crank arms are vertical i e one of your feet is in the highest position and the other is in the lowest position you cannot brake hard Move the crank arms into a horizontal position if you think you may want have to brake The back pedal brake is easy to apply in a controlle...

Page 45: ...own the gap steadily increases and the brake lever must travel a greater distance to achieve the same braking effect You should therefore inspect the brake at regular intervals and adjust it if the brake lever travel distance is too great or the brake is not working properly Check the brake as follows Pull the front wheel and then the rear wheel hand brake lever with the same amount of force as yo...

Page 46: ... brake If the brake is still not working properly or the brake pad is so worn that it is not possible to readjust it have your bike checked at a professional bike work shop and replace the brake block 21 5 Disc brakes Disc brake With this brake type the brake discs are on the hub and the brake calliper is on the frame or fork Have your disc brakes adjusted by a specialist cycle shop If this is don...

Page 47: ...he lever The heat in the brake disc could also reduce the clamping force of the quick release device If the brake disc is worn cracked or bent it must be re placed Have this work carried out by a professional bike workshop If the depth of the brake blocks is less than 0 5 mm they must be replaced 0 5 mm 0 5 mm 21 5 1 Hydraulic disc brake The hand brake lever of the hydraulic disc brake is equipped...

Page 48: ...e blocks come into contact with oil or grease they must be replaced If the brake disc comes into con tact with oil or grease it must be cleaned as otherwise its braking performance will be drastically reduced Clean and maintain the brake system using isopro pyl alcohol soapy water or a dry cloth Do not use commercially available brake cleaning agents or agents to prevent braking noises as these ca...

Page 49: ...ed Always carry these with you Dynamo operated lighting systems must be used with bikes that weight more than 11 kg The light ing system must come with an official test mark Please familiarise yourself with the applicable regulations and if applicable have the bike refit ted 22 3 Generator dynamo The dynamo produces the energy required to operate the front and rear lights There are different types...

Page 50: ...hen you put the front wheel back on turn it so that the connecting terminal for the light cable is on the right hand side facing in the direction of travel If the connecting terminal is on the left the dynamo will not be able to turn properly or the lighting system may stop working Ensure correct polarity of the con nections 22 4 Failure of the lighting system If the lighting system fails or devel...

Page 51: ...purpose Overloading by a carrier can lead to component breakages and serious accidents If you carry luggage on your bike it is extremely impor tant that you do not exceed the maximum permissible loading see Chapter 30 Technical data If you fit another carrier it must comply with standard EN 14873 The maximum permissible load must be stated on the car rier see Chapter 30 Technical data 23 1 1 Front...

Page 52: ...k This allows the mudguard to deflect and the wheel will not block If this happens the struts must be securely reat tached Have a specialist cycle shop check that the mudguard struts and plastic mounts are still in a serviceable condition Never ride with the strut detached it must be reat tached If this is not possible have the strut replaced by a professional bike workshop Check regularly that th...

Page 53: ...the child Never attach the child seat to the bike handle bars directly as it will not be possible to steer the bike safely Do not use a suspension saddle if you are car rying a child in a child seat behind the saddle The child s fingers could be crushed The coil springs under the seat must always be com pletely wrapped or covered in such a way that it is impossible to insert fingers into the coils...

Page 54: ...Bear in mind that the gross weight of the bike also includes the trailer A bike trailer may increase the braking distance considerably Failure to observe these points could result in an accident 24 4 Bike basket The fixing for the basket must not damage the handle bar or handlebar stem Attach the basket so as not to cover the front light and front reflector In doing so be careful not to bend the b...

Page 55: ...Chapter 29 contains a link list 26 Carbon components Carbon is a specific material that requires special han dling and care when setting up and carrying out mainte nance on the bike as well as when riding and also during transportation and storage 26 1 Properties Carbon parts must not be deformed dented or bent following an accident or crash It is possible that fi bres have been destroyed or have ...

Page 56: ...eas regularly at least every 100 km for cracks fractures or changes in surface appearance Furthermore if you come off the bike or if it falls over these components must always subse quently be inspected 26 4 Carbon frame Front derailleur clamp area derailleur hanger saddle clamp headset spacers bottom bracket spacers brake boss or disc brake mount dropout slots suspension mounts on main frame and ...

Page 57: ... bottle cage it must not be fitted The attach ment of pannier racks trailers and other fixtures are not permitted due to the risk of breakage 26 10 Splinters Carbon fibres are extremely thin and hard You should therefore handle damaged carbon parts very carefully Individual fibres may detach and stick out If these projecting fibres come into contact with your skin there is a danger of them splinte...

Page 58: ...eck your bike for cracks dents or material deformation Have defective parts replaced before you ride the bike again Touch up damaged paintwork Treat all parts that are susceptible to corrosion more frequently than other parts with preservatives and care products especially during the winter and in aggressive environments such as coastal regions as otherwise your bike will corrode rust more powerfu...

Page 59: ...dition of the pads regularly and if necessary have them replaced by a pro fessional bike workshop 27 6 Brake discs Brake discs also wear out as a result of intensive braking or during the course of time Find out from the manufac turer of your brakes or your specialist cycle shop about the respective wear limits You can have worn brake discs replaced at a professional bike workshop 27 7 Bike chains...

Page 60: ...r damage and touch up immediately if required Consult your specialist cycle shop for advice on how to care for your bike s surface finishes 27 14 Bearings All bearings on the bike such as the headset wheel hubs pedals and bottom brackets are subject to function relat ed wear which depends on the intensity and duration of use and how well the bike is looked after Check these parts regularly Clean a...

Page 61: ... brake contact surfaces Have inoperative or damaged parts replaced 28 1 Inspection schedule 28 1 1 Maintenance checks After the first 200 kilometres following purchase and subsequently at least once a year Have the following checked tyres and wheels Have the tightening torques of the following checked handlebar pedals pedal cranks bike saddle seatpost and fastening screws Have the following compon...

Page 62: ... use in each case If you use unsuitable lubricants and care products this can damage or im pair the performance of your bike 29 Link list You can obtain important information on your bike and its components via these links The relevant user manual is normally provided on the manufacturer s web pages in addition to important tips for use and making settings www rohloff de www speedlifter com www br...

Page 63: ...kg max 135 kg Urban bike XXL 170 kg max 155 kg E Bike 130 kg max 105 kg E Bike semi XXL 150 kg max 125 kg E Bike XXL 170 kg max 145 kg MTB hardtail 110 kg max 100 kg MTB hardtail semi XXL 140 kg max 125 kg MTB dirt 110 kg max 100 kg MTB full suspension 110 kg max 100 kg MTB full suspension semi XXL 140 kg max 125 kg Road bike 110 kg max 100 kg Road bike semi XXL 135 kg max 125 kg Cyclo Cross Cyclo...

Page 64: ...r break If you tighten screws too tightly this could damage the components You should therefore always observe the prescribed tightening torque Observe the minimum screw in depth For hard aluminium alloys this is at least 1 4 times the screw diameter e g nominal diameter M5 1 4 7 mm Whenever possible you should tighten all safety relevant screw connections using a torque wrench This indicates the ...

Page 65: ...5 5 Brake pad M6 10 Brake cable clamp M6 10 Sidewall dynamo fixing M6 10 Derailleur hanger M10x1 16 Bottom bracket BSA according to manufacturer s instructions Disc brake calliper Shimano IS and PM M6 6 to 8 Disc brake calliper AVID IS and PM M6 8 to 10 Disc brake calliper Magura IS and PM M6 6 Shifting lever clamp M5 5 Brake lever clamp M5 5 V brake fastening screw M6 10 Road bike brake M6 10 Fre...

Page 66: ...widths these pressures normally apply HD high pressure tyre TYRE WIDTH in mm PSI BAR 25 HD 80 110 5 5 7 6 28 HD 70 80 4 8 5 5 28 60 4 1 32 60 70 4 1 4 8 37 50 3 5 40 60 4 1 42 60 4 1 47 40 50 3 5 4 1 57 62 30 40 2 1 2 8 Note that the manufacturer s specifications may differ and must be observed as otherwise you could damage the tyres and inner tubes 30 5 Lighting set Depending on which type of lig...

Page 67: ... for the initial faultiness of the defective part The following are excluded from the warranty Damage caused by use in competitions improper use and force majeure see Chapter 6 Intended use All parts that are subject to function related wear providing this is not a production or material fault see Chapter 27 2 Wear parts Damage caused by incorrect or insufficient care and unprofessional repairs co...

Page 68: ...I General User Manual 67 ...

Page 69: ...ghly enjoy using your new bike Copyright 2012 Derby Cycle Werke GmbH Reproduction in whole or in part is not permitted without the consent of Derby Cycle Werke GmbH Subject to misprints errors and technical modifications ...

Page 70: ...II User Manual Fast Pedelec English Derby Cycle Werke GmbH 2012 ...
Page 71: ...2 II User Manual Fast Pedelec 4 LCD control panel 5 Charger 1 Battery 2 Battery lock 3 Motor unit 4 Control panel 5 Charger 4 2 3 1 ...

Page 72: ...to get started right away refer to the brief introduction in Chapter 1 Quick start The individual steps are subsequently explained in detail supplemented by illustrations and diagrams For more detailed information on your fast Pedelec refer to Chapter 11 Technical data The information in this User Manual specifically refers to your fast Pedelec only For general information on the bike technology t...

Page 73: ...5 Service life and warranty 19 6 5 1 of battery 19 7 Charger 20 Content 1 Quick start 7 2 Fast Pedelec fundamental legal principles 8 2 1 Legal principles 8 2 1 1 Meaning for the rider 8 2 1 2 Fast Pedelecs and cycle paths 8 2 1 3 Travel speed switch 8 3 Charging the battery 9 3 1 Charging operation 9 3 2 Fitting the battery 9 4 LCD control panel 10 4 1 Function of control panel 10 4 1 1 On Off bu...

Page 74: ... 1 3 Display E1 21 8 1 4 Display E9 22 8 1 5 Assistance control indicator flashing 22 8 1 6 Additional possible sources of errors 22 9 Cleaning 22 10 Warnings 23 11 Technical data 24 12 Replacing components of the fast Pedelec 25 12 1 Components that can only be replaced by equivalent parts or approved parts 25 12 2 Spare tyres 26 12 3 Components that do not require a certificate of approval 27 ...

Page 75: ...6 II User Manual Fast Pedelec ...

Page 76: ...in the lock you will need to turn it clockwise and pull it out to allow the battery to lock in place 7 Make sure that the battery is securely posi tioned and that the key is no longer in the lock 8 Push the On Off button on the control panel on the handlebar Wait for 2 seconds before turn ing the pedals The drive system requires this time when no force is applied to the pedals to adjust the power ...

Page 77: ...a helmet You legally have to have a driving license The mo ped test certificate is mandatory If you have a German driving licence you are auto matically exempt from this requirement In Germany if you were born before 01 04 1965 you may also ride a fast Pedelec without a driving licence You legally have to have insurance In Germany you can obtain the small registration mark from any insurance compa...

Page 78: ... 230 V ob serve type plate on the charger Type plate on charger Front and back 2 Put the battery in the docking station of the charger 3 The charging operation starts The battery LEDs light up or flash Once all five LEDs have gone out the battery is fully charged You can leave the bat tery standing in the charger However the charger always draws some current if you leave it plugged in 4 To save po...

Page 79: ...ontrol panel 4 1 1 On Off button Press the On Off button to switch on the control panel and drive The assist level that was active at the time the control panel was switched off is automatically reinstated The back lit display is turned on briefly then goes out All recording of data trip actual journey length average speed top speed total journey length starts as soon as you switch the control pan...

Page 80: ...selector button for the display panel for longer than three seconds with the control panel switched on this resets the trip average speed and top speed to zero You cannot delete the total journey length using this method 4 1 5 Switching the display on and off The back lit display and LCD control panel display can also be switched on even if the drive is not enabled To do this press the button that...

Page 81: ...tal mileage 1stdigit Selector button display Selector button display Selector button display Selector button display Selector button display button setting selection button setting selection button button setting selection button button setting selection button button setting selection button button setting selection Selector button display button button setting selection Selector button display b...

Page 82: ... km once the distance reaches 9999 9 km this is dis played without a decimal place 4 1 10 Battery charge state indicator Battery charge state indicator This indicator helps you save power when riding which means you can travel further The remaining battery charge is shown in 5 stages DISPLAY BATTERY CHARGE STATE 5 LEDs light up 80 100 4 LEDs light up 60 80 3 LEDs light up 40 60 2 LEDs light up 20 ...

Page 83: ... motor The hub gear system contains a device that protects it against gear shifting operations under excessive loads in order to preserve the gear unit in the hub 5 1 Operating principle of assistance The motor provides support as soon as you switch the as sistance on and start pedalling The thrust delivered by the motor depends on three factors Your own pedalling effort The motor adapts to the fo...

Page 84: ...ry in a heated room so that it is at room tem perature when you fit it on your Pedelec Rate of discharge at different temperatures Discharge curve at normal temperatures Discharge curve at low temperatures Discharge capacity at low temperatures Discharge capacity at normal temperatures Discharge capacity Ah or hours of use Difference between nor maland low temperature Rated voltage Minimum voltage...

Page 85: ...f operation Distance covered using different batteries DISTANCE COVERED 1 2 ASSISTANCE 32 KM H ON AVERAGE UNDER FAVOUR ABLE CONDITIONS 8 Ah battery 22 km 12 Ah battery 35 km 18 Ah battery 60 km 5 3 Riding your Pedelec efficiently You can monitor and influence the cost of your journeys with the Pedelec yourself You can reduce your consump tion and therefore costs by following the tips for increas i...

Page 86: ...ke for the first time or after you have not used it for a while You should run the battery all the way down to empty for the first three charging cycles This al lows the battery to reach its maximum capacity If you continuously run the battery to empty during normal operation this reduces its service life If you partially recharge the battery frequently dur ing normal operation this has a favourab...

Page 87: ...ght up and the way in which they light up Charge state and battery capacity indicator 6 4 1 Checking the battery charge state Press the Push button briefly the LEDs light up and dis play the current battery charge DISPLAY BATTERY CHARGE STATE 5 LEDs light up 80 100 4 LEDs light up 60 80 3 LEDs light up 40 60 2 LEDs light up 20 40 1 LED lights up 10 20 1 LED flashes 10 no display 0 E Battery is emp...

Page 88: ...arts also come with a two year warranty If the battery develops a fault during this period your specialist cycle shop will of course replace it Normal age ing and battery wear do not constitute a fault The service life of the battery depends on different factors The most important wear relevant factors are the number of charge cycles and the age of the battery When you have fully charged and disch...

Page 89: ...the charger in dry rooms Only place the charger in a secure stable position on a suitable surface Do not cover the charger or place any objects on it as otherwise it could overheat and catch fire 8 Troubleshooting The control panel also indicates when faults and techni cal errors are present A fault code appears in the LCD display Control panel display Have the electric drive inspected regularly b...

Page 90: ... 60 40 2 LEDs light up 40 20 1 LED lights up 20 0 8 1 2 Battery charge state indicator flashing or not visible If the battery charge state indicator is flashing or not visi ble at all one of the following causes solutions may apply Is the battery sufficiently charged Charge the battery if necessary The second and fourth LEDs of the battery indicator flash when you press the button on the battery T...

Page 91: ...s does not happen contact your specialist cycle shop 8 1 6 Additional possible sources of errors If you only pedal very gently the power assist is not enabled If the motor is not running and you cannot pinpoint the cause check the buttons cables and plugs of the electrical system If you find a break or a crack do not try to repair the fault yourself Take your Pedelec to a specialist cycle shop 9 C...

Page 92: ...ou open covers or remove parts Connection points may also be live Maintenance or repairs on the device when it is open and connected to the power supply must only be carried out by the specialist cycle shop When carrying out adjustments and maintenance or when cleaning the Pedelec avoid crushing cables or damaging them with sharp edges If risk free operation of your Pedelec cannot be assumed take ...

Page 93: ... Possible applications of batteries DCW ITEM NO ITEM NO CAPACITY AH WEIGHT KG POSSIBLE APPLICATION CENTRE FAST FRONT 17017002 NKY226B02 10 2 4 X 250W 17017012 NKY226B02 10 2 4 X 250W 17019018 NKY252B02 10 2 4 X 17019103 NKY252B02 10 2 4 X KD170110010 NKY266B02 10 2 4 X 250W 170110010 NKY266B02 10 2 4 X 250W 170110003 NKY265B02 10 2 4 300W 170110016 NKY267B02 10 2 4 X 170111002 NKY284B2 10 2 4 X 30...

Page 94: ...ority TÜV This fast Pedelec has such a permit During the approval process specific components were defined as being suitable for use with this vehicle This means that the permit for your fast Pedelec only remains valid if exactly the same components in the approved model are used If components are subsequently modified the same re quirements that apply with other motor vehicles take effect You mus...

Page 95: ...2 115 kg 6 bar Marathon Extreme Evolution folding 50 559 140 kg 5 bar Marathon Plus Performance wired 37 622 110 kg 6 bar Marathon Plus Performance wired 47 559 125 kg 5 bar Marathon Performance wired 37 622 110 kg 6 bar Marathon Performance wired 50 559 140 kg 5 bar Big Apple Performance folding wired 50 622 150 kg 5 bar Big Apple Performance folding wired 50 559 125 kg 5 bar Big Apple Performanc...

Page 96: ... used Mudguard the front edge of the front mudguard must be rounded Pannier rack Saddle Handlebar grip Gear shift components Only if the largest gear ratio is not modified Seatpost Bell Can be replaced with an equivalent bright sounding bell Rear view mirror Can be replaced with a different type ap proved rear view mirror Chain Headset Inner tube Hubs ...

Page 97: ... enjoy using your new fast Pedelec Copyright 2012 Derby Cycle Werke GmbH Reproduction in whole or in part is not permitted without the consent of Derby Cycle Werke GmbH Subject to misprints errors and technical modifications ...

Page 98: ...III User Manual Pedelec with centre motor English Derby Cycle Werke GmbH 2012 ...
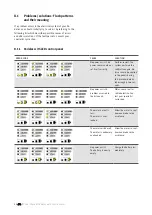
Page 99: ...2 III User Manual Pedelec with centre motor 4b LCD control panel 4a LED control panel 5 Charger 1 Battery 2 Battery lock 3 Motor unit 4 Control panel 4a LED 4b LCD 5 Charger 4 2 3 1 ...

Page 100: ...ained in detail supplemented by illustrations and diagrams For more detailed information on your Pedelec refer to Chapter 11 Technical data The information in this User Manual specifically refers to your Pedelec only For general information on the bike technology that features in your Pedelec for example refer to the General User Manual Even if you can t wait to go for your first ride in the inter...

Page 101: ...rded data 14 4 2 1 5 Switching the display on and off 14 4 2 1 6 Deleting all data 14 4 2 1 7 Reprogramming the language wheel circumference and LCD contrast 15 4 2 1 8 Automatic switch off 16 4 2 1 9 Measurement and display ranges 16 4 2 1 10 Battery charge state indicator 16 4 2 1 11 Power output indicator 16 5 Assistance by the electric motor 17 5 1 Operating principle of assistance 17 5 2 Dist...

Page 102: ...lec with LED control panel 24 8 1 2 Pedelec with LCD control panel 25 8 1 2 1 No display 25 8 1 2 2 Battery charge state indicator flashing or not visible 25 8 1 2 3 Display E1 25 8 1 2 4 Display E9 25 8 1 2 5 Assistance control indicator flashing 26 8 1 2 6 Additional possible sources of errors 26 9 Cleaning 26 10 Warnings 26 11 Technical data 27 ...

Page 103: ...ncy B9 Year of manufacture 2012 comply with all of the relevant requirements of the Machinery Directive 2006 42 EC Furthermore the machine complies with all of the requirements of the Electromagnetic Compatibility Directive 2004 108 EC The following harmonized standards have been applied DIN EN 15194 Cycles Electrically power assisted cycles EPAC cycles DIN EN 14764 City and trekking bikes Safety ...

Page 104: ...Year of manufacture 2013 comply with all of the relevant requirements of the Machinery Directive 2006 42 EC Furthermore the machine complies with all of the requirements of the Electromagnetic Compatibility Directive 2004 108 EC The following harmonized standards have been applied DIN EN 15194 Cycles Electrically power assisted cycles EPAC cycles DIN EN 14764 City and trekking bikes Safety require...

Page 105: ...8 III User Manual Pedelec with centre motor ...

Page 106: ... handlebar Wait for 2 seconds before turning the pedals The drive system requires this time when no force is applied to the pedals to adjust the power sensor correctly 9 The intermediate power assist mode appears on the display panel of the LED control panel Press the Mode buttons to select the level of as sistance gentle LOW intermediate MID or powerful HIGH Press this button once to change the a...

Page 107: ...o increase more intensely The motor must switch off once the bike reaches a speed of 25 km h 2 1 Meaning for the rider You do not legally have to wear a helmet In the interest of your own safety however you should never ride without a helmet You do not legally have to have a driving licence You do not legally have to have insurance No age restriction applies for a Pedelec The regulations governing...

Page 108: ... a socket 230 V ob serve type plate on the charger Type plate on charger Front and back 2 Put the battery in the docking station of the charger 3 The charging operation starts The battery LEDs light up or flash Once all 5 LEDs have gone out the battery is fully charged You can leave the battery standing in the charger However the charger al ways draws some current if you leave it plugged in 4 To s...

Page 109: ...ia the Mode buttons The LEDs next to the top button show how much assistance the motor is currently providing All three LEDs light up for two seconds when the power is switched on Please do not put your feet on the pedals during this time The power sensor is reset each time the power is switched on in order for the power supply to the motor to be pre cisely controlled A load must not be applied to...

Page 110: ...tance you will have to switch it back on via the control panel 4 2 LCD control panel Display switched off Display switched on 1 On Off 2 Light switch 3 Charge state indicator 4 Indicator for headlight 5 Power output indicator only visible when the bike is in motion 6 Speed 7 Display of actual journey length 8 Average speed 9 Top speed 10 Total journey length 11 Display panel 12 Assist level 13 Sel...

Page 111: ...nce switch es off Reduce power assist If you press the button that reduces the assist level the assistance reduces each time the button is pressed and returns to the most powerful assist level when it reaches the end of the loop In the NO ASSIST no assistance mode you ride the bike normally without the assistance of the motor 4 2 1 4 Resetting recorded data If you press the selector button for the...

Page 112: ...t Set total mileage 1stdigit Selector button display Selector button display Selector button display Selector button display Selector button display button setting selection button setting selection button button setting selection button button setting selection button button setting selection button button setting selection Selector button display button button setting selection Selector button d...

Page 113: ...means you can travel further The remaining battery charge is shown in 5 stages DISPLAY BATTERY CHARGE STATE 5 LEDs light up 80 100 4 LEDs light up 60 80 3 LEDs light up 40 60 2 LEDs light up 20 40 1 LED lights up 10 20 1 LED flashes 10 no display 0 E Battery is empty F Battery is full 4 2 1 11 Power output indicator The power output indicator shows the actual power output being requested and the a...

Page 114: ...is limited by the maximum motor output Variation in electric assistance Propulsive power Speed increasing pedal power and assistance reducing assistance assistance switched off Power assist mode 1 2 Pedal force 22 km h 25 km h Propulsive power pedal force electric assistance Electric assistance 1 0 2 Pedelec 28 8 speed Shimano The assist level you have selected With the high assist level HIGH the ...

Page 115: ...arge capacity at low temperatures Discharge capacity at normal temperatures Discharge capacity Ah or hours of use Difference between nor maland low temperature Rated voltage Minimum voltage for battery operation cutoff voltage Selected assist level If you want to cover a large distance assisted by the motor select the lower gears i e the ones that are easier to pedal Also change to low assist leve...

Page 116: ...journeys with the Pedelec yourself You can reduce your consump tion and therefore costs by following the tips for increas ing the travel distance The operating costs for power assist with an 18 Ah battery are calculated as follows A new battery costs roughly 599 euros You can cover 112 km on average with one battery charge You can charge the battery roughly 1 100 times 1100 charging cycles x 112 k...

Page 117: ...ur bike for the first time or after you have not used it for a while You should run the battery all the way down to empty for the first three charging cycles This al lows the battery to reach its maximum capacity If you continuously run the battery to empty during normal operation this reduces its service life If you partially recharge the battery frequently dur ing normal operation this has a fav...

Page 118: ...t light up and the way in which they light up Charge state and battery capacity indicator 6 4 1 Checking the battery charge state Press the Push button briefly the LEDs light up and dis play the current battery charge state DISPLAY BATTERY CHARGE STATE 5 LEDs light up 80 100 4 LEDs light up 60 80 3 LEDs light up 40 60 2 LEDs light up 20 40 1 LED lights up 10 20 1 LED flashes 10 no display 0 E Batt...

Page 119: ...ear parts Wear parts also come with a two year warranty If the battery develops a fault during this period your specialist cycle shop will of course replace it Normal age ing and battery wear do not constitute a fault The service life of the battery depends on different factors The most important wear relevant factors are the number of charge cycles and the age of the battery When you have fully c...

Page 120: ...mponents of your Pedelec replaced with genuine parts This makes it safer for you and avoids problems when processing warranty claims 7 Charger Read the two stickers on the charger before using it for the first time Do not use other chargers Only charge the battery using the charger provided or a charger approved by Derby Cycle If a fault develops or if the battery is in sleep mode you might be abl...

Page 121: ... assist The power sensor could not set itself correctly Perform restart The system performs the calibration again No force should be applied to the pedals during this procedure which takes roughly two sec onds No power assist A problem occurred in the drive unit Motor sensor unit or cable defective Con tact your specialist cycle shop The motor output is less The motor is over loaded Allow the moto...

Page 122: ...asons solutions may apply Is the battery sufficiently charged Charge the battery Is the battery capacity still sufficient Check the capacity If the remaining capacity is not enough the battery must be replaced Check the actual battery capacity If you press the Push button for longer than five sec onds the LEDs show the capacity of the battery at present Capacity of 18 Ah battery example DISPLAY CA...

Page 123: ...If children are present keep a close eye on them especially if they could insert objects into the ap pliance through apertures in the housing as this poses the danger of fatal electric shock 8 1 2 5 Assistance control indicator flashing If the assistance control indicator is flashing although the battery charge is sufficient the following cause and solu tion may apply The drive unit is overloaded ...

Page 124: ... batteries DCW ITEM NO ITEM NO CAPACITY AH WEIGHT KG POSSIBLE APPLICATION CENTRE FAST FRONT 17017002 NKY226B02 10 2 4 X 250W 17017012 NKY226B02 10 2 4 X 250W 17019018 NKY252B02 10 2 4 X 17019103 NKY252B02 10 2 4 X KD170110010 NKY266B02 10 2 4 X 250W 170110010 NKY266B02 10 2 4 X 250W 170110003 NKY265B02 10 2 4 300W 170110016 NKY267B02 10 2 4 X 170111002 NKY284B2 10 2 4 X 300W X 170111200 NKY306B2 8...

Page 125: ...ly enjoy using your new Pedelec Copyright 2012 Derby Cycle Werke GmbH Reproduction in whole or in part is not permitted without the consent of Derby Cycle Werke GmbH Subject to misprints errors and technical modifications ...

Page 126: ...IV User Manual Pedelec with front motor English Derby Cycle Werke GmbH 2012 ...
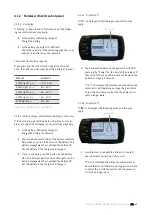
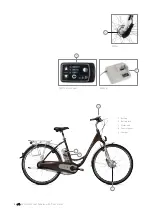
Page 127: ...2 IV User Manual Pedelec with front motor 3 Motor 5 Charger 4 LED control panel 1 Battery 2 Battery lock 3 Motor unit 4 Control panel 5 Charger 2 3 1 4 ...

Page 128: ...ined in detail supplemented by illustrations and diagrams For more detailed information on your Pedelec refer to Chapter 12 Technical data The information in this User Manual specifically refers to your Pedelec only For general information on the bike technology that features in your Pedelec for example refer to the General User Manual Even if you can t wait to go for your first ride in the intere...

Page 129: ...rating principle of assistance 12 5 2 Riding your Pedelec efficiently 13 6 Battery 14 6 1 Straightforward charging 14 6 2 High degree of safety due to battery management 14 6 3 Straightforward storage 14 6 4 Battery information system 15 6 4 1 Checking the battery charge state 15 6 4 2 Checking the battery capacity 15 6 5 Service life and warranty 16 6 5 1 the electric drive 16 6 5 2 the battery 1...

Page 130: ...ncy B9 Year of manufacture 2012 comply with all of the relevant requirements of the Machinery Directive 2006 42 EC Furthermore the machine complies with all of the requirements of the Electromagnetic Compatibility Directive 2004 108 EC The following harmonized standards have been applied DIN EN 15194 Cycles Electrically power assisted cycles EPAC cycles DIN EN 14764 City and trekking bikes Safety ...

Page 131: ...Year of manufacture 2013 comply with all of the relevant requirements of the Machinery Directive 2006 42 EC Furthermore the machine complies with all of the requirements of the Electromagnetic Compatibility Directive 2004 108 EC The following harmonized standards have been applied DIN EN 15194 Cycles Electrically power assisted cycles EPAC cycles DIN EN 14764 City and trekking bikes Safety require...

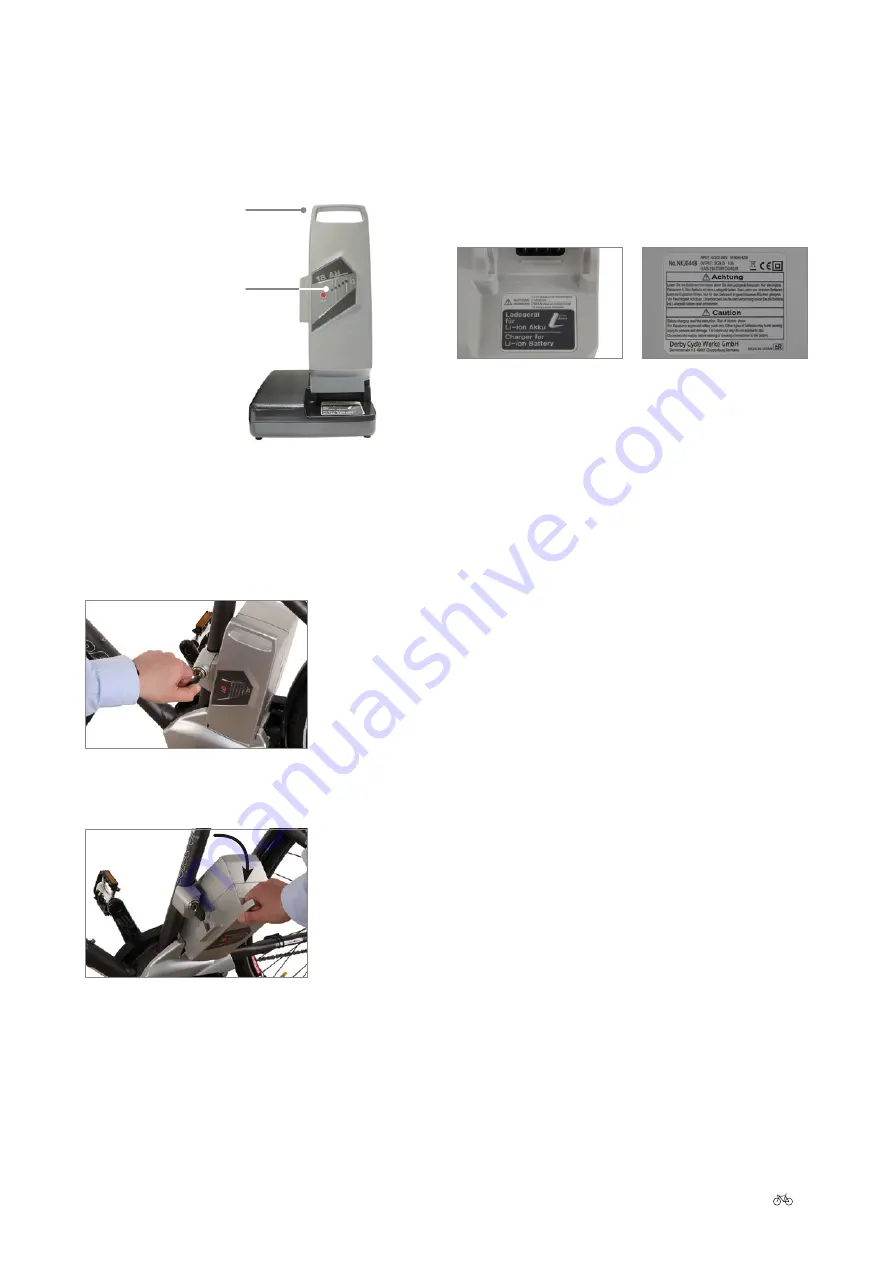
Page 132: ...need to turn it clockwise and pull it out to allow the battery to lock in place 7 Make sure that the battery is securely posi tioned and that the key is no longer in the lock 8 Push the Power button on the control panel on the handlebar Wait for 2 seconds before turn ing the pedals The drive system requires this time when no force is applied to the pedals to adjust the power sensor correctly 9 The...

Page 133: ...also increase more intensely The motor must switch off once the bike reaches a speed of 25 km h 2 1 Meaning for the rider You do not legally have to wear a helmet In the interest of your own safety however you should never ride without a helmet You do not legally have to have a driving licence You do not legally have to have insurance No age restriction applies for a Pedelec The regulations govern...

Page 134: ...a socket 230 V ob serve type plate on the charger Type plate on charger Front and back 2 Put the battery in the docking station of the charger 3 The charging operation starts The battery LEDs light up or flash Once all 5 LEDs have gone out the battery is fully charged You can leave the battery standing in the charger However the charger al ways draws some current if you leave it plugged in 4 To sa...

Page 135: ...he Mode but tons The LEDs next to the top button show the level of assistance you are currently receiving from the motor All three LEDs light up for two seconds when the power is switched on Please do not put your feet on the pedals during this time The power sensor is reset each time the power is switched on in order for the power supply to the motor to be pre cisely controlled A load must not be...

Page 136: ...e riding with the lights on and switch off the as sistance the lights also switch off automatically You must therefore switch the lights on again You must always take the battery with you even if you want to ride without assistance as the lights will only work with the battery 4 2 Automatic switch off If you stop and do not move your Pedelec for 10 minutes the system switches off automatically If ...

Page 137: ...ance Propulsive power Speed increasing pedal power and assistance reducing assistance assistance switched off Power assist mode 1 2 Pedal force 19 km h 25 km h Propulsive force pedal force electric assistance Electric assistance 1 0 2 Distance The distance you can travel using the power assist with the battery fully charged depends on several factors Ambient temperature If it is colder you will tr...

Page 138: ...ERAGE UNDER FAVOUR ABLE CONDITIONS 8 Ah battery 60 km 12 Ah battery 90 km 18 Ah battery 140 km 5 2 Riding your Pedelec efficiently You can monitor and influence the cost of your journeys with the Pedelec yourself You can reduce your consump tion and therefore costs by following the tips for increas ing the travel distance The operating costs of power assist with an 18 Ah battery work out as follow...

Page 139: ... your bike for the first time or after you have not used it for a while You should run the battery all the way down to empty for the first three charging cycles This al lows the battery to reach its maximum capacity If you continuously run the battery to empty during normal operation this reduces its service life If you partially recharge the battery frequently dur ing normal operation this has a ...

Page 140: ...p and the way in which they light up Charge state and battery capacity indicator 6 4 1 Checking the battery charge state Press the Push button briefly the LEDs light up and dis play the current battery charge state DISPLAY BATTERY CHARGE STATE 5 LEDs light up 80 100 4 LEDs light up 60 80 3 LEDs light up 40 60 2 LEDs light up 20 40 1 LED lights up 10 20 1 LED flashes 10 no display 0 E Battery is em...

Page 141: ...develops a fault during this period your specialist cycle shop will of course replace it A fault does not constitute normal ageing and battery wear The service life of the battery depends on different factors The most important wear relevant factors are the number of charge cycles and the age of the battery When you have fully charged and discharged your battery 1 100 times it will still have 60 o...

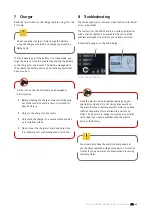
Page 142: ... stable position on a suitable surface Do not cover the charger or place any objects on it as otherwise it could overheat and catch fire 8 Troubleshooting The control panel also indicates when faults and techni cal errors are present If a fault occurs the LEDs flash in a specific pattern and with a specific rhythm This indicates the cause of the problem and makes it easier for you to find a soluti...

Page 143: ...ghly two sec onds No power assist A problem occurred in the drive unit Motor sensor unit or cable defective Con tact your specialist cycle shop The motor output is less The motor is over loaded Allow the motor to cool down and reduce the assistance The motor switches off The motor is extremely overloaded Allow the motor to cool down and reduce the assistance No power assist The battery is nearly e...

Page 144: ... to see one white and one green cable connector Open these connectors and pull them apart 1 Green connector 2 White connector 1 2 To open the white connector push a sharp object tip of a key or ball point pen down onto the an gled surface of the snap in mechanism as shown below You can pull the two connector halves apart when pushing this surface back White connector To open the green connector pu...

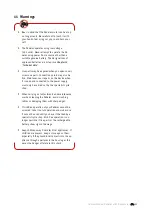
Page 145: ...heel refer to the General User Manual The General User Manual also contains all other bicycle related information on your Pedelec 10 Cleaning Remove the battery before you clean your Pedelec We recommend you clean your Pedelec with a damp cloth a sponge or a brush You can obtain suitable cleaning agents and additional information from your specialist cycle shop Make sure when cleaning that water d...

Page 146: ...on the device when it is open and connected to the power supply must only be carried out by the specialist cycle shop When carrying out adjustments and maintenance or when cleaning the Pedelec avoid crushing cables or damaging them with sharp edges If risk free operation of your Pedelec cannot be assumed take it out of operation and make sure it cannot be used until you have it checked by a specia...

Page 147: ...Wh Possible applications of batteries DCW ITEM NO ITEM NO CAPACITY AH WEIGHT KG POSSIBLE APPLICATION CENTRE FAST FRONT 17017002 NKY226B02 10 2 4 X 250W 17017012 NKY226B02 10 2 4 X 250W 17019018 NKY252B02 10 2 4 X 17019103 NKY252B02 10 2 4 X KD170110010 NKY266B02 10 2 4 X 250W 170110010 NKY266B02 10 2 4 X 250W 170110003 NKY265B02 10 2 4 300W 170110016 NKY267B02 10 2 4 X 170111002 NKY284B2 10 2 4 X ...

Page 148: ...IV User Manual Pedelec with front motor 23 ...

Page 149: ...ly enjoy using your new Pedelec Copyright 2012 Derby Cycle Werke GmbH Reproduction in whole or in part is not permitted without the consent of Derby Cycle Werke GmbH Subject to misprints errors and technical modifications ...

Page 150: ...VI User Manual Groove Pedelec English Derby Cycle Werke GmbH 2012 ...

Page 151: ...2 VI User Manual Groove Pedelec Battery and charger Battery lock 1 Battery 2 Battery lock 3 Motor unit 4 Control panel 5 Charger Motor unit Control panel 5 1 2 4 3 4 3 2 1 ...

Page 152: ...subsequently explained in detail supplemented by illustrations and diagrams More detailed information on your Pedelec is provided in Chapter 12 Technical data The information in this User Manual specifically refers to your Pedelec only For general information on the bike technology that features in your Pedelec for example refer to the General User Manual Even if you can t wait to go for your firs...

Page 153: ...l 11 5 3 Display of power assist mode 12 5 4 Battery charge state indicator 12 6 Assistance by the electric motor 13 6 1 Operating principle of assistance 13 6 2 Distance 13 6 3 Riding your Pedelec efficiently 14 7 Battery 14 7 1 Straightforward charging 14 7 2 High degree of safety due to battery management 14 7 3 Straightforward storage 14 7 4 Battery information system 15 7 5 Battery charge sta...

Page 154: ...ncy B9 Year of manufacture 2012 comply with all of the relevant requirements of the Machinery Directive 2006 42 EC Furthermore the machine complies with all of the requirements of the Electromagnetic Compatibility Directive 2004 108 EC The following harmonized standards have been applied DIN EN 15194 Cycles Electrically power assisted cycles EPAC cycles DIN EN 14764 City and trekking bikes Safety ...

Page 155: ...Year of manufacture 2013 comply with all of the relevant requirements of the Machinery Directive 2006 42 EC Furthermore the machine complies with all of the requirements of the Electromagnetic Compatibility Directive 2004 108 EC The following harmonized standards have been applied DIN EN 15194 Cycles Electrically power assisted cycles EPAC cycles DIN EN 14764 City and trekking bikes Safety require...

Page 156: ...delec place the battery back into the holder in the pannier rack by reinserting it from behind Once you have inserted the battery turn the key clockwise and then remove it other wise the battery will not lock into position 6 Make sure that the battery is securely posi tioned and that the key is no longer in the lock 7 Press the round switch on the side of the bat tery housing The red LED inside it...

Page 157: ...ally have to have a driving license unless you own a model with pushing assistance Chapter 2 2 Pushing assistance You do not legally have to have insurance No age restriction applies for a Pedelec The regulations governing the use of cycle paths are the same as for normal bikes These regulations apply to you wherever you are in the European Union It is possible that different regulations exist in ...

Page 158: ... Quick start You can also remove the battery from the holder and charge it in the docking station This is recom mended if it is cold outside in order to charge the battery in a warm room Hold the battery by the recessed grip at the back of the battery and turn the key anticlockwise This unlocks the battery and you can now remove it by pulling it backwards out of the Pedelec In do ing so hold on ti...

Page 159: ... on the battery to the right of the LEDs The greater the number of LEDs that light up the higher the charge state is LEDs on the battery 5 If the LED on the charger lights up green the battery is fully charged 6 To save power pull the charger plug out of the socket once the charging operation is complete You can also leave the charging cable plugged in once the charging operation is complete Howev...

Page 160: ...on to switch the control panel on and off On Off button If the model features pushing assistance the switch for this will be on the underside of the control panel Button for pushing assistance 5 1 On Off button Press the POWER button to switch the control panel on and off After it has been switched on the system is always in the medium power assist mode SPORT 5 2 Switches for power assist level Yo...

Page 161: ...evel ECO is activated and the assis tance is working only with a low level of effort 5 4 Battery charge state indicator The battery charge state indicator is located below the row of LED indicators that displays the power assist mode Battery charge state indicator If all three battery charge state indicator LEDs are lit the battery charge is between 100 and 65 If two LEDs are lit the battery charg...

Page 162: ...al factors Ambient temperature If it is colder you will travel a shorter distance with the same battery charge To maximise the distance you can travel keep the battery in a heated room so that it is at room tem perature when you fit it on your Pedelec As the battery discharges when the motor is in use it generates enough heat to not lose too much of its power at low ambient temperatures Level of a...

Page 163: ... Li Ion battery type for this application One of the main benefits of this type of battery is its low weight combined with a high capacity Li Ion batteries only weigh half as much as comparable nickel metal hydride or nick el cadmium batteries This means you carry less battery weight and more battery power 7 1 Straightforward charging There is no memory effect You can therefore fully recharge your...

Page 164: ...re the battery inside your house or in a warm garage when the outside temperature is low In this case you should only fit the battery on your bike just before using it If you are transporting your Pedelec by car take the battery out of its holder and transport it separately The battery should ideally be stored for longer periods with a charge of between 50 and 75 at a temperature of 10 C Charging ...

Page 165: ...f the battery According to the technical definition the battery is used if its capacity is only 60 in the new condition The battery of course also ages over time Even if you do not use your battery its capacity reduces In general the battery is expected to age at a rate of 5 per year Providing you can still cover the journey distances with the remaining battery capacity you can of course continue ...

Page 166: ...first thing you must do before releasing the front wheel is to open the connection to the front wheel motor Undo the locking nut for the electrical connector which is located on the back of the fork Take the up per half of the connector in one hand and the lower half in the other and pull the two halves apart 1 Locking nut 2 Cable tie 1 2 The lower half of the connector and the power cable are fas...

Page 167: ...e genuine battery Live parts may be exposed when you open covers or remove parts Connection points may also be live Maintenance or repairs on the device when it is open and connected to the power supply must only be carried out by the specialist cycle shop When carrying out adjustments and maintenance or when cleaning the Pedelec avoid crushing cables or damaging them with sharp edges If risk free...

Page 168: ...ith planetary gear unit and freewheel Output 250 watts Maximum torque 35 Nm Weight of motor 2 88 kg Assist levels 70 150 250 watts Switch off speed 25 km h at all assist levels Control via speed sensor GROOVE LI ION BATTERY Voltage 36 V Capacities 9 Ah Watt hours 324 Wh Weight 2 4 kg ...

Page 169: ...using your new Pedelec with Groove drive Copyright 2012 Derby Cycle Werke GmbH Reproduction in whole or in part is not permitted without the consent of Derby Cycle Werke GmbH Subject to misprints errors and technical modifications ...

Page 170: ...20 900 0 275 007 003 1 270 020 500 1 270 020 501 1 270 020 502 1 270 020 503 1 270 020 504 1 270 020 505 1 270 020 506 1 270 020 507 0 275 007 900 de Originalbetriebsanleitung en Original instructions fr Notice originale es Manual original it Istruzioni originali nl Oorspronkelijke gebruiksaanwijzing da Original brugsanvisning sv Bruksanvisning i original no Original driftsinstruks fi Alkuperäiset...

Page 171: ...ncy B9 Year of manufacture 2012 comply with all of the relevant requirements of the Machinery Directive 2006 42 EC Furthermore the machine complies with all of the requirements of the Electromagnetic Compatibility Directive 2004 108 EC The following harmonized standards have been applied DIN EN 15194 Cycles Electrically power assisted cycles EPAC cycles DIN EN 14764 City and trekking bikes Safety ...

Page 172: ...Year of manufacture 2013 comply with all of the relevant requirements of the Machinery Directive 2006 42 EC Furthermore the machine complies with all of the requirements of the Electromagnetic Compatibility Directive 2004 108 EC The following harmonized standards have been applied DIN EN 15194 Cycles Electrically power assisted cycles EPAC cycles DIN EN 14764 City and trekking bikes Safety require...

Page 173: ...11 Bosch eBike Systems 2 i n f o r e s e t mode l i g h t i n f o r e s e t mode l i g h t i n f o r e s e t mode l i g h t f b a 5 6 7 8 c d e g 4 3 2 1 OBJ_BUCH 1557 001 book Page 2 Wednesday September 28 2011 11 39 AM ...

Page 174: ...ike Systems 0 276 001 X45 28 9 11 m o d e li ht i n f o r e s e t m o d e light 11 9 max 1 Nm 2 10 max 1 Nm 2 9 max 1 Nm 1 2 12 5 1 7 m m D C B A OBJ_BUCH 1557 001 book Page 3 Wednesday September 28 2011 11 39 AM ...

Page 175: ...0 276 001 X45 28 9 11 Bosch eBike Systems 4 FA ST SL O W 13 19 20 23 21 22 18 17 18 17 14 16 15 16 15 0 275 007 900 OBJ_BUCH 1557 001 book Page 4 Wednesday September 28 2011 11 39 AM ...

Page 176: ... 5 Bosch eBike Systems 0 276 001 X45 28 9 11 20 17 18 20 22 21 19 18 13 14 17 19 18 17 21 F E OBJ_BUCH 1557 001 book Page 5 Wednesday September 28 2011 11 39 AM ...

Page 177: ...0 276 001 X45 28 9 11 Bosch eBike Systems 6 F A S T S L O W 230 27 28 24 25 24 26 23 29 30 31 OBJ_BUCH 1557 001 book Page 6 Wednesday September 28 2011 11 39 AM ...

Page 178: ... 7 Bosch eBike Systems 0 276 001 X45 28 9 11 F A S T S L O W 230 15 31 32 20 32 14 27 25 26 H G OBJ_BUCH 1557 001 book Page 7 Wednesday September 28 2011 11 39 AM ...

Page 179: ...es mit dem Auto oder dem Flugzeug transportieren oder es aufbewahren Bei unbeabsichtigtem Betäti gen des Ein Ausschalters besteht Verlet zungsgefahr f Die Funktion Anfahrhilfe darf ausschließ lich beim Anfahren bzw Schieben des eBikes verwendet werden Haben die Räder des eBikes beim Benutzen der Anfahrhilfe keinen Bodenkontakt besteht Verletzungs gefahr f Verwenden Sie nur original Bosch Batterien...

Page 180: ... 10 bzw 9 mit einem Anzugsdrehmoment von maximal 1 Nm fest Die Halterung 2 kann sonst be schädigt werden Halterung verschieben kippen siehe Bild A Lösen Sie die beiden Schrauben 9 an der Unter seite der Halterung 2 Verschieben Sie die Halte rung auf dem Lenker oder ändern Sie den Kipp winkel Drehen Sie die beiden Schrauben 9 mit einem Anzugsdrehmoment von maximal 1 Nm wieder fest Antriebseinheit D...

Page 181: ...en autorisierten Fahrradhändler Betrieb Inbetriebnahme Voraussetzungen Der Antrieb Ihres eBikes kann nur aktiviert wer den wenn folgende Voraussetzungen erfüllt sind Eine ausreichend geladene Batterie ist einge setzt siehe Betriebsanleitung der Batterie Der Bediencomputer ist richtig in die Halte rung eingesetzt siehe Bediencomputer ein setzen und entnehmen Seite Deutsch 3 Der Geschwindigkeitssens...

Page 182: ...der Anzeige f erscheint Während der Benutzung der Anfahrhilfe erlischt die Anzeige f der eingestellte Unterstützungs modus wird gespeichert Unterstützungsstufe einstellen Im eingestellten Unterstützungsmodus können Sie jederzeit auch während der Fahrt die Un terstützungsstufe ändern Hinweis In einzelnen Ausführungen ist es mög lich dass die Unterstützungsstufe voreingestellt ist und nicht geändert...

Page 183: ...diencom puter Bei beiden Ausführungen drücken Sie zum Ein schalten der Beleuchtung die Taste light 5 Im Display erscheint die Beleuchtungsanzeige b Zum Ausschalten der Beleuchtung drücken Sie die Taste light 5 erneut die Beleuchtungsan zeige b erlischt Geschwindigkeits und Entfernungsanzeigen Hinweis Je nach länderspezifischer Ausführung können Entfernung und Geschwindigkeit entwe der in km und km...

Page 184: ...iebs einheit Antriebseinheit überprüfen lassen 101 Verbindungsproblem der Antriebseinheit Anschlüsse und Verbindungen überprüfen lassen 102 Fehler des Geschwindigkeits sensors Geschwindigkeitssensor überprüfen lassen 103 Verbindungsproblem der Beleuchtung Anschlüsse und Verbindungen überprüfen lassen 104 Verbindungsproblem des Bediencomputers Anschlüsse und Verbindungen überprüfen lassen 105 Tempe...

Page 185: ...ie Wahl des richtigen Ganges können Sie bei gleichem Krafteinsatz die Geschwindigkeit und die Reichweite erhöhen Erste Erfahrungen sammeln Es ist empfehlenswert die ersten Erfahrungen mit dem eBike abseits vielbefahrener Straßen zu sammeln Probieren Sie unterschiedliche Unterstützungs modi und Unterstützungsstufen aus Sobald Sie sich sicher fühlen können Sie mit dem eBike wie mit jedem Fahrrad am ...

Page 186: ... durch gewerbliche Benutzer oder beim Transport durch Dritte z B Lufttrans port oder Spedition sind besondere Anforderun gen an Verpackung und Kennzeichnung zu beach ten z B Vorschriften des ADR Bei Bedarf kann bei der Vorbereitung des Versandstückes ein Ge fahrgut Experte hinzugezogen werden Versenden Sie die Batterien nur wenn das Ge häuse unbeschädigt ist Kleben Sie offene Kon takte ab und verp...

Page 187: ...n Kurzschluss zwischen den Batteriekon takten kann Verbrennungen oder Feuer zur Folge haben Bei in diesem Zusammenhang entstandenen Kurzschlussschäden entfällt jeglicher Anspruch auf Garantie durch Bosch f Bei falscher Anwendung kann Flüssigkeit aus der Batterie austreten Vermeiden Sie den Kontakt damit Bei zufälligem Kontakt mit Wasser abspülen Wenn die Flüssigkeit in die Augen kommt nehmen Sie z...

Page 188: ...erieschlosses 18 Batterieschloss 19 Obere Halterung der Standard Batterie 20 Standard Batterie 21 Untere Halterung der Standard Batterie 22 Tragegurt 23 Ladegerät Technische Daten Li Ionen Batterie Battery Pack Sachnummer Standard Batterie schwarz Standard Batterie weiß Standard Batterie silber Gepäckträger Batterie 1 270 020 500 1 270 020 504 1 270 020 501 1 270 020 505 1 270 020 502 1 270 020 50...

Page 189: ...ensdauer der Batterie erreicht Ladezustandsanzeige Die fünf grünen LEDs der Ladezustandsanzeige 15 zeigen bei eingeschalteter Batterie den Lade zustand der Batterie an Dabei entspricht jede LED etwa 20 Kapazität Bei vollständig geladener Batterie leuchten alle fünf LEDs Der Ladezustand der eingeschalteten Batterie wird außerdem im Bediencomputer angezeigt Lesen und beachten Sie dazu die Betriebsan...

Page 190: ...s der Anzeige 15 erlöschen Der eBike Antrieb wird damit eben falls ausgeschaltet Wird etwa 10 min lang keine Leistung des An triebs abgerufen z B weil das eBike steht schaltet sich die Batterie aus Energiespargrün den automatisch ab Die Batterie ist durch die Electronic Cell Pro tection ECP gegen Tiefentladung Überla dung Überhitzung und Kurzschluss geschützt Bei Gefährdung schaltet sich die Batte...

Page 191: ...e com Transport Die Batterien unterliegen den Anforderungen des Gefahrgutrechts Die Batterien können durch den privaten Benutzer ohne weitere Auflagen auf der Straße transportiert werden Beim Transport durch gewerbliche Benutzer oder beim Transport durch Dritte z B Lufttrans port oder Spedition sind besondere Anforderun gen an Verpackung und Kennzeichnung zu beach ten z B Vorschriften des ADR Bei ...

Page 192: ...en auftretenden Erwär mung des Ladegerätes besteht Brandgefahr f Bei Beschädigung und unsachgemäßem Ge brauch der Batterie können Dämpfe austre ten Führen Sie Frischluft zu und suchen Sie bei Beschwerden einen Arzt auf Die Dämpfe können die Atemwege reizen f Beaufsichtigen Sie Kinder Damit wird si chergestellt dass Kinder nicht mit dem Lade gerät spielen f Kinder und Personen die aufgrund ihrer ph...

Page 193: ... auch an 220 V betrieben werden Stecken Sie dann den Gerätestecker 27 des Netzkabels in die Gerätebuchse 25 am Ladege rät Schließen Sie das Netzkabel länderspezifisch an das Stromnetz an Die Betriebsanzeige 30 am Ladegerät leuchtet auf f Verbinden Sie das Ladegerät erst mit dem Stromnetz wenn am Netzspannungsschal ter 26 die richtige Netzspannung eingestellt ist Das Ladegerät kann sonst beschädigt...

Page 194: ...igt die Aufladung der nächsten 20 an Die Batterie ist vollständig geladen wenn alle fünf LEDs der Anzeige 15 dauerhaft leuchten Der Ladevorgang wird automatisch unterbrochen Trennen Sie das Ladegerät vom Stromnetz und die Batterie vom Ladegerät Beim Trennen der Batterie vom Ladegerät wird die Batterie automatisch abgeschaltet Sie können die Batterie jetzt in das eBike ein setzen Fehler Ursachen un...

Page 195: ...inen autorisierten Fahrradhändler Kontaktdaten autorisierter Fahrradhändler fin den Sie auf der Internetseite www bosch ebike com Entsorgung Ladegeräte Zubehör und Verpackungen sollen einer umweltgerechten Wiederverwertung zuge führt werden Werfen Sie Ladegeräte nicht in den Hausmüll Nur für EU Länder Gemäß der Europäischen Richtlinie 2002 96 EG über Elektro und Elektronik Altgeräte und ihrer Um s...

Page 196: ...ction may only be used when starting or pushing the eBike Danger of injury when the wheels of the eBike do not have ground contact while using the start assistance function f Use only original Bosch batteries approved for your eBike by the manufacturer Using other batteries can lead to injuries and pose a fire hazard When using other batteries Bosch shall not assume any liability and warranty f Pl...

Page 197: ...rting it see Inserting and Removing the Drive HMI Retighten screw 10 again with a tighten ing torque of 1 Nm max Inserting and Removing the Drive HMI see figure C To insert the drive HMI place it turned by approx 30 onto holder 2 and then turn it clockwise to the stop To remove the drive HMI turn it approx 30 anticlockwise and pull it out of the holder 2 f Remove the drive HMI when parking the eBi...

Page 198: ... battery also switches on the display of the drive HMI The drive HMI indicates the charge condition of the battery as well as the settings of the drive unit The drive is activated as soon as you step into the pedals except when in start assistance mode see Switching Start assistance On Off page English 4 The assistance level depends on the settings of the drive HMI As soon as you stop pedaling whe...

Page 199: ...t a traffic light or when starting uphill It can also be used as a pushing aid when in the lowest gear f The start assistance function may only be used when starting or pushing the eBike Danger of injury when the wheels of the eBike do not have ground contact while using the start assistance function To activate the start assistance function press the button 6 longer than 1 second and con tinue to...

Page 200: ...eset button 3 until the indication is reset to zero While using the start assistance function multi function indicator e goes out Error Code Indication The components of the eBike drive are continu ously and automatically monitored When an er ror is detected the respective error code is in dicated in display f Depending on the type of error the drive is au tomatically shut off if required Continue...

Page 201: ...he wear of the drive train By selecting the right gear you can increase the speed and range with the same pedaling effort Gathering First Experience It is recommended to gather first experience with the eBike away from roads with heavy traffic Try out the different assistance modes and as sistance levels As soon as you feel safe you can participate in traffic with the eBike as with any other bicyc...

Page 202: ...intenance and Service Maintenance and Cleaning Keep all components of your eBike clean espe cially the battery contacts and corresponding holders Clean them carefully with a soft damp cloth All components including the drive unit may not be immersed in water or cleaned with a high pressure cleaner For service or repairs on the eBike please refer to an authorised bicycle dealer After sales Service ...

Page 203: ...ide line 2002 96 EC electrical devic es tools that are no longer usable and according to the European Guideline 2006 66 EC defective or used battery packs batteries must be col lected separately and disposed of in an environ mentally correct manner Please return batteries that are no longer usable to an authorised bicycle dealer Li ion Please observe the instruc tions in section Transport page Eng...

Page 204: ...s flush with wa ter If liquid contacts eyes additionally seek medical help Liquid ejected from the battery may cause skin irritations or burns f Vapours can escape in case of damage and improper use of the battery Provide for fresh air and seek medical attention in case of complaints The vapours can irritate the respiratory system f Charge the battery only with chargers recom mended by the manufac...

Page 205: ...rger The battery can be charged any time without re ducing the battery life Interrupting the charging procedure does not cause damage to the bat tery The battery is equipped with a temperature con trol indicator which enables charging only within a temperature range between 0 C and 40 C This provides for a long life of the battery Charge control Indicator When the battery is switched on the five g...

Page 206: ...holder 13 Operation Initial Operation f Use only original Bosch batteries approved for your eBike by the manufacturer Using other batteries can lead to injuries and pose a fire hazard When using other batteries Bosch shall not assume any liability and war ranty Switching On and Off Before switching on the battery check that the lock 18 is locked Note When switching on the battery the pedals of the...

Page 207: ...t recommended to have the battery con nected permanently to the charger Storage Conditions Store the battery in a dry well ventilated loca tion Protect the battery against moisture and water Under unfavourable weather conditions it is recommended e g to remove the battery from the eBike and store it in an enclosed loca tion until being used again The battery can be stored at temperatures be tween ...

Page 208: ... more detailed national regula tions In case of questions concerning transport of the batteries please refer to an authorised bicycle dealer Bicycle dealers can also provide suitable transport packaging Disposal The batteries accessories and packaging should be sorted for environmental friendly recycling Do not dispose of batteries into household waste Only for EC countries According to the Europe...

Page 209: ...ldren This will ensure that children do not play with the charger f Children or persons that owing to their physical sensory or mental limitations or to their lack of experience or knowledge are not capable of securely operating the charg er may only use this charger under supervi sion or after having been instructed by a re sponsible person Otherwise there is danger of operating errors and injuri...

Page 210: ...nsert the charger plug 27 of the power cord into the charger socket 25 of the charger Connect the mains cable country specific to the mains supply The operation indicator 30 on the charger lights up f Do not connect the charger to the mains supply until after the correct mains voltage has been set on the mains voltage selector switch 26 Otherwise the charger can be come damaged Switch the battery ...

Page 211: ...es the charging of the next 20 The battery is completely charged when all five LEDs of indicator 15 light up continuously The charge procedure is automatically ended Disconnect the charger from the mains supply and the battery from the charger When disconnecting the battery from the charg er the battery is automatically switched off The battery can now be inserted into the eBike Troubleshooting Ca...

Page 212: ...orised bicycle dealer For contact data of authorised bicycle dealers please refer to www bosch ebike com Disposal Battery chargers accessories and packaging should be sorted for environmental friendly recycling Do not dispose of battery chargers into house hold waste Only for EC countries According to the European Guide line 2002 96 EC for Waste Electri cal and Electronic Equipment and its impleme...

Page 213: ...iture ou en avion ou de le stocker Appuyer par mégarde sur l in terrupteur Marche Arrêt peut provoquer des blessures f La fonction aide au démarrage ne doit être utilisée que quand vous démarrez ou pous sez le vélo électrique Les roues du vélo électrique doivent être en contact avec le sol lorsque l aide au démarrage est utilisé sinon il y a danger de blessures f N utilisez que les batteries d ori...

Page 214: ... rage de 1 Nm max La fixation 2 risque autre ment d être endommagée Déplacer basculer la fixation voir figure A Desserrez les deux vis 9 se trouvant sur la face inférieure de la fixation 2 Déplacez la fixation sur le guidon ou modifiez l angle d inclinaison Resserrez les deux vis 9 avec un couple de ser rage de 1 Nm max Unité d entraînement Drive Unit 45 N d article 0 275 007 003 Puissance perma n...

Page 215: ...teur de vitesse à la distance correcte Si l indica teur tachymétrique a n affiche toujours pas de vitesse adressez vous à un vélociste autorisé Fonctionnement Mise en service Conditions préalables L entraînement de votre vélo électrique ne peut être activé que si les conditions suivantes sont remplies Une batterie suffisamment chargée est insé rée voir notice d utilisation de la batterie L ordinat...

Page 216: ...ote Dans des versions individuelles le mode assistance est préréglé et ne peut pas être mo difié Il est également possible que moins de modes soient disponibles qu indiqués ici Quatre modes assistance sont disponibles au maximum Pour commuter le mode assistance appuyez plu sieurs fois sur la touche mode 4 jusqu à ce que le mode souhaité apparaisse sur l affichage f Lorsque vous êtes en mode aide a...

Page 217: ... la lampe arrière et l éclairage de l écran Seul l éclairage de l écran peut être allumé ou éteint la lampe avant et la lampe arrière du vélo électrique sont indépendantes de l ordinateur de commande Pour les deux versions appuyez sur la touche light 5 pour allumer l éclairage L affichage d éclairage b apparaît sur l écran Pour éteindre l éclairage appuyez à nouveau sur la touche light 5 l afficha...

Page 218: ...ème de connexion de l unité d entraînement Faire contrôler les raccords et connexions 102 Erreur du capteur de vitesse Faire contrôler le capteur de vitesse 103 Problème de connexion de l éclairage Faire contrôler les raccords et connexions 104 Problème de connexion de l ordinateur de commande Faire contrôler les raccords et connexions 105 Température de l unité d entraînement trop élevée supérieu...

Page 219: ...e d entraînement En choisissant la vitesse appropriée vous pou vez augmenter la vitesse et la portée en appli quant la même force Faire les premières expériences Il est recommandé de faire les premières expé riences avec le vélo électrique à l écart de rues fortement fréquentées Essayez les différents modes d assistance et niveaux d assistance Dès que vous vous sentez sûr de vous vous pouvez circu...

Page 220: ...x transport aérien ou entreprise de transport les exigences spécifi ques à l emballage et au marquage doivent être respectées par ex prescriptions de l ADR Le cas échéant lors de la préparation de l envoi il faut faire appel à un expert en transport de ma tières dangereuses N expédiez pas les batteries si le carter présen te des dommages Recouvrez les contacts à l air libre et emballez la batterie...

Page 221: ...on d une borne à une autre Un court circuit entre les contacts de batterie peut provoquer des brûlures ou un incendie La garantie de Bosch est annulée dans en cas de dommages provoqués par un court circuit survenant dans ce contexte f En cas d une utilisation incorrecte du liqui de pourrait s écouler de la batterie Evitez tout contact En cas de contact accidentel nettoyez à l eau Si le liquide ent...

Page 222: ...terie 19 Fixation supérieure de la batterie standard 20 Batterie standard 21 Fixation inférieure de la batterie standard 22 Sangle 23 Chargeur Caractéristiques techniques Batterie à ions lithium Battery Pack N d article Batterie standard noir Batterie standard blanche Batterie standard argentée Batterie de porte bagages 1 270 020 500 1 270 020 504 1 270 020 501 1 270 020 505 1 270 020 502 1 270 02...

Page 223: ... une longue durée de vie de la batterie Voyant lumineux indiquant l état de charge Les cinq LED vertes du voyant lumineux 15 indi quent l état de charge de la batterie lorsque la batterie est mise en marche Chaque LED correspond à environ 20 de ca pacité Si la batterie est complètement déchar gée les cinq LED s allument L état de charge de la batterie mise en marche est également indiqué par l ord...

Page 224: ...L entraînement du vélo électrique est en même temps également éteint Si l entraînement n est pas sollicité pendant 10 min par ex parce que le vélo électrique est arrêté la batterie s éteint automatiquement pour économiser l énergie La batterie est protégée par la Electronic Cell Protection ECP contre décharge profonde surcharge surchauffe et court circuit En cas de danger la batterie s éteint auto...

Page 225: ...ilisateur privé peut transporter les batteries sur la route sans conditions supplémentaires Lors d un transport par utilisateurs commerciaux ou par tiers par ex transport aérien ou entrepri se de transport les exigences spécifiques à l em ballage et au marquage doivent être respectées par ex prescriptions de l ADR Le cas échéant lors de la préparation de l envoi il faut faire appel à un expert en ...

Page 226: ...augmente le risque d in cendie f En cas d endommagement et d utilisation non conforme de la batterie des vapeurs peuvent s échapper Ventilez le lieu de tra vail et en cas de malaises consultez un médecin Les vapeurs peuvent irriter les voies respiratoires f Ne laissez pas les enfants sans surveillance Veillez à ce que les enfants ne jouent pas avec le chargeur f Les enfants et les personnes souffr...

Page 227: ...onction ner sous 220 V Introduisez ensuite la fiche de l appareil 27 du câble de secteur dans la prise de l appareil 25 Branchez le câble de secteur différent selon le pays sur le réseau d alimentation électrique Le voyant de fonctionnement 30 du chargeur s al lume f Ne raccordez le chargeur au réseau électri que que si la tension de secteur correcte et réglée sur le commutateur 26 Sinon le charge...

Page 228: ...ée quand les cinq LED du voyant lumineux 15 sont allumées en permanence Le processus de charge est automatiquement interrompu Déconnectez le chargeur du réseau électrique et la batterie du chargeur Lorsque la batterie est déconnectée du char geur elle est automatiquement éteinte Vous pouvez maintenant monter la batterie dans le vélo électrique Défaut Causes et remèdes Mode de charge Mode de char g...

Page 229: ...données de contact de vélo cistes autorisés sur le site internet www bosch ebike com Elimination des déchets Les chargeurs ainsi que leurs accessoires et em ballages doivent pouvoir suivre chacun une voie de recyclage appropriée Ne jetez pas les chargeurs avec les ordures ménagères Seulement pour les pays de l Union Européenne Conformément à la directive euro péenne 2002 96 CE relative aux déchets...

Page 230: ...e o avión o al guardarla En caso contrario podría accidentarse al accionar for tuitamente el interruptor de conexión desco nexión f La función de Asistencia al arrancar deberá usarse exclusivamente al poner a rodar la eBike o al empujarla Puede llegar a lesionar se si las ruedas de la eBike no están tocando el firme en el momento de utilizar la Asisten cia al arrancar f Únicamente utilice baterías...

Page 231: ...0 o 9 con un par de apriete máximo de 1 Nm En caso contrario podría dañarse el soporte 2 Desplazamiento o inclinación del soporte ver figura A Afloje ambos tornillos 9 en la parte inferior del soporte 2 Desplace el soporte sobre el manillar o varíe su inclinación A continuación apriete de nuevo ambos tornillos 9 con un par de apriete máximo de 1 Nm Unidad motriz Drive Unit 45 Nº de artículo 0 275 ...

Page 232: ...en marcha Requisitos El accionamiento de su eBike solamente puede activarse si se cumplen los siguientes requisitos Aplicación de una batería suficientemente car gada ver instrucciones de uso de la batería Ordenador de control correctamente fijado a su soporte ver Montaje y desmontaje del ordenador de control página Español 3 Captador de velocidad correctamente conec tado y ajustado ver Comprobaci...

Page 233: ... tantas veces como sea nece sario hasta visualizar el modo deseado en el indicador f Al utilizar la Asistencia al arrancar el indicador f se apaga y se memoriza el modo de asistencia ajustado Ajuste del nivel de asistencia En el modo de asistencia seleccionado puede Ud alterar en todo momento el nivel de asisten cia incluso durante la marcha Observación En ciertas ejecuciones es posible que el mod...

Page 234: ...luminación de la pantalla la luz delan tera y trasera de la eBike se conectan inde pendientemente del ordenador de control En ambas ejecuciones pulse la tecla light 5 para conectar la iluminación En el display apa rece el indicador de iluminación b Para apagar la iluminación vuelva a pulsar la tecla light 5 el indicador de iluminación b se apaga Indicadores de velocidad y distancia Observación Seg...

Page 235: ... la unidad motriz 101 Problema de conexión en la unidad motriz Deje verificar las conexiones y las uniones 102 Fallo en captador de velocidad Haga verificar el captador de velocidad 103 Problema de conexión en la iluminación Deje verificar las conexiones y las uniones 104 Problema de conexión del ordenador de control Deje verificar las conexiones y las uniones 105 Temperatura excesiva en la unidad...

Page 236: ...ccionamiento Seleccionando el cambio de marcha correcto Ud puede aumentar la velocidad y el alcance aplicando la misma fuerza muscular Acumulación de experiencia Se recomienda ir adquiriendo experiencia con la eBike en lugares alejados de carreteras con mu cho tráfico Pruebe diferentes modos y niveles de asisten cia Cuando se sienta seguro Ud podrá circular con su eBike en el tráfico igual que con...

Page 237: ...rciales o envío por terceros p ej transporte aéreo o agencia de transportes deberán considerarse las exigencias especiales en cuanto a su emba laje e identificación p ej prescripciones ADR Si fuese preciso puede recurrirse a un experto en mercancías peligrosas al preparar la pieza para su envío Únicamente envíe las baterías si su carcasa no está dañada Si los contactos no van protegidos cúbralos c...

Page 238: ...ar sus contactos El cortocircuito de los contactos de la batería puede causar quema duras o un incendio En los daños derivados de un cortocircuito por los motivos antedichos Bosch anula cualquier derecho a garantía f La utilización inadecuada de la batería pue de provocar fugas de líquido Evite el con tacto con él En caso de un contacto acci dental enjuagar el área afectada con abundante agua Si h...

Page 239: ...dura de la batería 19 Soporte superior de la batería estándar 20 Batería estándar 21 Soporte inferior de la batería estándar 22 Correa de transporte 23 Cargador Datos técnicos Batería de Iones de Litio Battery Pack Nº de artículo Batería estándar negra Batería estándar blanca Batería estándar plateada Batería para por taequipajes 1 270 020 500 1 270 020 504 1 270 020 501 1 270 020 505 1 270 020 50...

Page 240: ...anera se consigue una eleva da vida útil de la batería Indicador de estado de carga El nivel de carga de la batería se señaliza me diante los cinco LED verdes del indicador de carga 15 Cada uno de los LED corresponde por lo tanto a una capacidad aprox de 20 Estando comple tamente cargada la batería se encienden los cin co LED El nivel de carga de la batería conectada se muestra además en el ordena...

Page 241: ...D de la pantalla 15 se apagan Con ello se desco necta asimismo el accionamiento de la eBike Si en el transcurso de 10 min el accionamiento sigue inactivo p ej al estar detenida la eBike la batería se desconecta automáticamente con el fin de ahorrar energía La batería va protegida contra alta descarga so brecarga sobretemperatura y cortocircuito por Electronic Cell Protection ECP Protección Electró...

Page 242: ... jados en la legislación sobre mercancías peligro sas Las baterías pueden ser transportadas por carretera por usuarios particulares sin más impo siciones En caso de transporte por usuarios comerciales o envío por terceros p ej transporte aéreo o agen cia de transportes deberán considerarse las exi gencias especiales en cuanto a su embalaje e identificación p ej prescripciones ADR Si fuese preciso ...

Page 243: ...ntorno inflamable Puesto que el car gador se calienta durante el proceso de car ga existe un peligro de incendio f Si la batería se daña o usa de forma inapro piada puede que ésta emane vapores Ven tile con aire fresco el recinto y acuda a un médico si nota alguna molestia Los vapores pueden irritar las vías respiratorias f Vigile a los niños Con ello se evita que los ni ños jueguen con el cargado...

Page 244: ...dor Los cargadores para 230 V pueden funcionar también a 220 V Introduzca entonces el enchufe 27 del cable de red en el conector hembra 25 del cargador Conecte el enchufe específico de cada país a la red El indicador de operación 30 del carga dor se enciende f Únicamente conecte el cargador a la red tras haber ajustado la tensión de red co rrecta en el selector de tensión 26 En caso contrario podr...

Page 245: ...atería se encuentra completamente cargada al encenderse permanentemente los cinco LED del indicador 15 El proceso de carga es inte rrumpido automáticamente Desconecte el cargador de la red y la batería del cargador Al desconectar del cargador la batería ésta se desconecta automáticamente Acto seguido puede Ud montar la batería en la eBike Fallos causas y soluciones Modo de carga Carga normal FAST ...

Page 246: ...cicletas autorizada Las direcciones de tiendas de bicicletas autori zadas las encuentra en la página de internet www bosch ebike com Eliminación Los cargadores accesorios y embalajes deberán someterse a un proceso de recuperación que respete el medio ambiente No arroje los cargadores a la basura Sólo para los países de la UE Conforme a la Directiva Europea 2002 96 CE sobre aparatos eléc tricos y e...

Page 247: ...i dal produt tore della bicicletta specificatamente per la Vostra eBike In questo modo l unità di azio namento viene protetta da sovraccarico e danneggiamento f Rimuovere la batteria dalla eBike prima di iniziare interventi p es montaggio manu tenzione ecc alla eBike prima di traspor tarla con l auto o l aereo oppure prima di conservarla In caso di azionamento acciden tale dell interruttore di acc...

Page 248: ...ualizzazione computer di controllo a Visualizzazione tachimetro b Visualizzazione illuminazione c Visualizzazione grado di assistenza d Visualizzazione aiuto all avviamento e Visualizzazione multifunzione f Visualizzazione modo di assistenza e codice errore g Indicatore dello stato di ricarica della batteria Dati tecnici Unità di azionamento Drive Unit 45 Codice prodotto 0 275 007 003 Potenza cont...

Page 249: ...nché l aziona mento non possa essere utilizzato da terzi non autorizzati Senza il computer di con trollo l azionamento non può essere inserito Controllo del sensore di velocità vedi figura D Il sensore di velocità 11 ed il relativo magnete per raggi 12 devono essere montati in modo tale che durante un giro della ruota il magnete per raggi si muova davanti al sensore di velocità ad una distanza min...

Page 250: ...ntrollo sono possibili solamente se la batteria eBike è attivata Il computer di controllo non è dotato di una propria alimentazione di corrente Indicatore dello stato di carica della batteria Oltre che sull indicatore dello stato di carica che si trova sulla batteria stessa lo stato di carica può essere letto anche nella visualizzazione g del computer di controllo Nella visualizzazione g ogni barr...

Page 251: ... utilizzata esclusivamente all avviamento oppure mentre si spinge l eBike Se durante l impiego dell aiuto all avviamento le ruote non hanno alcun contatto con il terreno esi ste il pericolo di lesioni Per l attivazione dell aiuto all avviamento pre mere il tasto 6 per più di 1 s e tenerlo premu to L azionamento dell eBike viene attivato la vi sualizzazione d lampeggia e le visualizzazioni c e e f ...

Page 252: ...alizzazione multifunzione e Visualizzazione codice errore I componenti dell azionamento dell eBike ven gono costantemente controllati automaticamen te Se viene individuato un errore compare nella visualizzazione f il relativo codice di errore In funzione del tipo di errore l azionamento vie ne eventualmente disattivato automaticamente Il proseguimento della corsa senza assistenza tramite l azionam...

Page 253: ...di marcia interrompere brevemente di pedalare In questo modo il cam bio di marcia diventa più facile e si riduce l usura degli organi di azionamento Grazie alla selezione della marcia corretta è pos sibile con lo stesso impiego di forza aumentare la velocità e l autonomia 103 Problema di collegamento dell illuminazione Fare controllare raccordi e collegamenti 104 Problemi di collegamento del compu...

Page 254: ...le del cambio marcia tanto inferiore sarà l energia che l azionamento dell eBike consu merà e tanto maggiore sarà l autonomia di una carica della batteria Tanto maggiore sarà selezionato il grado di assistenza modo e livello di assistenza a condizioni altrimenti uguali tanto più limita ta sarà l autonomia Trattamento e cura dell eBike Osservare le temperature di funzionamento e di magazzinaggio de...

Page 255: ...de relative al trasporto delle batterie rivolgersi ad un rivenditore autorizzato di biciclette Presso il rivenditore è possibile or dinare anche un imballo per il trasporto adatto Smaltimento Avviare ad un riciclaggio rispettoso dell ambiente l unità di azionamento il computer di comando la batteria il sen sore di velocità accessori ed imballaggi non più impiegabili Non gettare l eBike ed i suoi c...

Page 256: ...tti della batteria può causare ustioni oppure fuoco In caso di cor tocircuiti verificatisi in relazione a queste condizioni decadrà qualsiasi pretesa di ga ranzia tramite Bosch f In caso di impiego errato può fuoriuscire liquido dalla batteria Evitare il contatto con il liquido stesso In caso di contatto acci dentale sciacquare con acqua Se il liquido dovesse venire a contatto con gli occhi richie...

Page 257: ...sura batteria 18 Dispositivo di chiusura batteria 19 Supporto superiore della batteria standard 20 Batteria standard 21 Supporto inferiore della batteria standard 22 Cinghia portante 23 Stazione di ricarica Dati tecnici Batteria agli ioni di litio Battery Pack Codice prodotto Batteria standard nera Batteria standard bianca Batteria standard argentata Batteria per montag gio al portapacchi 1 270 02...

Page 258: ...to di carica I cinque LED verdi dell indicatore dello stato di carica 15 indicano con batteria attivata lo stato di carica della batteria stessa Ogni LED corrisponde a circa il 20 della capa cità Quando la batteria è completamente carica sono illuminati tutti i cinque LED Lo stato di carica della batteria attivata viene inoltre visualizzato sul computer di controllo A riguardo leggere ed osservare...

Page 259: ...si spengono In questo modo l azionamento dell eBike viene spento anch esso Se per ca 10 min non viene richiesto alcun in tervento dell azionamento p es poichè l eBike è ferma la batteria di spegne automaticamente per ragioni di risparmio energetico La batteria è protetta tramite l Electronic Cell Protection ECP contro lo scaricamento tota le il sovraccarico il surriscaldamento ed il cor tocircuito...

Page 260: ...ette ai requisiti di legge re lativi a merci pericolose Le batterie possono es sere trasportate su strada tramite l utente priva to senza ulteriori precauzioni In caso di trasporto tramite utente commerciale oppure in caso di trasporto tramite terzi p es trasporto aereo oppure spedizioniere devono essere osservati particolari requisiti relativi ad imballo e marcatura ad es norme dell ADR In caso d...

Page 261: ...iscaldamento del caricabatteria che si ha durante la fase di ricarica si viene a cre are il pericolo di incendio f In caso di danneggiamento ed un uso non corretto della batteria possono fuoriuscire vapori Aerare con aria fresca ed in caso di disturbi rivolgersi ad un medico I vapori possono irritare le vie respiratorie f Sorvegliare i bambini In questo modo viene assicurato che i bambini non gioc...

Page 262: ...ibile selezionare tra 115 V e 230 V f Osservare la tensione di rete La tensione della rete deve corrispondere a quella indica ta sulla stazione di ricarica Stazioni di ricari ca previste per l uso con 230 V possono esse re azionate anche a 220 V Inserire poi la spina dell apparecchio 27 del ca vo elettrico nella presa dell apparecchio 25 sulla stazione di ricarica Collegare il cavo elettrico speci...

Page 263: ...cautela in caso di contatto con la stazione di ricarica durante l opera zione di ricarica Mettere i guanti di prote zione In modo particolare nel funziona mento di ricarica normale e a elevate tempe rature ambientali la stazione di ricarica può riscaldarsi notevolmente Nota bene Prestare attenzione affinchè la sta zione di ricarica durante l operazione di ricarica sia ben arieggiata e le aperture ...

Page 264: ...riche ed elettroniche RAEE ed all attua zione del recepimento nel diritto nazionale le stazioni di ricarica di ventate inservibili devono essere raccolte sepa ratamente ed essere inviate ad una riutilizzazio ne ecologica Con ogni riserva di modifiche tecniche Causa Rimedi L indicatore di funzionamento 30 non è illu minato non è possibile alcuna operazione di ricarica Selezionata tensione di rete e...

Page 265: ...houd enz aan de eBike voordat u deze per auto of vliegtuig vervoert en voordat u deze opbergt Bij per ongeluk bedienen van de aan uit schakelaar bestaat verwondingsgevaar f De functie starthulp mag uitsluitend bij het wegrijden en het lopen met de eBike worden gebruikt Als de wielen van de eBike bij het gebruik van de starthulp geen contact met de grond maken bestaat gevaar voor letsel f Gebruik a...

Page 266: ...even 9 aan de onderzijde van de houder 2 los Verschuif de houder op het stuur of verander de kantelhoek Draai de beide schroeven 9 met een aandraaimoment van maxi maal 1 Nm weer vast Houder draaien zie afbeelding B Draai de schroef 10 aan de bovenzijde van de houder 2 los Draai het bovenste deel van de houder zodanig dat u de bedieningscomputer 1 na het inzetten zie Bedieningscomputer aan brengen ...

Page 267: ... erkende rijwiel vakhandel Gebruik Ingebruikneming Voorwaarden De aandrijving van uw eBike kan alleen geacti veerd worden als aan de volgende voorwaarden is voldaan Er is een voldoende opgeladen accu ge plaatst zie gebruiksaanwijzing van de accu De bedieningscomputer is correct in de houder geplaatst zie Bedieningscomputer aanbrengen en verwijderen pagina Nederlands 3 De snelheidssensor is correct...

Page 268: ...teld en kan deze niet worden gewijzigd Het is ook mogelijk dat er uit minder modi dan hier ver meld kan worden gekozen Maximaal vier ondersteuningsmodi zijn beschik baar Als u van ondersteuningsmodus wilt verande ren drukt u zo vaak op de toets mode 4 tot de gewenste modus in de indicatie f verschijnt Tijdens het gebruik van de starthulp gaat de in dicatie f uit De ingestelde ondersteuningsmo dus ...

Page 269: ...yver lichting in en uitgeschakeld worden Alleen de displayverlichting kan in en uitge schakeld worden Voor en achterlicht van de eBike zijn onafhankelijk van de bedienings computer Bij beide uitvoeringen drukt u voor het inschake len van de verlichting op de toets light 5 In het display verschijnt de verlichtingsindicatie b Voor het uitschakelen van de verlichting drukt u opnieuw op de toets light...

Page 270: ...nterne fout van aandrijfeen heid Aandrijfeenheid laten controleren 101 Verbindingsprobleem van aandrijfeenheid Aansluitingen en verbindingen laten controleren 102 Fout van snelheidssensor Snelheidssensor laten controleren 103 Verbindingsprobleem van verlichting Aansluitingen en verbindingen laten controleren 104 Verbindingsprobleem van bedieningscomputer Aansluitingen en verbindingen laten control...

Page 271: ... slijtage van de aandrijflijn beperkt Door de keuze van de juiste versnelling kunt u bij gelijke krachtsinspanning de snelheid en het bereik vergroten Eerste ervaringen opdoen Geadviseerd wordt om de eerste ervaringen met de eBike op te doen op een weg zonder druk verkeer Probeer verschillende ondersteuningsmodi en ondersteuningsniveaus uit Zodra u zich zeker voelt kunt u met de eBike net als met ...

Page 272: ...kelijke gebruikers of bij ver voer door derden bijv luchtvervoer of vervoers bedrijf moeten bijzondere eisen ten aanzien van verpakking en markering in acht worden ge nomen bijv ADR voorschriften Indien ge wenst kan bij de voorbereiding van de verzen ding een deskundige voor gevaarlijke stoffen worden geraadpleegd Verzend de accu s alleen als de behuizing onbe schadigd is Plak blootliggende contac...

Page 273: ...sen de accucontacten kan brandwonden of brand tot gevolg hebben Bij in dit verband ontstane schade door kortsluiting vervalt el ke aanspraak op garantie door Bosch f Bij verkeerd gebruik kan er vloeistof uit de accu lekken Voorkom contact daarmee Bij onvoorzien contact met water afspoelen Als de vloeistof in de ogen komt dient u bovendien een arts te raadplegen Gelekte accuvloeistof kan tot huidir...

Page 274: ...ze niet Neem contact op met een erkende rijwielhandel Accu opladen f Gebruik alleen het oplaadapparaat dat op de pagina met afbeeldingen vermeld staan Alleen dit oplaadapparaat is afgestemd op de bij de eBike gebruikte lithiumionaccu Opmerking De accu wordt gedeeltelijk opgela den geleverd Om de volledige capaciteit van de accu te verkrijgen laadt u voor het eerste gebruik de accu volledig met het...

Page 275: ...dat de sleutel eruit valt of de accu van een geparkeerde eBike door anderen wordt meegenomen Als u de standaardaccu wilt verwijderen 20 schakelt u deze uit en opent u het slot met de sleutel 17 Kantel de accu uit de bovenste hou der 19 en trek deze aan de draagriem 22 uit de onderste houder 21 Als u de bagagedrageraccu wilt verwijderen 14 schakelt u deze uit en opent u het slot met de sleutel 17 T...

Page 276: ...op te laden Opmerking Als de accu lange tijd in lege toe stand wordt bewaard kan deze ondanks de ge ringe zelfontlading worden beschadigd en kan de opslagcapaciteit sterk worden verminderd Het is niet aan te raden de accu langdurig aan het oplaadapparaat aangesloten te laten Bewaaromstandigheden Bewaar de accu bij voorkeur op een droge en goed geventileerde plaats Bescherm deze te gen vocht en wat...

Page 277: ...g beweegt Neem ook eventuele overige nationale voorschriften in acht Neem bij vragen over het vervoer van de accu s contact op met een erkende rijwielhandel Bij de rijwielhandel kunt u ook een geschikte trans portverpakking bestellen Afvalverwijdering Accu s toebehoren en verpakkingen moe ten op een voor het milieu verantwoorde wijze worden gerecycled Gooi accu s niet bij het huisvuil Alleen voor ...

Page 278: ...j het opladen optredende verwarming van het oplaadapparaat bestaat brandgevaar f Bij beschadiging en onjuist gebruik van de accu kunnen er dampen vrijkomen Zorg voor frisse lucht en raadpleeg bij klachten een arts De dampen kunnen de luchtwegen irriteren f Houd toezicht op kinderen Daarmee wordt gewaarborgd dat kinderen niet met het op laadapparaat spelen f Kinderen en personen die op grond van hu...

Page 279: ...t 220 V worden gebruikt Steek vervolgens de apparaatstekker 27 van het netsnoer in de apparaataansluiting 25 op het oplaadapparaat Sluit het netsnoer verschilt per land op het stroomnet aan De functie indicatie 30 op het oplaadapparaat gaat branden f Verbind het oplaadapparaat pas met het stroomnet als op de netspanningschakelaar 26 de juiste netspanning is ingesteld Het oplaadapparaat kan anders ...

Page 280: ...volgende 20 aan De accu is volledig opgeladen als alle vijf leds van de indicatie 15 continu branden Het opla den wordt automatisch onderbroken Koppel het oplaadapparaat los van het stroom net en de accu van het oplaadapparaat Als de accu van het oplaadapparaat wordt losge koppeld wordt de accu automatisch uitgescha keld U kunt de accu nu in de eBike plaatsen Oorzaken en oplossingen van fouten Opl...

Page 281: ...wielhandel Contactgegevens van de erkende rijwielhandel vindt u op de internetpagina www bosch ebike com Afvalverwijdering Oplaadapparaten toebehoren en verpakkingen moeten op een voor het milieu verantwoorde wijze worden hergebruikt Gooi oplaadapparaten niet bij het huisvuil Alleen voor landen van de EU Volgens de Europese richtlijn 2002 96 EG over elektrische en elektronische oude apparaten en d...

Page 282: ... det Util sigtet betjening af start stop kontakten er forbundet med kvæstelsesfare f Funktionen starthjælp må udelukkende bru ges til at starte eller skubbe eBiken Har eBikens hjul ikke nogen kontakt med jorden når starthjælpen bruges kan man komme til skade f Brug kun originale Bosch batterier der er blevet godkendt til din eBike af produen ten Brug af andre batterier kan føre til kvæ stelser og ...

Page 283: ...du tydeligt kan se på betjeningscomputeren 1 efter isætningen se Isætning og udtagning af cykelcomputeren Drej skruen 10 fast igen med et tilspændingsmoment på maks 1 Nm Isætning og udtagning af cykel computeren se Fig C Cykelcomputeren sættes i ved at dreje den ca 30 før den anbringes på holderen 2 og dreje den til højre til den falder i hak Cykelcomputeren tages ud ved at dreje den ca 30 til ven...

Page 284: ...en belastning Når batteriet tændes tændes også samtidigt cy kelcomputerens display Cykelcomputeren viser batteriets ladetilstand samt drivenhedens ind stillinger Drevet aktiveres så snart du træder i pedalerne undtagen i funktionen starthjælp se Tænd sluk for starthjælpen side Dansk 4 Understøtningsgraden retter sig efter indstillin gerne på betjeningscomputeren Så snart du holder op med at træde ...

Page 285: ... Starthjælpen kan bruges som ekstra understøt ning de første meter hvis det er besværligt at komme i gang som f eks ved lyskrydset eller oppe på bjerget Den kan også bruges som skubbehjælp i laveste gear f Funktionen starthjælp må udelukkende bru ges til at starte eller skubbe eBiken Har eBikens hjul ikke nogen kontakt med jorden når starthjælpen bruges kan man komme til skade Starthjælpen tændes ...

Page 286: ... da til en af de to indikatorer og tryk så på tasten info reset 3 til indikatoren står på nul Når starthjælpen er i brug slukker multifunkti onsindikatoren e Visning af fejlkode eBike drevets komponenter kontrolleres auto matisk hele tiden Konstateres en fejl fremkom mer den pågældende fejlkode i indikatoren f Drevet slukkes i givet fald automatisk afhængigt af fejltypen En viderekørsel uden under...

Page 287: ... driv strengen slides ikke så hurtigt Vælges det rigtige gear kan du ved ensblivende kraftforbrug øge hastigheden og rækkevidden De første erfaringer Det anbefales at samle de første anbefalinger med eBike på gader og veje med lidt trafik Prøv forskellige understøttende funktioner og understøttende trin Så snart du føler dig sikker kan du også køre med eBike lige som en almin delig cykel på gader ...

Page 288: ... peraturer Vedligeholdelse og service Vedligeholdelse og rengøring Hold alle komponenter rene på din eBike især kontakterne til batteri og tilhørende holder Rengør den forsigtigt med en fugtig blød klud Alle komponenter inkl drivenhed må hverken dyppes i vand eller rengøres med en højtryks renser Til service eller reparation af eBike bedes du kontakte en autoriseret cykelforhandler Kundeservice og...

Page 289: ...n i EU lande Iht det europæiske direktiv 2002 96 EF skal kasseret elektro værktøj og iht det europæiske di rektiv 2006 66 EF skal defekte el ler opbrugte akkuer batterier indsamles separat og genbruges iht gældende miljøforskrifter Aflever venligst kasserede batterier til en autori seret cykelforhandler Li Ion Læs og overhold henvisnin gerne i afsnit Transport side Dansk 7 Ret til ændringer forbeh...

Page 290: ...utte kontakterne En kort slutning mellem batterikontakterne kan føre til forbrændinger eller brand Opslutter der i den ne sammenhæng kortslutningsskader bortfal der ethvert garantikrav over for Bosch f Forkert anvendelse kan medføre at væske slipper ud af batteriet Undgå at komme i kontakt med denne væske Hvis det allige vel skulle ske skylles med vand Søg læge hvis væsken kommer i øjnene Udstrømm...

Page 291: ... gang f Oplad ikke et beskadiget batteri og tag det ikke i brug Kontakt en autoriseret cykelfor handler Opladning af batteriet f Brug kun det ladeaggregat der findes på grafiksiden Kun dette ladeaggregat er af stemt i forhold til det Li ion batteri der bru ges på din eBike Bemærk Batteriet er delvist opladt ved udleve ringen For at sikre at batteriet fungerer 100 oplades batteriet fuldstændigt i l...

Page 292: ...il udtagning af standard batteriet 20 slukkes det og låsen åbnes med nøglen 17 Vip batteriet ud af den øverste holder 19 og træk det vha bæ reremmen 22 ud af den nederste holder 21 Til udtagning af bagagebærer batteriet 14 sluk kes det og låsen åbnes med nøglen 17 Træk batteriet ud af holderen 13 Drift Ibrugtagning f Brug kun originale Bosch batterier der er blevet godkendt til din eBike af produe...

Page 293: ...t opbevares ved en stuetemperatur på ca 20 C Sørg for at den maksimale opbevaringstempe ratur ikke overskrides Sørg for at batteriet f eks om sommeren ikke opbevares bilen og opbevar det sådan at det ikke udsættes for di rekte solstråler Vedligeholdelse og service Vedligeholdelse og rengøring Renhold batteriet Rengør det forsigtigt med en fugtig blød klud Batteriet må hverken dyppes i vand eller r...

Page 294: ...ropæiske direktiv 2002 96 EF skal kasseret elektro værktøj og iht det europæiske direktiv 2006 66 EF skal defekte eller opbrugte akkuer batterier indsamles separat og genbruges iht gældende miljøforskrifter Aflever venligst kasserede batterier til en autori seret cykelforhandler Li Ion Læs og overhold henvisnin gerne i afsnit Transport side Dansk 12 Ret til ændringer forbeholdes OBJ_BUCH 1557 001 ...

Page 295: ...ller i brændbare omgivelser Pas på Lade aggregatet bliver varmt under opladningen Brandfare f Beskadiges batteriet eller bruges det for kert kan der sive dampe ud Tilfør frisk luft og søg læge hvis du føler dig utilpas Dam pene kan irritere luftvejene f Sørg for at børn er under opsyn Dermed sikres det at børn ikke leger med ladeaggre gatet f Børn og personer der på grund af deres fy siske sensori...

Page 296: ... tilsluttes 220 V Sæt så netkablets stik 27 ind i bøsningen 25 på ladeaggregatet Tilslut netkablet landespecifik til strømnettet Driftsindikatoren 30 på ladeaggregatet lyser f Forbind først ladeaggregatet med strøm nettet når den rigtige netspænding er ind stillet med netspændingskontakten 26 El lers kan ladeaggregatet blive beskadiget Sluk for batteriet og tag det ud af holderen på eBike Læs og o...

Page 297: ... af de næste 20 Batteriet er helt opladt når alle fem LED lamper i indikatoren 15 lyser hele tiden Opladningen afbrydes automatisk Afbryd ladeaggregatet fra strømnettet og batte riet fra ladeaggregatet Når batteriet afbrydes fra ladeaggregatet sluk kes batteriet automatisk Nu kan du sætte batteriet ind i eBike Fejl Årsager og afhjælpning Ladedrift Normal oplad ningsfunktion FAST Lydløs oplad nings...

Page 298: ...s stillet til en autoriseret cykelforhandler Kontaktdata for autoriserede cykelforhandlere findes på internetsiden www bosch ebike com Bortskaffelse Ladeaggregater tilbehør og emballage skal gen bruges på en miljøvenlig måde Smid ikke ladeaggregater ud sammen med det almindelige husholdningsaffald Gælder kun i EU lande Iht det europæiske direktiv 2002 96 EF om affald af elektrisk og elektronisk ud...

Page 299: ...inns risk för personskada f Funktionen för starthjälp får endast använ das när elcykeln startas eller leds Om elcy kelns hjul inte har kontakt med marken när starthjälpen används finns risk för person skada f Använd endast originalbatterier från Bosch som tillverkaren rekommenderat för din elcykel Om andra batterier används finns risk för personskada och brand Om andra batterier används fritar sig...

Page 300: ...ator 1 se Insättning och borttagning av manöverdatorn Dra åter fast skruven 10 med ett åtdragningsmoment på högst 1 Nm Insättning och borttagning av manöver datorn se bild C För insättning av manöverdatorn lägg upp den svängd om ca 30 på fästet 2 och vrid den sedan medurs mot stopp För borttagning vrid manöverdatorn ca 30 moturs och dra den sedan ur fästet 2 f Ta bort manöverdatorn från parkerad e...

Page 301: ...amtidigt med batteriet Manöverdatorn indikerar batteri ets laddningstillstånd och drivenhetens inställ ningar Drivningen aktiveras så fort du trampar peda lerna förutom vid starthälpfunktionen se Till frånkoppling av starthjälpen sidan Svenska 4 Assistansgraden är relaterad till inställningarna på manöverdatorn Så fort du slutat trampa pedalerna i normaldrift eller en hastighet på 45 km h uppnåtts...

Page 302: ... får endast använ das när elcykeln startas eller leds Om elcy kelns hjul inte har kontakt med marken när starthjälpen används finns risk för person skada För inkoppling av starthjälpen tryck knappen 6 för mer än 1 s och håll sedan knappen ned tryckt Elcykelns drivning startar displayen d blinkar och indikeringarna c e och f slocknar Starthjälpen slås från så fort ett av följande moment inträffar n...

Page 303: ...ktive felkod på displayen f Beroende på felets typ kopplas drivningen even tuellt automatiskt från Fortsatt åkning utan hjälpmotor är alltid möjlig Före långa turer ska elcykeln kontrolleras f Låt alltid en auktoriserad cykelhandlare kontrollera och reparera cykeln Om ett åtgärdat fel fortfarande indikeras kontakta en auktoriserad cykelhandlare Kod Orsak Åtgärd 001 Internt fel på manöverdatorn Låt...

Page 304: ...r du är säker på din sak kan du med elcykeln delta i trafiken som med en vanlig cykel Testa elcykelns räckvidd under olika villkor innan du startar för längre turer Räckvidden påverkas av Med fullt laddat batteri och sparsam åkning är en räckvidd upp till 105 km möjlig Räckvidden påverkas dock av många fler fakto rer som exempelvis Hjälpfunktion och steg växlingssätt däckens typ och lufttryck batt...

Page 305: ...port genom rörelsedrivande person eller tredje person t ex flygfrakt eller spedi tion ska speciella villkor för förpackning och märkning beaktas t ex föreskrifterna i ADR I detta fall måste vid förberedelse av transport en expert för farligt gods konsulteras Försänd endast batterier med oskadat hölje Tejpa öppna kontakter och förpacka batteriet så att det inte kan röras i förpackningen Ta även hän...

Page 306: ...ör att vätska rinner ur batteriet Undvik kontakt med vätskan Vid oavsiktlig kontakt spola med vatten Om vätska kommer i kon takt med ögonen uppsök dessutom läkare Batterivätskan kan medföra hudirritation och brännskada f I skadat eller felanvänt batteri kan ångor uppstå Tillför friskluft och uppsök läkare vid åkommor Ångorna kan leda till irritation i andningsvägarna f Ladda upp batteriet endast i...

Page 307: ... helst laddas upp eftersom detta inte påverkar livslängden Batteriet skadas inte om laddning avbryts Batteriet är försett med en temperaturövervak ning som endast tillåter laddning inom ett tem peraturområde mellan 0 C och 40 C Härvid uppnår batteriet en lång livslängd Laddningsdisplay De fem gröna lysdioderna på laddningsdis playen 15 visar laddningstillståndet för påkopp lat batteri Härvid motsv...

Page 308: ...nsvar In och urkoppling Kontrollera före inkoppling av batteriet att låset 18 är stängt Anvisning Elcykelns pedaler får inte belastas vid inkoppling av batteriet i annat fall begränsas driveffekten För inkoppling av batteriet tryck på På Av knap pen 16 Lysdioderna på displayen 15 tänds och visar samtidigt batteriets laddningstillstånd Anvisning Om batteriets kapacitet underskri der 5 tänds ingen l...

Page 309: ...äffande batterier kontakta en auk toriserad cykelhandlare f Anteckna nyckelns 17 nummer Om nyckeln går förlorad kontakta en auktoriserad cykel handlare Ange nyckelnumret För auktoriserade cykelhandlare kan du hitta kontaktadresser på internetsidan www bosch ebike com Transport Batterierna faller under begreppet riskgods En privat person kan utan ytterligare förpliktelser transportera batterierna p...

Page 310: ...brännbar omgivning Vid laddningen värms laddaren upp vilket kan medföra brandrisk f I skadat eller felanvänt batteri kan ångor uppstå Tillför friskluft och uppsök läkare vid åkommor Ångorna kan leda till irritation i andningsvägarna f Håll barn under uppsikt Barn får inte leka med laddaren f Laddaren får inte användas av barn eller personer med begränsad fysisk sensorisk eller psykisk förmåga elle...

Page 311: ...skylt Laddare märkta med 230 V kan även anslutas till 220 V Anslut sedan nätkabelns stickkontakt 27 till apparathylsdonet 25 på laddaren Anslut landsspecifik nätkabel till strömnätet Driftsdisplayen 30 på laddaren tänds f Anslut laddaren till strömnätet först sedan korrekt nätspänning ställts in på nätspän ningsbrytaren 26 I annat fall kan laddaren skadas Frånkoppla batteriet och ta bort det ur fä...

Page 312: ...gt laddat när de fem lysdio derna lyser kontinuerligt på displayen 15 Ladd ningen avbryts automatiskt Bryt strömmen till laddaren och koppla bort bat teriet från laddaren Batteriet frånkopplas automatiskt när det tas ur laddaren Batteriet kan nu anslutas till elcykeln Fel Orsak och åtgärd Laddning Normal laddning FAST Ljudlös laddning SLOW Laddnings ström 4 A 1 A Driftsindi kering 30 blinkar lyser...

Page 313: ...ad cykelhandlare För auktoriserade cykelhandlare kan du hitta kontaktadresser på internetsidan www bosch ebike com Avfallshantering Laddare tillbehör och förpackning ska omhän dertas på miljövänligt sätt för återvinning Släng inte laddare i hushållsavfall Endast för EU länder Enligt europeiska direktivet 2002 96 EG för kasserade elek triska och elektroniska apparater och dess modifiering till nati...

Page 314: ... bry teren ved en feiltagelse f Starthjelp funksjonen må kun brukes når du starter hhv skyver el sykkelen Hvis hjulene til el sykkelen ikke har bakkekontakt når du bruker starthjelpen er det fare for skader f Bruk kun original Bosch batterier som er godkjent av produsenten for denne el syk kelen Bruk av andre batterier kan medføre skader og brannfare Ved bruk av andre bat terier overtar Bosch inte...

Page 315: ...nn setting og fjerning av styreenheten Skru skru en 10 fast igjen med et tiltrekkingsmoment på maksimalt 1 Nm Innsetting og fjerning av styreenheten se bilde C Til innsetting av styreenheten setter du den dreid 30 på holderen 2 og dreier den med urvi serne helt fast Til fjerning dreier du styreenheten ca 30 mot urviserne og trekker den ut av holderen 2 f Ta ut styreenheten når du har satt fra deg ...

Page 316: ...lastning Med batteriet koples også displayet på styreen heten inn Styreenheten viser batteriets ladetil stand og innstillingene på drivenheten Drivenheten aktiveres når du trør på pedalene unntatt i starthjelp funksjonen se Inn utkop ling av starthjelpen side Norsk 4 Støtte graden retter seg etter innstillingene på styreen heten Når du i normaldrift slutter å trø på pedalene el ler når du har nådd...

Page 317: ... gir f Starthjelp funksjonen må kun brukes når du starter hhv skyver el sykkelen Hvis hjulene til el sykkelen ikke har bakkekontakt når du bruker starthjelpen er det fare for skader Til innkopling av starthjelpen trykker du på tas ten 6 i mer enn 1 s og holder den trykt inne Drivverket til el sykkelen koples inn indikatoren d blinker og indikatorene c e og f slokner Starthjelpen koples ut når et a...

Page 318: ...istreres en feil vises tilsvarende feilkode på indikatoren f Avhengig av feiltypen koples drivverket eventu elt også automatisk ut Videresykling uten støtte fra drivverket er alltid mulig el sykkelen bør sjekkes før videre turer f La alle kontroller og reparasjoner uteluk kende utføres av en autorisert sykkel for handler Hvis en feil fortsatt anvises til tross for at den er utbedret må du også hen...

Page 319: ...ttemoduser og støttetrinn Når du føler deg sikker kan du sykle med el syk kelen i vanlig trafikk som med en vanlig sykkel Test rekkevidden til el sykkelen under forskjellige vilkår før du planlegger lengre krevende turer Innflytelser på rekkevidden Med fullt oppladet batteri og sparsommelig kjø remåte er en rekkevidde på opp til 105 km mulig Men rekkevidden påvirkes av mange faktorer som for eksem...

Page 320: ... som utføres av yrkesmessige bru kere eller ved transport av tredje personer f eks lufttransport eller spedisjon må det opp fylles spesielle krav til emballasje og merking f eks de tyske forskriftene ADR Ved behov må du konsultere en ekspert for farlig gods ved for beredelse av forsendelsen Send batteriene kun hvis huset ikke er skadet Lim igjen de åpne kontaktene og pakk batteriet slik at det ikk...

Page 321: ...t Unngå kontakt med denne væsken Ved tilfeldig kontakt må det skylles med vann Hvis det kommer væske i øynene må du i tillegg oppsøke en lege Batterivæske som renner ut kan føre til irritasjoner på hu den eller forbrenninger f Ved skader og usakkyndig bruk av batteriet kan det slippe ut damp Tilfør frisk luft og gå til lege hvis det oppstår helseproblemer Dampene kan irritere åndedrettsorganene f ...

Page 322: ...et mellom 0 C og 40 C Slik oppnås en lang levetid for batteriet Ladetilstandsindikator De fem grønne LEDene på ladetilstandsindikato ren 15 viser batteriets ladetilstand ved innko plet batteri Hver LED tilsvarer ca 20 kapasitet Ved et helt oppladet batteri lyser alle fem LEDene Ladetilstanden til det innkoplede batteriet anvi ses dessuten på styreenheten Les og følg drifts instruksen til drivenhet...

Page 323: ...g av batteriet er en av forutsetningene for igangsetting av el sykkel driften Les og følg driftsinstruksen til drivenhet og styreenhet Til utkopling av batteriet trykker du på på av tasten 16 LEDene på indikatoren 15 slokner el sykkel driften koples da også ut Hvis det ikke aktiveres en driveffekt i løpet av ca 10 min f eks fordi el sykkelen står stille ko ples batteriet automatisk ut for å spare ...

Page 324: ...ppfyller kravene i loven for farlig gods En privat bruker kan transportere batte riene uten spesielle krav på vanlige veier Ved transport som utføres av yrkesmessige bru kere eller ved transport av tredje personer f eks lufttransport eller spedisjon må det opp fylles spesielle krav til emballasje og merking f eks de tyske forskriftene ADR Ved behov må du konsultere en ekspert for farlig gods ved f...

Page 325: ... i brennbare omgivelser Ladeapparatet oppvarmes under oppladingen og det er der for fare for brann f Ved skader og usakkyndig bruk av batteriet kan det slippe ut damp Tilfør frisk luft og gå til lege hvis det oppstår helseproblemer Dampene kan irritere åndedrettsorganene f Barn må være under oppsyn Slik kan du sør ge for at barn ikke leker med ladeapparatet f Barn og personer som på grunn av sine ...

Page 326: ... med 230 V kan også brukes med 220 V Sett så apparatstøpselet 27 til strømledningen inn i apparatkontakten 25 på ladeapparatet Strømledningen avhengig av landet koples til strømnettet Driftsindikatoren 30 på ladeappa ratet lyser f Forbind ladeapparatet først med strømnet tet når korrekt nettspenning er innstilt på nettspenningsbryteren 26 Ladeapparatet kan ellers ta skade Slå av batteriet og ta de...

Page 327: ...t er fullstendig oppladet når alle fem LEDer på indikatoren 15 lyser kontinuerlig Opp ladingen avbrytes automatisk Adskill ladeapparatet fra strømnettet og batte riet fra ladeapparatet Når batteriet skilles fra ladeapparatet koples batteriet automatisk ut Du kan nå sette batteriet inn i el sykkelen Feil Årsaker og utbedring Opplading Normal opplading FAST Stilleopp lading SLOW Ladestrøm 4 A 1 A Dr...

Page 328: ...g til en autorisert sykkel forhandler Kontaktinformasjoner til autoriserte sykkelfor handlere finner du på internettsiden www bosch ebike com Deponering Ladeapparater tilbehør og emballasje må leve res inn til miljøvennlig gjenvinning Ikke kast ladeapparater i vanlig søppel Kun for EU land Jf det europeiske direktivet 2002 96 EF vedr gamle elektris ke og elektroniske apparater og tilpassingen til ...

Page 329: ...aantumisvaaran f Toimintoa liikkeellelähtöapu saa käyttää ai noastaan liikkeellelähdössä tai eBike a työnnettäessä Jos eBike n pyörät eivät kos keta maata liikkeellelähtöapua käytettäessä on olemassa loukkaantumisvaara f Käytä ainoastaan alkuperäisiä Bosch akku ja joita valmistaja sallii sinun eBike ssa Muiden akkujen käyttö saattaa johtaa louk kaantumiseen ja tulipaloon Muita akkuja käy tettäessä...

Page 330: ...ökentässä Kiristä ruuvi 10 uudelleen 1 Nm kiristysmomentilla Käyttötietokoneen asennus ja irrotus katso kuva C Asenna käyttötietokone asettamalla se noin 30 käännettynä pidikkeeseen 2 ja kiertämällä sitä myötäpäivään vasteeseen asti Irrota kääntämällä käyttötietokone noin 30 vastapäivään ja vetämällä se irti pidikkeestä 2 f Poista käyttötietokone pysäköidystä eBike sta jotta sivullinen ei luvattom...

Page 331: ...lleen päälle kun kuormitus poistuu Käyttötietokoneen näyttö kytkeytyy myös päälle samanaikaisesti akun kanssa Käyttötietokone näyttää akun lataustilan sekä käyttövoimayksi kön asetukset Käyttölaite aktivoituu heti kun painat poljinta paitsi liikkeellelähtöaputoiminnassa katso Liikkeellelähtöavun käynnistys ja pysäytys sivu Suomi 4 Tehostusaste riippuu käyttötie tokoneeseen tehdyistä asetuksista He...

Page 332: ...käyttää ainoastaan liikkeellelähdössä tai eBike a työnnettäessä Jos eBike n pyörät eivät kos keta maata liikkeellelähtöapua käytettäessä on olemassa loukkaantumisvaara Käynnistä liikkeellelähtöapu painamalla paini ketta 6 yli 1 s ja pitämällä se painettuna eBike n käyttölaite käynnistyy näyttö d vilkkuu ja näytöt c e ja f sammuvat Liikkeellelähtöapu pysähtyy heti kun jokin seu raavista tapahtuu pä...

Page 333: ...puen vian laadusta käyttölaite kytkeytyy tar vittaessa automaattisesti pois päältä Matkan jatkaminen ilman käyttölaitteen tehostusta on kuitenkin aina mahdollista Anna tarkista eBike ennen seuraavia matkoja f Jätä kaikki tarkistukset ja korjaukset aino astaan valtuutetun polkupyöräkauppiaan suoritettaviksi Jos vika esiintyy edelleen korjauksistasi huolimatta käänny valtuute tun polkupyöräkauppiaan...

Page 334: ...immäisten kokemusten hankkiminen On suositeltavaa hankkia ensimmäiset koke mukset eBike n kanssa muualla kuin vilkkaasti liikennöidyillä kaduilla Kokeile erilaisia tehostustiloja ja tehostusvaihei ta Kun olet saavuttanut varmuuden voit käyttää eBike a liikenteessä kuten mitä tahansa polku pyörää Kokeile eBike si toimintamatkaa erilaisissa olo suhteissa ennen kuin suunnittelet pitkiä vaati via matk...

Page 335: ...tujen polkupyöräkauppiaiden yhteys tiedot löydät internetsivulta www bosch ebike com Kuljetus Akut ovat vaara ainelain määräysten alaisia Yksi tyinen käyttäjä saa kuljettaa akkuja kadulla ilman erikoistoimenpiteitä Ammattimaisessa kuljetuksessa tai toimitetta essa sivullisen kautta esim lentorahti tai huo linta on noudatettava pakkausta ja merkintää koskevia erikoisvaatimuksia esim ADR n mää räyks...

Page 336: ...taa akusta vuotaa nestettä Vältä koskettamasta nes tettä Huuhtele vedellä jos vahingossa kos ketat nestettä Jos nestettä pääsee silmiin tarvitaan tämän lisäksi lääkärin apua Akus ta vuotava neste saattaa aiheuttaa ihoärsy tystä ja palovammoja f Jos akku vaurioituu tai sitä käytetään asi aankuulumattomalla tavalla saattaa siitä purkautua höyryjä Tuuleta raikkaalla ilmal la ja hakeudu lääkärin luo j...

Page 337: ...daan ladata milloin vain lyhentämättä sen elinikää Latauksen keskeytys ei vaurioita akkua Akku on varustettu lämpötilanvalvonnalla joka sallii lataamisen vain akun lämpötilan ollessa vä lillä 0 C ja 40 C Täten saavutetaan pitkä käyt töikä akulle Lataustilan merkkivalo Akun lataustilan merkkivalon 15 viisi vihreää LED iä osoittaa akun varaustilan sen ollessa kyt kettynä Tällöin jokainen LED vastaa ...

Page 338: ...tys Tarkista ennen akun kytkemistä että lukko 18 on lukittuna Huomio eBike n polkimia ei saa kuormittaa kun akku kytketään koska se rajaa käyttölaitteen tehoa Kytke akku painamalla käynnistyspainiketta 16 Näytön 15 LED it syttyvät ja näyttävät samalla varaustilan Huomio Jos kapasiteetti on alle 5 ei akun la taustilan näytössä 15 syty yhtään LED merkkiva loa Ainoastaan käyttötietokoneesta voi pääte...

Page 339: ...a f Merkitse muistiin avaimessa 17 oleva nume ro Käänny valtuutetun polkupyöräkauppiaan puoleen jos avain häviää Ilmoita tällöin avai men numero Valtuutettujen polkupyöräkauppiaiden yhteystie dot löydät internetsivulta www bosch ebike com Kuljetus Akut ovat vaara ainelain määräysten alaisia Yksi tyinen käyttäjä saa kuljettaa akkuja kadulla ilman erikoistoimenpiteitä Ammattimaisessa kuljetuksessa t...

Page 340: ...alla esim paperi kangas jne tai pala vassa ympäristössä Latauslaitteen kuume neminen latauksen aikana synnyttää tulipalo vaaran f Jos akku vaurioituu tai sitä käytetään asiaan kuulumattomalla tavalla saattaa siitä pur kautua höyryjä Tuuleta raikkaalla ilmalla ja hakeudu lääkärin luo jos haittoja ilmenee Höyryt voivat ärsyttää hengitysteitä f Pidä lapsia silmällä Täten varmistat että lapset eivät l...

Page 341: ...erkkojännitteen valintakytkimellä 26 on valittu oikea jännite Muussa tapaukses sa latauslaite saattaa vaurioitua Kytke pois akku ja poista se eBike n pidikkeestä Lue ja noudata akun käyttöohjetta Työnnä latauslaitteen latauspistoke 31 akussa olevaan hylsyyn 32 Latauslaitteessa oleva käyt töilmaisin 30 vilkkuu Lataustapahtuma Lataustapahtuma alkaa heti kun latauslaite on kytketty akkuun ja sähköver...

Page 342: ...auslaite menee rikki Huolto ja asiakasneuvonta Käänny valtuutetun polkupyöräkauppiaan puo leen kaikissa latauslaitteeseen liittyvissä kysy myksissä Valtuutettujen polkupyöräkauppiaiden yhteys tiedot löydät internetsivulta www bosch ebike com Hävitys Latauslaitteet lisätarvikkeet ja pakkaukset tulee toimittaa ympäristöystävälliseen uusiokäyttöön Älä heitä latauslaitteita talousjätteisiin Vain EU ma...

Reviews: