20
IV User Manual Pedelec with front motor
›
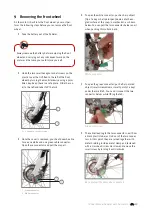
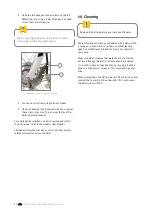
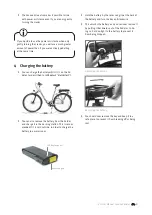
Undo the two hexagon socket screws on the left
behind the fork using a 5 mm Allen key. You need
to turn them anticlockwise.
Apply a max. tightening torque of 9.5 Nm to these
screws when putting the wheel back on
1 + 2 Hexagon socket screws on the fork
1
2
›
You can now start removing the front wheel.
›
Once you have put the front wheel back on, repeat
these steps in reverse. This ensures that your Pe-
delec will work properly.
For a detailed description on how to remove and install
the front wheel, refer to the General User Manual.
The General User Manual also contains all other bicycle-
related information on your Pedelec.
10 Cleaning
Remove the battery before you clean your Pedelec.
We recommend you clean your Pedelec with a damp cloth,
a sponge or a brush. You can obtain suitable cleaning
agents and additional information from your specialist
cycle shop.
Make sure when cleaning that water does not enter the
battery. Although the electrical components are sealed,
it is not advisable to clean the bike by spraying it with a
hose or a high-pressure cleaner. This could damage your
bike.
When wiping down the battery, be careful not to touch and
connect the contacts on the underside. This could cause
the battery to switch off.
Summary of Contents for Rixe
Page 2: ...I General User Manual English Derby Cycle Werke GmbH 2012 ...
Page 68: ...I General User Manual 67 ...
Page 70: ...II User Manual Fast Pedelec English Derby Cycle Werke GmbH 2012 ...
Page 75: ...6 II User Manual Fast Pedelec ...
Page 98: ...III User Manual Pedelec with centre motor English Derby Cycle Werke GmbH 2012 ...
Page 105: ...8 III User Manual Pedelec with centre motor ...
Page 126: ...IV User Manual Pedelec with front motor English Derby Cycle Werke GmbH 2012 ...
Page 148: ...IV User Manual Pedelec with front motor 23 ...
Page 150: ...VI User Manual Groove Pedelec English Derby Cycle Werke GmbH 2012 ...

