Total Exhaust Hood
Pg.3
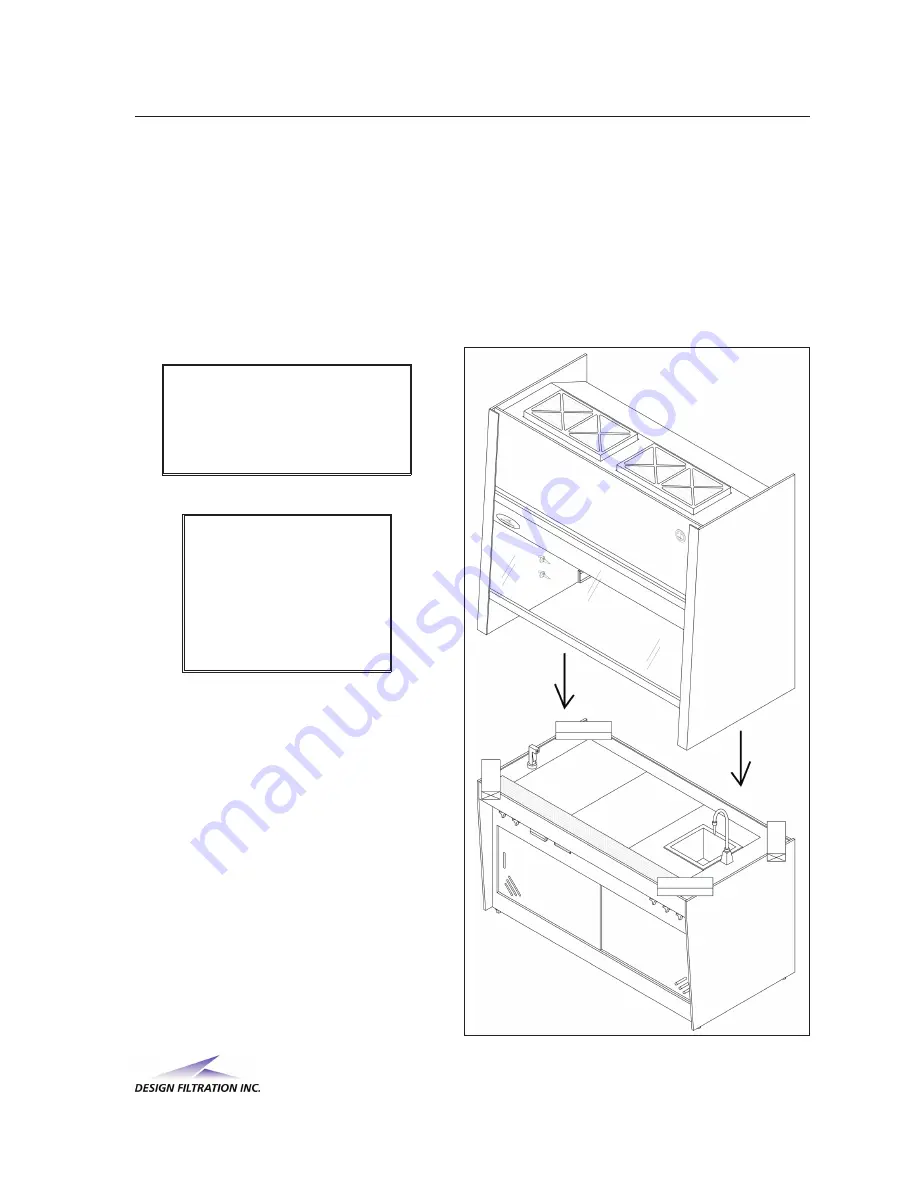
Figure 2.1
2.
Installation
Once in location it is recommended that your hood be re-tested for airflows and leaks by an
independent testing organization with technicians trained in the evaluation and maintenance
of HEPA filtered equipment. Always use safe lifting guidelines when installing your hood on
a base frame or existing work bench.
Do not use a lift truck when moving your Total Exhaust Hood. Leave your hood on the
shipping skid until it is in its final installation location. Never lift from the centre of the hood.
Allow hood to acclimatize to room temperature, before installation.
WARNING:
Allow 24 Hrs for Hood to
Acclimatize Before Installation,
to Prevent Damage to Hood.
WARNING:
Always Lift from the
Outside Edges of Hood
to Prevent Damage.
Do Not Use Fork Lift
on Center of Hood.
Your Total Exhaust Hood is shipped to
you in four pieces. To start, locate the
base frame as close to the final area as
possible, allowing enough space for the
head section and personnel to move
freely around the front or back.
Place the wood blocks supplied, angled
across the corners of the work surface, as
shown in Figure 2.1. Raise the head
section keeping as straight as possible.
Move head section over base, and gently
lower on the wood pieces, avoiding
damage to fingers. Lifting one end at a
time remove wood spacers and lower to
base section, aligning connection screws
as shown.


