Protocol 3
TM
User Guide
E105, 313327, REV A
©2021 ITW EAE. All rights reserved. Despatch is a registered trademark in the U.S. and other
countries.
No part of the contents of this manual may be reproduced, copied or transmitted in any form
or by any means without the written permission from ITW EAE, unless for purchaser's personal use.
23 of 82
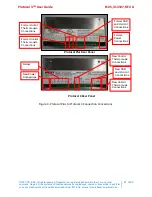
Table 7. Protocol Plus to Protocol 3 Controller Conversion.
Terminal Block
Former
Protocol Plus Connections
New
Protocol 3 Connections
Three pin terminal block for
power leads
Terminals 30, 31, 32
Terminals 1, 2, 3
Five pin terminal block for
SSR and Hi-limit
Terminals 17, 18, 19, 20, 21 Terminals 26, 27, 28, 29, 30
Remove the four-pin
terminal block from
thermocouples and rewire
with two three-pin blocks.
Control Thermocouple
Terminals 13, 14
Control Thermocouple
Terminals 17, 18
Hi-limit Thermocouple
Terminals 15, 16
Hi-limit Thermocouple
Terminals 32, 33
5.3.
Setting up Remote Communication
Remote communication between the Protocol 3 controller and a PC running the
Despatch Protocol Manager software involves providing each controller with a
unique address and following the communication protocol procedures. Up to 32
separate controllers can be run from a PC running the Despatch Protocol Manager
software. See
Protocol Manager with Protocol 3 and Protocol Plus, E-107,
document available online for the complete set-up procedure.
5.3.1.
Protocol 3
™
Ethernet Communication Setup
When using the built-in Ethernet port on the Protocol 3, the
hardware address must be set to 1 and the baud rate set to 9600.
1.
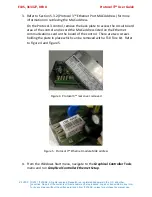
From the equipment manual, locate the file
SetupEthernetTools.msi
(PN
324868). The application may have already been installed during the
Protocol Manager installation process.
2.
Run the file and follow the prompts to install the Ethernet configuration
program.


