background image

8555-0530-0M Rev E 

x

 MedVue MV2 Owner’s 

40 

SETUP REVIEW 

(Non-Protected Setup Parameters) 

The MedVue Model MV2 Medical Weight Analyzer allows several operational parameters to be 
reviewed and changed as necessary without having to remove the end cap, pressing the 
calibration switch, or breaking any seals to enter the Non-Protected Calibration Setup mode. 
 

To Enter Setup Review 

With the MV2 on and in the normal Gross weight mode: 

1.  Press and hold the 

CLEAR

 key for approximately 3 seconds. 

2.  The display will change to show 

SETUP REVIEW

 in small letters at the bottom of the 

display. 

3. Release the 

CLEAR

 key. 

4.  The display will change to show: 


With 

SYSTEM

 displayed, press the 

ENTER

 key. The display will change to 

LANGUAGE

. Note 

that continued pressing of the 

ENTER

 key will advance you through the Setup Review 

parameters. For information and instructions on how to change these parameters, refer to the 
Calibration Setup (Non- Protected Setup Parameters) section of this manual. 
 
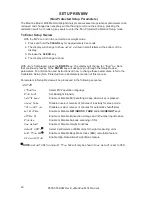
Parameters in Setup Review will be processed in the following sequence: 

SYSTEM 


LANGUAGE 

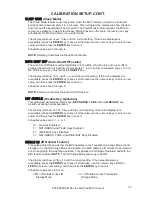
Select MV2 operation language 

bACkLIGHT 

Set Backlight Intensity 

KEYPAd bEEP 

Enable or Disable MV2 emitting a beep when a key is pressed 

SLEEP MOdE 

Disable or select number of minutes of inactivity for sleep mode 

AUTO SHUT OFF 

Disable or select number of minutes for automatic shutoff timer 

kEY dISAbLE 

Enable or Disable 

NET/GROSS

TARE

 and/or 

ID/HEIGHT

 keys 

ENAbLE Id 

Enable or Disable transaction storage and ID number input feature 

bARCOdE 

Enable or Disable barcode scanning of ID’s 

USE HEIGHT 

Enable or Disable Height Functions 

HEIGHT UNITS

¸

¸


Select Centimeters or Millimeters for height measuring units 

bOdY MASS IdX

¸


Enable or Disable Body Mass Index (BMI) calculation feature 

HI RESOLUTION 

Enable High-Resolution Weight Mode feature 


¸

NOTE:


HEIGHT UNITS

 and 

bOdY MASS IdX

 will only be shown if 

USE HEIGHT

 is set to YES. 


Summary of Contents for MedVue MV2

Page 1: ...8555 0530 0M Rev E x MedVue MV2 Owner s 1 Model MV2 Medical Weight Analyzer Owner s Manual...

Page 2: ...8555 0530 0M Rev E x MedVue MV2 Owner s 2...

Page 3: ...ler assumes no responsibility for errors or omissions Neither is any liability assumed for damages resulting from use of the information contained herein All instructions and diagrams have been checke...

Page 4: ...PER DISPOSAL When this device reaches the end of its useful life it must be properly disposed of It must not be disposed of as unsorted municipal waste Within the European Union this device should be...

Page 5: ...S Page 11 OPERATION Page 13 Basic Operation Page 13 Tare Storage and Recall Page 15 Basic Operation with ID Page 16 Body Mass Index BMI Operation Using Mechanical Height Rod or Entering Known Height P...

Page 6: ...8555 0530 0M Rev E x MedVue MV2 Owner s 6 IV...

Page 7: ...ugh 9 divisions Weighing Units Kilograms kg Keyboard Membrane type with 19 keys Enclosure Size 248 9 mm W x 172 7 mm H x 45 7 mm D 9 8 in W x 6 8 in H x 1 8 in D Construction Painted Steel Standard Fe...

Page 8: ...ake sure that the MV2 has good clean AC power and is properly grounded In areas subject to lightning strikes additional protection to minimize lightning damage such as surge suppressors should be inst...

Page 9: ...ld keep the carton and packing material for return shipment if it should become necessary The purchaser is responsible for filing all claims for any damages or loss incurred during transit Should your...

Page 10: ...e MV2 to the desired viewing angle and direction and then tighten the Adjustment Knob NOTE The top plate mounting configuration varies depending on the model of your scale and may be different than th...

Page 11: ...MV2 it locks in place a clicking sound will be heard when it is locked in place Load Cell The load cell cable connects to the MV2 via a 9 pin D connector on the rear panel of the MV2 Figure No 4 shows...

Page 12: ...y with the baud rate set to 9600 baud Bluetooth Wi Fi Optional The optional Bluetooth Wi Fi requires the purchase of the MV2C Medical Weight Analyzer which includes the Redbird Wireless Transmitter mo...

Page 13: ...s the following steps should be followed 1 Make sure the AC power adapter is unplugged 2 Remove the MV2 from the mounting bracket and turn it over so that the display is facing away from you 3 Locate...

Page 14: ...of either 4 or 100 of the scale capacity The zero limit is set during setup and calibration of the MV2 This is the PRINT key It is used to signal completion of the data entry process the data entered...

Page 15: ...a numeric weight value Keypad Tare selecting a memory location and then pressing the ENTER key will cause the value entered to be stored as the new tare weight Either method will change the weight di...

Page 16: ...e the MV2 and return it to weight mode This is the CLEAR BACKSPACE key It is used to clear an incorrect entry from the display without processing the data If an incorrect entry is made press this key...

Page 17: ...or is only active when a tare weight value is stored STABLE The annunciator is turned on when the weight display is stable When off it means that the change in successive weight samples is greater tha...

Page 18: ...is in centimeters mm The mm annunciator is turned on to indicate that the displayed height measurement is in millimeters AM The AM annunciator is turned on to indicate that the displayed time is befor...

Page 19: ...ker etc on the scale 2 Press the TARE key 3 The Display will change to show ENTER TARE WT the weight of the item on the scale and the TARE annunciator will turn on 4 Press the ENTER key 5 Display will...

Page 20: ...ey Sequence 1 0 6 4 After the tare weight has been entered press the ENTER key 5 The display will show a minus Net weight and NET annunciator will turn on 6 Assist patient onto scale 7 When weight is...

Page 21: ...e weight has been entered press the ID HEIGHT key 5 Display will change to show 3 6 Using numeric keys enter the memory location 1 to 99 7 Press the ENTER key 8 The tare weight is now stored in memory...

Page 22: ...NOTE Tare entry is not allowed if Auto Hold is enabled 1 In Gross Weight mode GROSS annunciator on place item wheelchair walker etc on the scale 2 Press the TARE key 3 Display will show weight of ite...

Page 23: ...ing or trailing zeros required to obtain your desired tare is dependent upon the DIVISION VALUE selected in the setup procedure For example Division Value 0 2 kg Desired Tare Value 10 6 kg Key Sequenc...

Page 24: ...nter is not connected to scale the BMI display will clear when patient is assisted off scale and the weight returns to zero Body Mass Index BMI Operation with ID Using Mechanical Height Rod or Manuall...

Page 25: ...eters was selected for HEIGHT UNITS in setup the display will change to show CENTIMETERS a Use numeric keys to enter up to 4 digits for height in centimeters and then press the ENTER key 6 Press ID HE...

Page 26: ...ey without entering a value for steps 9 or 10 and proceed to Step 11 9 If Centimeters was selected for HEIGHT UNITS in setup the display will change to show CENTIMETERS a Use numeric keys to enter up...

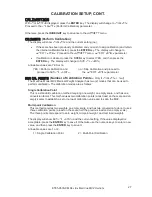
Page 27: ...or setup and calibration During setup and calibration it is necessary to enter operational parameters via the MV2 s keypad The following keys and the numeric keypad are used to input the values NOTE T...

Page 28: ...ion Setup parameters Some parameter prompts require only a yes or no selection while others require a numeric value to be entered NOTE The 1 and 0 keys have dual functions They are used to enter numer...

Page 29: ...ing data from the Electronic Talley Roll ETR file using the MV2 display Refer to page 44 for more information Note that a customer supplied Micro SD card must be installed in the battery charger board...

Page 30: ...setting If the value displayed is acceptable press the ENTER key to save it Otherwise use the numeric keys to enter a new value and then press the ENTER key to save it The sample rate may be set from...

Page 31: ...ro Limit is Disabled NOTE If the MV2 is used in a Legal for Trade application the Zero Limit must be set to YES ZERO LIMIT YES POWER UP ZERO Power Up Zero The display will show POWER UP ZERO and the c...

Page 32: ...save it Otherwise use the numeric keys to enter a new value and then press the ENTER key to save it Allowable values are 0 1 or 2 0 Minimal Filtering 1 Moderate Filtering 2 Custom Filtering NOTE The f...

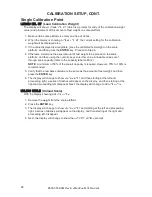
Page 33: ...bLE parameter NUM CAL POINTS Number of Calibration Points Only if CALIbRATE YES The MedVue Model MV2 Medical Weight Analyzer has two 2 modes that can be used to perform calibration The calibration mod...

Page 34: ...this value Allowable values are 1 through scale capacity refer to the capacity label on MV2 NOTE A minimum of 50 of the scale s capacity is required However 70 to 100 is recommended 5 Verify that the...

Page 35: ...is a prompt for entry of the second calibration weight value and placement of this amount of test weight on scale platform NOTE The MV2 defaults to full scale capacity 1 When the display is showing C...

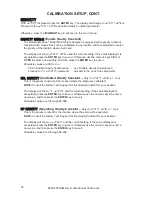
Page 36: ...to CAL GRAVITY parameter no Disable Gravity Constant and proceed to the HOLd MOdE parameter CAL GRAVITY Calibrated Gravity Constant Only if GRAVITY ENAbLE YES This is the gravity constant of the loca...

Page 37: ...tinue setup With the Hold Mode enabled HOLd MOdE 1 the MV2 will lock the weight shown on the display when the LOCK RELEASE key is pressed and unlock the weight display when you press the key again If...

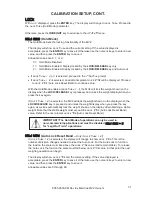
Page 38: ...lected bACkLIGHT Backlight Intensity The display will show bACkLIGHT and the current setting If the value displayed is acceptable press the ENTER key to save it Otherwise use the numeric keys to enter...

Page 39: ...use the numeric keys to enter a new value and then press the ENTER key to save it Allowable values are 0 through 9 NOTE Selecting 0 disables the Auto Shut Off feature KEY dISAbLE Disable Key Operatio...

Page 40: ...YES or no YES The Height functions are allowed and the HEIGHT UNITS prompt will be displayed no The Height functions are not allowed Proceed to the HI RESOLUTION parameter NOTE If USE HEIGHT no no is...

Page 41: ...ve it Otherwise use the numeric keys 0 NO or 1 YES to select a new setting Allowable values are YES or no YES If High Resolution Weight mode is desired no High Resolution Weight mode is not desired If...

Page 42: ...nd then press the ENTER key to save it Allowable values are 1 through 9 and 0 1 2400 Baud 4 14 4k Baud 7 38 4k Baud 2 4800 Baud 5 19 2k Baud 8 56k Baud 3 9600 Baud 6 28 8k Baud 9 57 6k Baud 0 115 2k B...

Page 43: ...indows 2 USB Port Output Mode is set for Continuous Data requires serial driver inf file for Windows 3 USB Port Output Mode is set for a Printer only works for printers with an internal font 4 USB Por...

Page 44: ...current setting If the value displayed is acceptable press the ENTER key to save it Otherwise use the numeric keys to enter a new value and then press the ENTER key to save it Allowable values are 1 t...

Page 45: ...S to select a new setting and then press the ENTER key to save it Allowable values are YES or no YES Use 24 Hour Time Format 3PM displays 15 00 no Use 12 Hour Time Format 3PM displays 3 00 Calibration...

Page 46: ...nstructions on how to change these parameters refer to the Calibration Setup Non Protected Setup Parameters section of this manual Parameters in Setup Review will be processed in the following sequenc...

Page 47: ...nd Operation Manual for MedVue Medical Weight Analyzer with Wi Fi and Bluetooth Displayed if Redbird module is present ETHERNET Ethernet Configuration Refer to manual 8555 M520 O1 Model MVIP Ethernet...

Page 48: ...lt your scale service representative ANALOG HI The load cell input is above the range of the MV2 Consult your scale service representative ERR EEPROM NOVRAM failure Consult your scale service represen...

Page 49: ...aning tools such as steel pads and scrapers which will scratch the painted surface Instead use soft cloths or plastic scouring pads for cleaning x When possible use treated water Hard water can leave...

Page 50: ...n internal consecutive transaction number that cannot be modified will be stored in memory The ETR file is structured such that when the capacity of the Micro SD card is reached the newest transaction...

Page 51: ...eby preventing unauthorized access to the calibration adjustments To install a lead and wire security seal refer to Figure No 13 and follow the steps provided below 1 Make certain the two drilled scre...

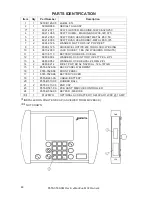
Page 52: ...LCKR WICKING 10 4 6610 2000 JACK SOCKET 1 EA NO WASHERS OR NUTS 11 1 6610 5119 BATTERY HOLDER 6 C CELLS 12 7 6680 0004 WASHER LOCK INT TOOTH 6 TYPE A Z PL 13 4 6680 0052 WASHER LOCK HELICAL 4 REG Z PL...

Page 53: ...8555 0530 0M Rev E x MedVue MV2 Owner s 47 PARTS IDENTIFICATION CONT...

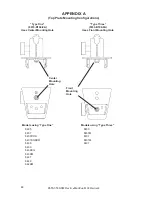
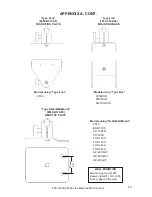
Page 54: ...ions Models using Type One Models using Type Three 6495 8430 6437 8430M 6437DHR 8431 6437KGDHR 8431M 6438 8437 6439 6439KG 6439M 6447 6449 6449M Type One 0033 B104 0A Uses Center Mounting Hole Type Th...

Page 55: ...8555 B517 08 TRANSITION PLATE Type Five 1930 C199 08 MOUNTING BASE Models using Desk Wall Mount 6500 BRW1000 CD 1000D CR 500D FHD 133 II FHD 143 II FHD 144 II FHD 164 II GP 400 MV1 GP 600 MV1 GP 600...

Page 56: ...TER key 4 The next setting that appears is the HOLd bANd Enter 10 for this setting and then press the ENTER key Press the PRINT key to return to the setup menu 5 The next setting that must be correct...

Page 57: ...8555 0530 0M Rev E x MedVue MV2 Owner s 51...

Page 58: ...for the freight both ways This warranty does not apply to peripheral equipment not manufactured by Detecto this equipment will be covered by certain manufacturer s warranty only This warranty does not...

Page 59: ...on with the sale or use of the product Detecto will not be liable for consequential damages of any nature including but not limited to loss of profit delays or expenses whether based on tort or contra...

Page 60: ...2 Owner s 54 8555 0530 0M Rev E 01 20 Printed in USA Cardinal Scale Manufacturing Co 102 E Daugherty Webb City MO 64870 USA Ph 417 673 4631 or 1 800 641 2008 Fax 417 673 2153 Technical Support 1 866 2...

Reviews: