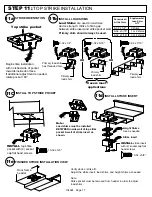
Top strike pocket
Begin strike installation
with notched side of pocket
towards inside door face.
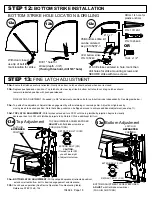
If additional adjustment is needed,
Door frame
header
STEP 11:
TOP STRIKE INSTALLATION
104924 Page 17
INSTALL
top strike
pocket with (4) socket
cap flat head screws
Primary
load shim
OR
OR
Load Shims
are used to maximize
device strength. Utilize to fill-in gap
between strike insert and strike pocket wall.
Primary shim should always be used.
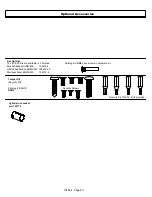
10-32 x 5/8"
8-32 x 1/4"
8-32 x 7/16"
8-32 x 5/16"
Primary
load shim
Primary
load shim
STRIKE ORIENTATION
11a
INSTALL LOAD SHIMS
11b
INSTALL TOP STRIKE POCKET
11C
Height Shims
Use as needed
Strike insert
INSTALL STRIKE INSERT
11d
FINISHED STRIKE INSTALLATION VIEW
11e
INSTALL
strike insert
with (2) socket cap flat
head screws
10-32 x 5/8"
Covers most
applications
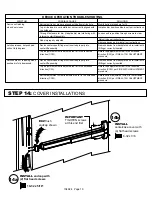
Verify device / strike fit.
Adjust the strike insert, load shims, and height shims as needed
Note:
Strike pocket must be removed from header in order to adjust
load shims.
8-32 x 1/4"
8-32 x 5/16"
8-32 x 7/16"
Screw used
with shims
0 shims
1 or 2 shims
3 or 4 shims
Primary load shim
has threaded hole
Note:
Load shims must be installed
BETWEEN inside wall of top strike
pocket & wall of strike insert as
shown.
Supplemental
Load Shim
QTY


