cleaner (optional) are energized. When the fan switch
is returned to the AUTO position, the circulator and
electronic air cleaner are de-energized.
11.5
Error codes
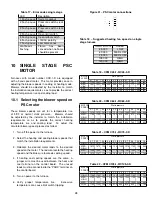
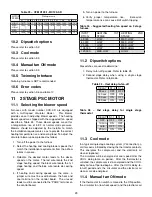
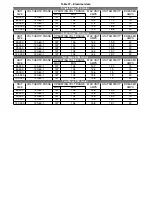
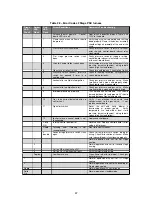
For a list a error codes and the diagnostic please refer to
table 28
12
SAFETY CHECK
12.1
Prime drain trap
Failure to follow this check may result in intermittent unit
operation or bad performance. Condensate trap must
be PRIMED or proper draining may not occur.
The
condensate trap has three internal chambers which can
ONLY be primed by pouring water into the side or top
drain inlet of condensate trap.
12.2
Furnace operating conditions
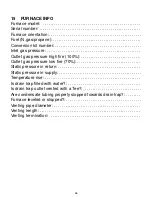
Be sure to fill section 15 : Furnace info. By doing so, you
will make sure the furnace operates in the best conditions
: temperature rise, gas inlet and outlet pressure, duct
static pressure, vent length, etc.
12.3
Checklist
1. Make sure you filled section 15 Furnace Info.
2. Put away tools and instruments. Clean up debris.
3. Verify that blower and control doors are properly
installed.
4. Cycle test furnace with room thermostat.
5. Check operation of accessories.
6. Review manual with homeowner.
7. Attach litterature to furnace.
13
OPERATING
YOUR
FURNACE
These furnaces are equipped with an ignition device
which automatically lights the burners.
Do not try to
light the burners by hand.
Before operating, smell around furnace area for gas. Be
sure to smell near floor because some gas is heavier than
air and will settle to the lowest point. See WHAT TO DO
IF YOU SMELL GAS if the odour of gas is present. Use
only your hand to turn the gas control knob; never use
tools. If the knob will not turn by hand, don’t try to repair
it. Call a qualified service technician. Force or attempted
repair may result in a fire or explosion.
13.1
WHAT TO DO IF YOU SMELL
GAS
WARNING
FIRE OR EXPLOSION HAZARD
Failure to follow safety warnings exactly could
result in serious injury, death or property damage.
-Do not store or use gasoline or other flammable
vapors and liquids in the vicinity of this or any
other appliance.
-WHAT TO DO IF YOU SMELL GAS
Do not gry to light any appliance.
Do not touch any electrical switch; do not use any
phone in your building.
Leave the building immediately.
Immediately
call
your
gas
supplier
from
a
neighbor’s phone.
Follow the gas supplier’s
instructions.
If you cannot reach your gas supplier, call the fire
department
-Installation and service must be performed by
a qualified installer, service agency or the gas
supplier.
13.2
SHUTTING DOWN THE
FURNACE
To shut down the furnace, set the thermostat to the “OFF”
position.
13.2.1
To turn off gas to furnace
1. Set the thermostat to the lowest setting.
2. Turn off all electric power to the furnace if service is
to be performed.
3. Remove the burner compartment access panel.
4. Move the gas control knob or switch to “OFF” . Do
not force.
5. Replace the burner compartment access panel.
14
MAINTENANCE OF YOUR
FURNACE
There are routine maintenance steps you should take to
keep your furnace operating efficiently. This maintenance
will assure longer life, lower operating costs, and fewer
service calls.
In addition to the maintenance procedures listed in this
manual, there are also other service and maintenance
procedures that require the skills of a service person that
has specialized tools and training. Personal injury can
result if you are not qualified to do this work. Please call
your dealer when service is needed.
Your gas furnace is designed to give many years of
30
Summary of Contents for C105-1-D
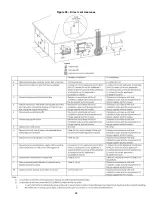
Page 24: ...Figure 26 Alternate horizontal termination C Figure 27 Venting gasket 23...
Page 25: ...Figure 28 Direct vent clearance 24...
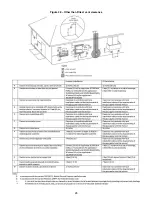
Page 26: ...Figure 29 Other than Direct vent clearance 25...
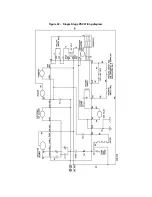
Page 34: ...Figure 32 Single Stage PSC Wiring diagram...
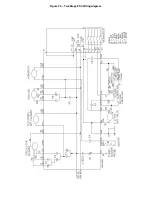
Page 35: ...Figure 33 Two Stage PSC Wiring diagram...
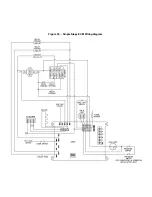
Page 36: ...Figure 34 Single Stage ECM Wiring diagram...
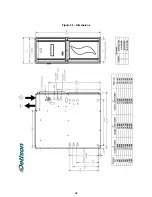
Page 39: ...Figure 35 Dimensions 38...
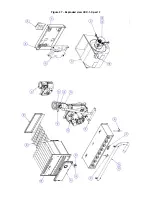
Page 40: ...Figure 36 Exploded view CXX 1 X part 1...
Page 41: ...Figure 37 Exploded view CXX 1 X part 2...
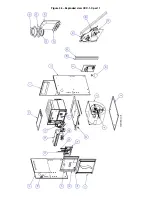
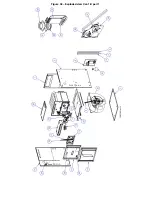
Page 43: ...Figure 38 Exploded view Cxx 1 D part 1...
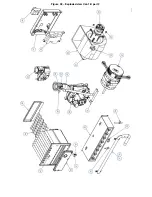
Page 44: ...Figure 39 Exploded view Cxx 1 D part 2...
Page 46: ...Figure 40 Exploded view Cxx 2 D part 1...

