Customer Documentation DEV 5071
14
Copyright DEV Systemtechnik GmbH 2007-2017
If the corresponding AC power plug is not connected (indicated via the
corresponding AC LED, please refer to chapter 3.2.1), a power supply
module delivers no DC, but is capable to provide status information to the
CPU module. Note, that this status information may be erroneous if less
than one AC supply line per two power supply modules is active.
It is
highly recommended
to reboot the DEV 5071 after power-up
(chapter 4.2.4)!
4.2.3
Installation and Exchange of Power Supply Modules
The product is usually delivered with the number of ordered power supply
modules that are already installed. Therefore, you may proceed in reading
the next chapter.
In case that a power supply module has to be exchanged, or that a
DEV 5071 is to be upgraded with an additional power supply module, the
following instructions are to be noticed:
Though the power supply modules are hot pluggable, it is recommended to
power down the device for exchange operations for safety reasons and to
avoid short circuits!
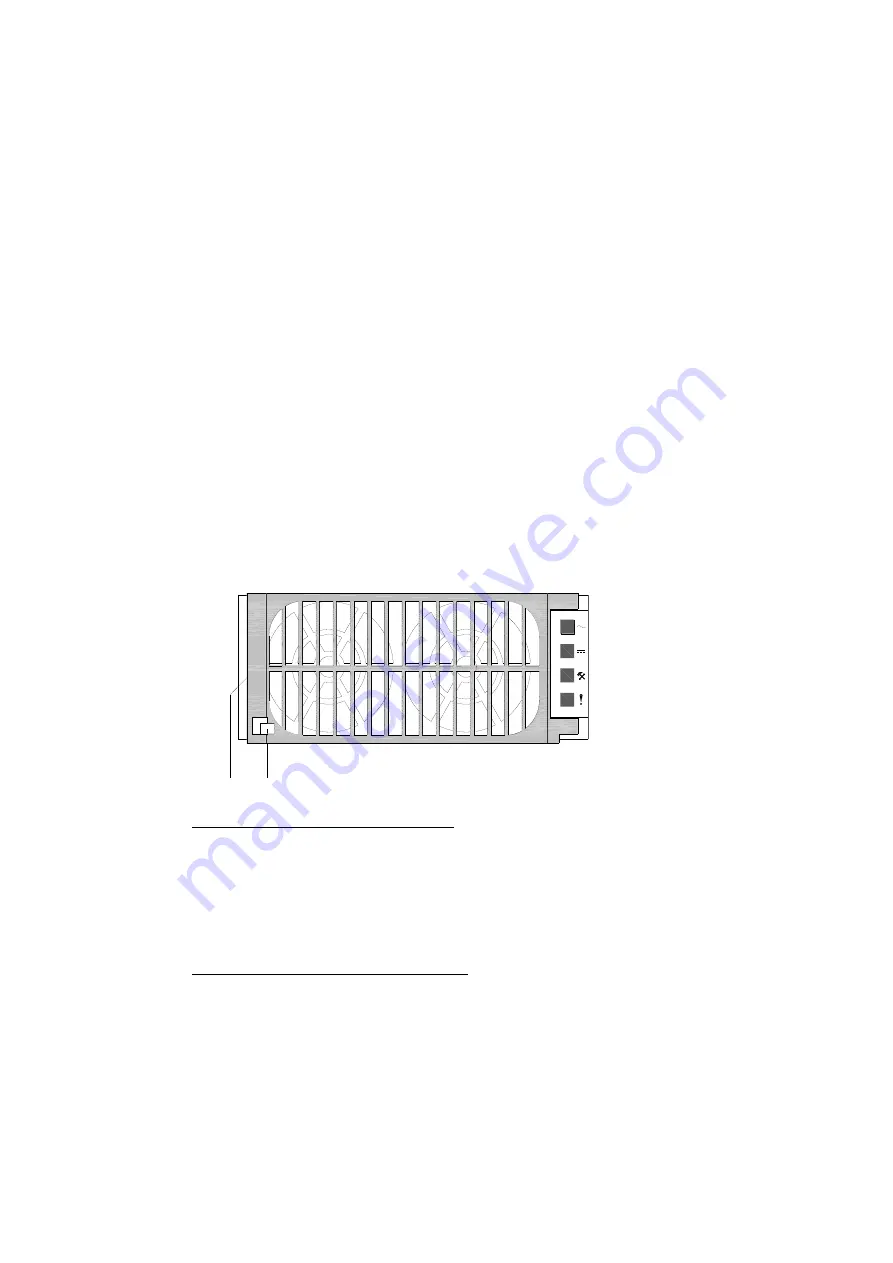
1
2
Removal of a power supply module:
First, with the thumb of the left hand push the metal lever (1) of the power
supply module to the left. This releases the plastic handle (2) of the plastic
cover, which now can be actuated with the index finger of the left hand. Pull
gently and completely the plastic handle of the module; this releases the
power supply module from the chassis.
Then, pull out the power supply module completely using the plastic handle.
Installation of a power supply module:
In the first step, release the plastic handle (2) of the exchange/new power
supply module by pushing the metal lever (1) to the left and then by pulling
the plastic handle.
Insert the power supply module into an unpopulated slot of the chassis and
gently push in the module until experiencing a little resistance.
Then, push gently the plastic handle of the module until the metal lever (1)
locks the power supply module within the chassis.
If applicable, power up the device and
reboot
(please refer to chapter 4.2.4)


