4
2
E
CL
3
11
15
FRONT
1
1
1
2
2
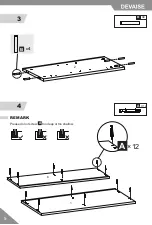
When installing, please make sure the screws are flattened, Not crooked;
Otherwise the drawers will not be installed perfectly.
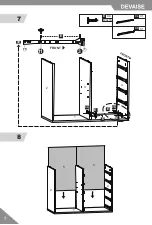
Please do not install the bottom drawer runner part in this step, Otherwise
it will not be able to install the connector housing ( Part C ), the bottom
drawer runner part will be installed in
step 7
.
REMARK
X16
E
M4x14
X4
CL
X4
CR
CL
CR
TOP
BOTTOM
E
E
E
E
E
E
E
E
E
E
E
E
E
E
E
E
4
3
Summary of Contents for ASNG010
Page 1: ...ASNG010 Wood 5 Drawer Storage Cabinet V3 0 ...
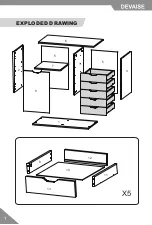
Page 4: ...1 EXPLODED DRAWING X5 2 1 4 3 6 5 5 7 8 9 10 11 12 13 ...
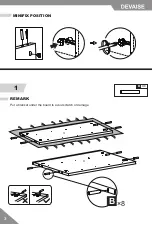
Page 8: ...5 3 4 2 1 X4 B X12 A REMARK Please do not screw too deep or too shallow A 12 A 6 B 4 ...
Page 10: ...7 7 8 11 3 15 1 FRONT CR E 5 5 2 2 3 1 1 4 4 X4 E M4x14 X1 CL X1 CR E E E E CL CR ...
Page 11: ...8 9 10 1 1 2 2 2 4 4 4 6 2 1 4 6 6 6 G F F X6 C X2 G X2 F X16 E M4x14 C 6 G 16 E ...
Page 12: ...9 11 12 X10 B X10 A X10 B X10 A A A A A B B B B 5 5 9 11 12 13 ...
Page 13: ...10 13 14 9 9 9 10 11 11 11 12 12 12 X10 C 5 5 C 2 9 11 ...
Page 14: ...11 15 9 9 9 10 10 11 13 13 13 13 X10 C 5 C 2 ...
Page 15: ...12 16 DL DR X20 E M4x14 FRONT FRONT FRONT E 1 2 FRONT 3 E E E E 5 X5 DL X5 DR DL E DL ...
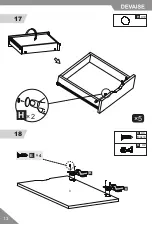
Page 16: ...13 17 18 X4 E M4x14 X2 K K K X10 H 5 2 H 8 E 4 ...
Page 17: ...14 19 X8 E M4x14 2 2 1 1 4 4 6 6 2 4 8 8 E 8 ...
Page 18: ...15 20 21 X4 I 4 I I Please make the groove on board 7 match with the part 7 REMARK ...
Page 19: ...16 22 23 X4 H H 4 ...
Page 20: ...17 24 X8 X8 J E M4x14 8 E J ...


