17. Image quality problem
Field Service Ver. 1.0 Apr. 2005
168
ineo 161
ineo 210
T
roubleshooting
17.2.14
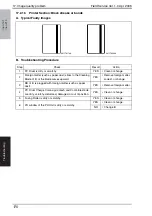
Printer Section: Low image density
A. Typical Faulty Images
B. Troubleshooting Procedure
4011T003AA
Step
Check
Result
Action
1
The image changes when “Toner Replenisher” is exe-
cuted.
• “Toner Replenisher” of Utility
YES
• Replenish the supply of
toner using Toner
Replenisher.
2
The image changes when “ID Adjust” and “VG Adjust” are
executed.
YES
• Readjust. For details,
see ADJUSTING/SET-
TING.
3
Image transfer current contact is dirty, folded, or bent.
YES
• Clean, correct, or
change.
4
Developing bias contact is dirty, folded, or bent.
YES
• Clean, correct, or
change.
5
High Voltage Unit (HV1) connectors is loose.
YES
• Reconnect.
6
ATDC Sensor (UN1) is dirty with foreign matter (such as
paper dust) other than developer.
YES
• Clean.
7
The following voltages develop from the ATDC Sensor
(UN1).
<Check Procedure>
Check voltage across a Master Board pin and GND when
the Power Switch is turned ON.
• DC5.39 V to 8.15 V across PJ10A-1 and GND
• DC1.41 V to 4.98 V across PJ10A-3 and GND
NO
• Change ATDC Sensor
(UN1) and then change
developer.
8
The following voltage is supplied from the Master Board
(PWB-A).
<Check procedure>
• Check that there is 24 V developing across the Master
Board pin and GND when the Power Switch is turned
ON (during a copy cycle or a standby state).
YES
• Change IU.
• Change High Voltage
Unit (HV1).
NO
• Change Master Board
(copier: PWB-A).


