MAINTENANCE & TROUBLESHOOTING
PAGE 2
MAINTENANCE & TROUBLESHOOTING
PAGE 2
SPRAY FAULTS
Condition
Cause
Correction
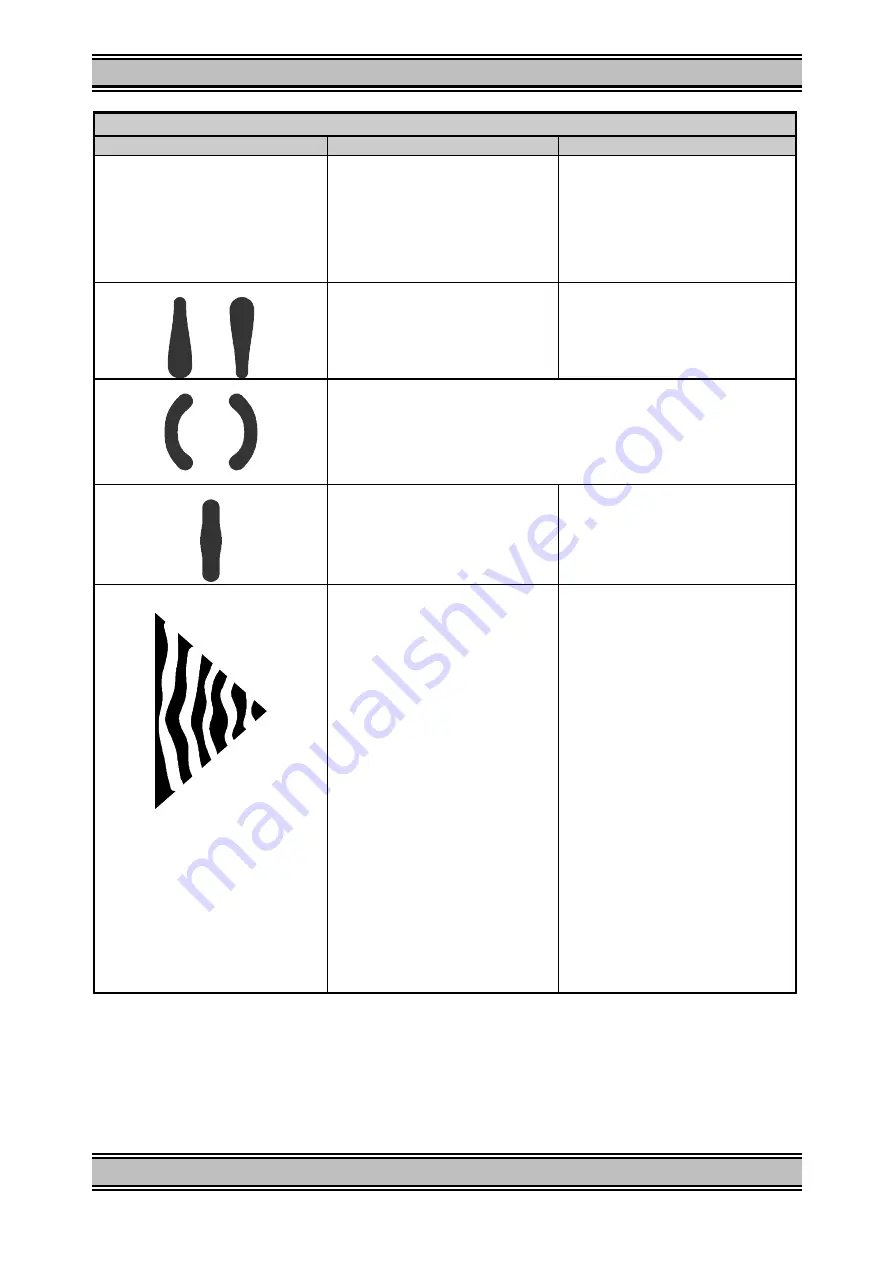
Improper spray pattern
Gun Improperly adjusted.
Dirty air cap
Fluid tip obstructed
Sluggish needle
Readjust gun, follow instructions carefully.
Clean air cap.
Clean
Lubricate (see lubrication section) or
loosen packing nut.
Heavy top or bottom pattern
Material build-up on air cap, partially
plugged horn holes, centre holes or jets.
Material build-up on fluid tip or partially
plugged fluid tip
Soak cap or tip in suitable solvent and wipe
clean. To clean orifice, use a broom straw
or toothpick. Never use a wire or hard
instruments. This damages holes and
distorts spray pattern.
Heavy right or left side pattern
Note: To determine where material build-up is, invert cap and test spray. If pattern shape
stays in same position, the condition is caused by material build-up on fluid tip. If pattern
changes with cap movement, the condition is in the air cap.
Heavy centre pattern
Too much material
Material too thick
Reduce fluid flow by turning fluid needle
adjusting screw clockwise. Reduce fluid
pressure or increase atomisation pressure.
Thin
Intermittent or ‘fluttering’ spray fan
Loose fluid tip
Fluid tip not seated correctly in gun head
Gun (with cup) tipped at excessive angle.
Obstructed fluid passage or hose.
Loose or cracked fluid tube in cup or
tank.
Insufficient fluid in cup or pressure tank.
Too heavy fluid for suction feed.
Dry or worn packing or loose packing nut.
Plugged vent on suction feed cup.
Gun fluid inlet loose or not sealed/seated
correctly
Fluid hose or cup not fitted correctly to
gun fluid inlet connector
Tighten to 17 Nm (150 ibf/in)
Remove tip, clean components, check
cone seating on tip and gun for damage or
contamination
Do not tip excessively or rotate fluid tube.
Clean
Tighten or replace
Fill cup or tank
Thin material or change to pressure feed
Lubricate or replace. Tighten
Clean vent hole in cup lid.
Tighten to 8 Nm (70 lbf/in)
Remove, check mating surfaces and re-
tighten


