English
10
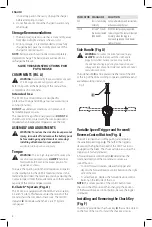
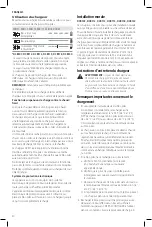
Fig. H
2
1
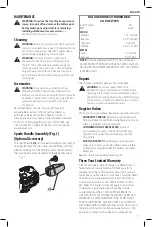
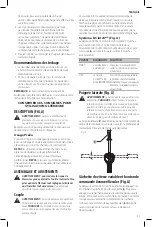
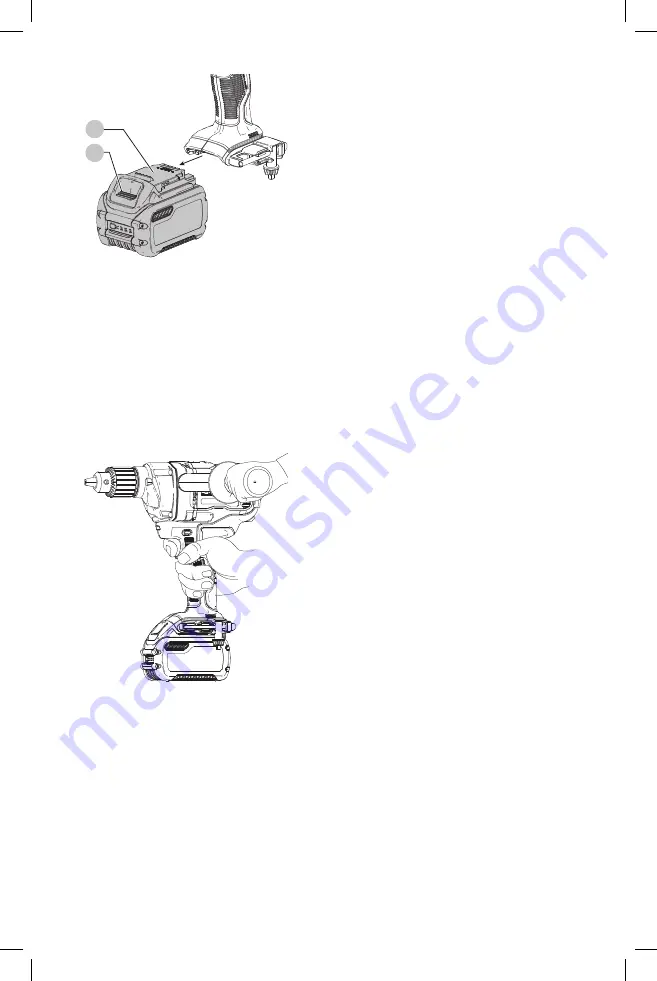
Proper Hand Position (Fig. I)
WARNING:
To reduce the risk of serious personal injury,
ALWAYS
use proper hand position as shown.
WARNING:
To reduce the risk of serious personal
injury,
ALWAYS
hold securely in anticipation of a
sudden reaction.
WARNING:
To reduce the risk of serious personal
injury,
NEVER
brace the tool by placing the battery
pack against another object.
Always
hold tool firmly with both hands in the proper
position for operation as shown.
Fig. I
Mixing
WARNING: Never mix flammable materials
. Refer
to the material package label and Material Safety
Data Sheet for flammability information.
1. Hold the mixer with both hands.
2. To start the unit, pull the trigger in.
3. To stop the tool, release the trigger.
During the mixing process you should guide the mixer
around the container to ensure a more consistent mix.
Continue until all of the material is completely mixed.
nOTE:
Please follow the processing instructions of the
manufacturer of the material.
Always be aware that the greater the viscosity of the
material, the greater the impact of the torque forces on
the mixer.
CAUTION:
If the mixer comes into contact with the
surface of the mixing container while running, it may
kick back.
Drilling
WARNING: TO REDUCE THE RISK OF PERSONAL
INJURY, ALWAYS
ensure workpiece is anchored or
clamped firmly. If drilling thin material, use a wood
“back-up” block to prevent damage to the material.
1. Use sharp drill bits only. For WOOD, use twist drill
bits, spade bits, auger bits, self-feed bits, or hole saws.
For METAL, use steel twist drill bits or hole saws. For
MASONRY, such as brick, cement, cinder block etc., use
carbide-tipped bits. Do not use water.
2. Always apply pressure in a straight line with the bit. Use
enough pressure to keep drill biting, but do not push
hard enough to stall the motor or deflect the bit.
3. Hold tool firmly with both hands to control the twisting
action of the drill.
CAUTION:
Drill may stall if overloaded causing a
sudden twist. Always expect the stall. Grip the drill
firmly to control the twisting action and avoid injury.
4. IF DRILL STALLS, it is usually because it is being
overloaded or improperly used. RELEASE TRIGGER
IMMEDIATELY, remove drill bit from work, and
determine cause of stalling. DO NOT CLICK TRIGGER ON
AND OFF IN AN ATTEMPT TO START A STALLED DRILL
— THIS CAN DAMAGE THE DRILL.
5. To minimize stalling or breaking through the material,
reduce pressure on drill and ease the bit through the
last fractional part of the hole.
6. Keep the motor running when pulling the bit back out
of a drilled hole. This will help prevent jamming.
Drilling in Metal
Start drilling with slow speed and increase to full power
while applying firm pressure on the tool. A smooth even
flow of metal chips indicates the proper drilling rate. Use a
cutting lubricant when drilling metals. The exceptions are
cast iron and brass which should be drilled dry.
nOTE:
Large [5/16" (8 mm) to 1/2" (13 mm)] holes in steel
can be made easier if a pilot hole [5/32" (4 mm) to 3/16"
(5 mm)] is drilled first.
nOTE:
When using a cutting lubricant, be sure not to get
the lubricant on the tool.
Drilling in Wood
Start drilling with slow speed and increase to full power
while applying firm pressure on the tool. Holes in wood can
be made with the same twist drills used for metal. These
bits may overheat unless pulled out frequently to clear chips
from the flutes. For larger holes, use spade bits, power auger
bits, or hole saws. Work that is apt to splinter should be
backed up with a block of wood.
Drilling in Masonry
Use carbide tipped masonry bits at low speeds. Keep even
force on the drill but not so much that you crack the brittle
materials. A smooth, even flow of dust indicates the proper
drilling rate.

