background image

H
H

ENGLISH 

GERMAN 

ITALIAN 

FRENCH

SPANISH

PORTUGUESE

DUTCH

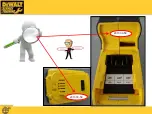
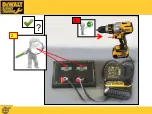
USE STATIC 

PROTECTION 

DEVICE

ANTISTATIK MATTE

BENUTZEN

USARE I DISPOSITIVI 

ANTISTATICI

UTILISEZ UN 

EQUIPEMENT DE 

PROTECTION 

ANTISTATIQUE

USE PROTECCION 

ANTIESTATICA

USE PROTEÇÃO

ESTATICA

GEBRUIK  ANTI -

STATISCH 

MATERIAAL

CLEAN

SÄUBERN

PULIRE

NETTOVER

LIMPIAR

LIMPAR

KUISEN

REMOVE

ÊNTFERNE

DIMETTERE

RETIRER

QUITAR

REMOVER

UITNEMEN

ASSEMBLING

ZUSAMMENBAU

MONTAGGIO

MONTAGE

EL MONTAJE

ENSAMBLAR

ASSEMBLAGE

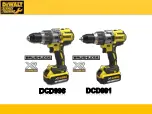
Summary of Contents for DCD991P2

Page 1: ...H H ...

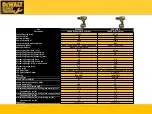
Page 2: ... 1 5 Marketing Weight kg with pack 2 1 2 0 Marketing Height mm without pack 208 208 Marketing Length mm 213 201 Width mm 70 70 LED Foot Chin Foot Switched LED Low Med High 20 min Foot Switched LED Low Med High 20 min LED Light Lumens Output 3 18 77 3 18 77 IP Rating IP54 TBC IP54 TBC Charge Type DCB115 DCB115 Sound Pressure dB A 97 75 Sound Pressure uncertainty dB A 3 3 Sound Power dB A 108 86 Sou...

Page 3: ...ontrolled LED Light Focal working area reduced shadow SET I LOW Light LED LED with stay on for 20sec 2 6 Lumens SET II MEDIUM Light LED LED with stay on for 20sec 18 Lumens SET III HIGH 20min Light LED LED with stay on for 20min 60 Lumens ...

Page 4: ...GIRAR NO SENTIDO HORARIO DRAAI RECHTSOM MOVE IN THIS DIRECTION IN RICHTUNG BEWEGEN MUOVI IN DIREZIONE BOUGEZ DANS CETTE DIRECTION DIRECION DE LA FLECHA AVANÇAR NESSA DIREÇAO BEWEEG IN DE RICHTING VAN DE PIJL CORRECT RICHTIG CORRETTO CORRECT CORRECTO CORRECTO GOED FUNCTION TEST FUNKTIONSTEST DURCHFÜHREN ESEGUIRE IL TEST TEST FONCTIONNEL PRUEVA DE FUNCIONAMIENTO TESTE DE FUNCIONAMENTO FUNCTIETEST LI...

Page 5: ...NSILE DI SERVIZIO OUTILLAGE DE SERVICE HERRAMIENTAS DE SERVICIO FERRAMENTAS DE SERVIÇO SERVICE GEREEDSCHAP LUBRICATION BEFETTEN LUBRIFICAZIONE LUBRIFICATION ENGRASE LUBRIFICAÇÃO SMERING COMPARE VERGLEICHEN COMPARARE COMPAREZ COMPARAR COMPARAR VERGELIJKEN LISTEN HÖREN ASCOLTARE ECOUTEZ ESCUCHAR OUVIR LUISTEREN HOW DOES IT WORK WIE FUNKTIONIERT DAS COME FUNZIONA COMMENT CELA FONCTIONNE COMO FUNCIONA...

Page 6: ...TIVI ANTISTATICI UTILISEZ UN EQUIPEMENT DE PROTECTION ANTISTATIQUE USE PROTECCION ANTIESTATICA USE PROTEÇÃO ESTATICA GEBRUIK ANTI STATISCH MATERIAAL CLEAN SÄUBERN PULIRE NETTOVER LIMPIAR LIMPAR KUISEN REMOVE ÊNTFERNE DIMETTERE RETIRER QUITAR REMOVER UITNEMEN ASSEMBLING ZUSAMMENBAU MONTAGGIO MONTAGE EL MONTAJE ENSAMBLAR ASSEMBLAGE ...

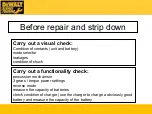
Page 7: ...tery mode selector leakages condition of chuck Carry out a functionality check percussion mechanism 3 gears torque power settings reverse mode measure the capacity of batteries check condition of charger use the charger to charge a obviously good battery and measure the capacity of the battery ...

Page 8: ...battery When the tool is in clutch mode or desired setting the module senses a determined current value for a defined clutch setting and activates the clutch thus clutching out and stopping the motor Clutch Position Sensor CPS Clutch Collar Understand how the E Clutch works ...

Page 9: ...ine at which setting we are at a defined value of voltage is measured To give an example If we are at torque setting 6 it will detect this position by design correct voltage will be measured The correct specification 1 205v to 1 480v Within this range the micro processor will detect X voltage and therefore cut voltage to the unit Understand how the E Clutch works ...

Page 10: ...H H ...

Page 11: ...H H ...

Page 12: ...H H ...

Page 13: ...H H 2013 33 59 2013 33 59 ...

Page 14: ...H H 1 2 3 2 20 ...

Page 15: ...H H ...

Page 16: ...H H ...

Page 17: ...H H 1 Ge ar 2 Gear 3 Gear 1 307 69 905 69 1336 68 2 350 77 1027 77 1527 77 3 390 86 1114 85 1707 87 4 Drill 446 100 1320 100 1964 100 1 min ...

Page 18: ...H H ...

Page 19: ...H H 2016 17 59 ...

Page 20: ...H H ...

Page 21: ...H H ...

Page 22: ...H H DCD991 ...

Page 23: ...H H DCD996 ...

Page 24: ...H H Remove housing and gear case screws opening up and removing cover side handle Carefully remove Transmission Front End and Module Motor together as one full unit ELECTRICAL CHECK ...

Page 25: ...H H ...

Page 26: ...H H ...

Page 27: ...H H ...

Page 28: ...H H ...

Page 29: ...H H ...

Page 30: ...H H ...

Page 31: ...H H ...

Page 32: ...H H ...

Page 33: ...H H ...

Page 34: ...H H Component Identification SA Front End Brushless Motor Forward Reverse Bar Module LED Switch PCB Terminal Block ...

Page 35: ...H H Inspect all wires for pinches nicks or cuts Anything abnormal can effect function Please check the electrical inputs and outputs from Clutch Position Sensor CPS ...

Page 36: ...oint LED wires to housing and PCBs Pinch Point Hall wires to housing Pinch Point CPS wires into the screw boss Pinch Point CPS wires between the screw boss and gear case Pinch Point Connector must be fully seated ...

Page 37: ...lutch and related sensors We have assembled an initial diagnostic flowchart to better pinpoint the root cause of a potential customer complaint ELECTRICAL CHECK Remove housing and gearcase screws opening up and removing cover side handle Carefully remove Transmission Front End and Module Motor together as one full unit Inspect all wires for pinches nicks or cuts Anything abnormal can effect functi...

Page 38: ...H H Put Drill in Clutch 1 Speed 3 and pull the trigger hold for 2 seconds Diagnostic Flowchart DCD991 DCD996 eClutch ...

Page 39: ...H H Diagnostic Flowchart DCD991 DCD996 eClutch ...

Page 40: ...H H Diagnostic Flowchart DCD991 DCD996 eClutch ...

Page 41: ...H H Ground Wire BLK Power Wire RED LED on indicates power to Sensor ...

Page 42: ...H H ...

Page 43: ...H H Clutch Setting Ω 1 1 2000 2 4000 3 5870 4 7740 5 9790 6 12600 7 16400 8 21040 9 27380 10 37140 11 50140 DRILL 72240 HAMMER 106240 ...

Page 44: ...H H ...

Page 45: ...H Connector pins should be pushed fully into connector body Occasionally the pins will get bent down and slide under the mating connector instead of into Inspect units for this and be sure not to do this ...

Page 46: ...H H ...

Page 47: ...H H TX10 3X10 ...

Page 48: ...H H ...

Page 49: ...H H ...

Page 50: ...H H ...

Page 51: ...H H ...

Page 52: ...H H ...

Page 53: ...H H 559661 99 596004 99 ...

Page 54: ...H H ...

Page 55: ...H H ...

Page 56: ...H H Assembling Gear Housing ...

Page 57: ...H H Assembling Gear Housing ...

Page 58: ...H H Assembling Gear Housing ...

Page 59: ...H H Assembling Gear Housing ...

Page 60: ...H H Assembling Gear Housing ...

Page 61: ...H H Assembling Gear Housing ...

Page 62: ...H H TX10 3X10 Assembling Gear Housing ...

Page 63: ...H H 1 Ge ar 2 Gear 3 Gear 1 307 69 905 69 1336 68 2 350 77 1027 77 1527 77 3 390 86 1114 85 1707 87 4 Drill 446 100 1320 100 1964 100 1 min After repair ...

Page 64: ...H H WWW 2HELPU COM ...

Page 65: ...H H Remember the next check will be made by your customer ...

Reviews: