background image

2

c) 

 Keep children and bystanders away while operating a power tool. 

Distractions can cause you to lose control.

2) ELECTRICAL SAFETY

a) 

 Power tool plugs must match the outlet. Never modify the plug in any 

way. Do not use any adapter plugs with earthed (grounded) power tools. 

Unmodified plugs and matching outlets will reduce risk of electric shock.

b) 

 Avoid body contact with earthed or grounded surfaces such as pipes, 

radiators, ranges and refrigerators. 

There is an increased risk of electric 

shock if your body is earthed or grounded.

c) 

 Do not expose power tools to rain or wet conditions. 

Water entering a power 

tool will increase the risk of electric shock.

d)  

Do not abuse the cord. Never use the cord for carrying, pulling or 

unplugging the power tool. Keep cord away from heat, oil, sharp edges 

or moving parts.


Damaged or entangled cords increase the risk of electric 

shock. 

e) 

 When operating a power tool outdoors, use an extension cord suitable 

for outdoor use. 

Use of a cord suitable for outdoor use reduces the risk of 

electric shock. 

f) 

 If operating a power tool in a damp location is unavoidable, use a residual 

current device (RCD) protected supply.

 Use of an RCD reduces the risk of 

electric shock.

3) PERSONAL SAFETY

a)  

Stay alert, watch what you are doing and use common sense when 

operating a power tool. Do not use a power tool while you are tired or 

under the influence of drugs, alcohol or medication. 

A moment of inattention 

while operating power tools may result in serious personal injury.

b) 

 Use personal protective equipment. Always wear eye protection. 

Protective 

equipment such as dust mask, non-skid safety shoes, hard hat, or hearing 

protection used for appropriate conditions will reduce personal injuries.

c)  

Prevent unintentional starting. Ensure the switch is in the off position 

before connecting to power source and/or battery pack, picking up or 

carrying the tool. 

Carrying power tools with your finger on the switch or 

energising power tools that have the switch on invites accidents.

d)  

Remove any adjusting key or wrench before turning the power tool on. 

wrench or a key left attached to a rotating part of the power tool may result in 

personal injury.

e)  

Do not overreach. Keep proper footing and balance at all times. 

This 

enables better control of the power tool in unexpected situations.

f) 

 Dress properly. Do not wear loose clothing or jewellery. Keep your hair, 

clothing and gloves away from moving parts. 

Loose clothes, jewellery or 

long hair can be caught in moving parts. 

g) 

 If devices are provided for the connection of dust extraction and collection 

facilities, ensure these are connected and properly used. 

Use of dust 

collection can reduce dust-related hazards.

4) POWER TOOL USE AND CARE

a)  

Do not force the power tool. Use the correct power tool for your 

application. 

The correct power tool will do the job better and safer at the rate 

for which it was designed.

b)  

Do not use the power tool if the switch does not turn it on and off. 

Any 

power tool that cannot be controlled with the switch is dangerous and must 

be repaired.

c)  

Disconnect the plug from the power source and/or the battery pack from 

the power tool before making any adjustments, changing accessories, 

or storing power tools. 

Such preventive safety measures reduce the risk of 

starting the power tool accidentally.

d)  

Store idle power tools out of the reach of children and do not allow 

persons unfamiliar with the power tool or these instructions to operate the 

power tool. 

Power tools are dangerous in the hands of untrained users.

e) 

 Maintain power tools. Check for misalignment or binding of moving parts, 

breakage of parts and any other condition that may affect the power tool’s 

operation. If damaged, have the power tool repaired before use. 

Many 

accidents are caused by poorly maintained power tools.

f) 

 Keep cutting tools sharp and clean. 

Properly maintained cutting tools with 

sharp cutting edges are less likely to bind and are easier to control.

g) 

  Use the power tool, accessories and tool bits, etc. in accordance with 

these instructions, taking into account the working conditions and the work 

to be performed. 

Use of the power tool for operations different from those 

intended could result in a hazardous situation.

Summary of Contents for DW735-XE

Page 1: ...DW735 XE 330 MM 13 HEAVY DUTY PORTABLE THICKNESS PLANER INSTRUCTION MANUAL ...

Page 2: ......

Page 3: ... and may be used to compare one tool with another It may be used for a preliminary assessment of exposure WARNING The declared vibration emission level represents the main applications of the tool However if the tool is used for different applications with different accessories or poorly maintained the vibration emission may differ This may significantly increase the exposure level over the total ...

Page 4: ...emove any adjusting key or wrench before turning the power tool on A wrench or a key left attached to a rotating part of the power tool may result in personal injury e Do not overreach Keep proper footing and balance at all times This enables better control of the power tool in unexpected situations f Dress properly Do not wear loose clothing or jewellery Keep your hair clothing and gloves away fr...

Page 5: ... of the cutter head carriage Never clear clogs make cutter knife replacement or any other repairs adjustments with unit plugged in Make certain that the switch is in the OFF position before connecting plug to a power source To prevent unexpected turn on of the tool after power is disrupted turn the switch OFF before restoring power Be sure that the cutter knives are mounted as described in the ins...

Page 6: ...and other construction activities contains chemicals known to cause cancer birth defects or other reproductive harm Some examples of these chemicals are lead from lead based paints crystalline silica from bricks and cement and other masonry products and arsenic and chromium from chemically treated lumber Your risk from these exposures varies depending on how often you do this type of work To reduc...

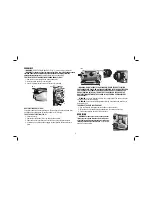
Page 7: ...rt until the button engages the dust ejection chute and locks in place K H H C I FIG 4 WARNING DO NOT OPERATE YOUR PLANER WITHOUT THE DUST EJECTION PORT LOCKED INTO PLACE DO NOT INSERT ANYTHING INTO THE DUST EJECTION CHUTE UNLESS THE PLANER IS UNPLUGGED AND YOU ARE CLEARING A CLOG OR OBSTRUCTION IN THE UNIT DO NOT GET YOUR FACE OR EYES NEAR THE DUST EJECTION PORT WHEN THE PLANER IS IN OPERATION SE...

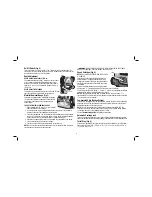
Page 8: ...erial recommended on the material removal gauge WARNING DO NOT SWITCH THE UNIT ON WITH THE MATERIAL POSITIONED UNDER THE CARRIAGE SERIOUS INJURY COULD RESULT Speed Selection Fig 8 NOTE ONLY SWITCH SPEEDS WHEN THE PLANER FIG 8 P IS RUNNING Your planer has the ability to feed materialat two different speeds The two speed feature P was designed to improve efficiency when planing and to provide the be...

Page 9: ...few tight knots as possible Do not plane wood that is severely warped twisted knotted or bowed WARNING Do not place your body between the rear of the planer and a stationary object while material is feeding Serious injury could result MINIMUM MAXIMUM WIDTH HEIGHT DEPTH NOTE Always plane in the direction of the grain Support the workpiece adequately at all times Planing material less than 19 mm 3 4...

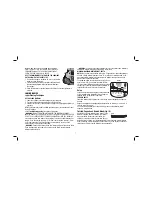
Page 10: ... 11 WARNING TWISTED WOOD MAY JAM YOUR FIG 11 THICKNESS PLANER IF A JAM OCCURS TURN THE POWER OFF DISCONNECT THE POWER SUPPLY AND RAISE THE CARRIAGE TO RELEASE THE MATERIAL FROM THE cutter head If your material is only slightly twisted Plane both sides alternating from one to the other until the desired thickness is reached TO PLANE CUPPED WOOD FIG 12 To obtain the best possible results with cupped...

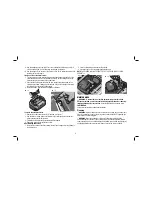
Page 11: ...knife change procedure indicated above 4 Repeat the procedure for the last dull knife After installing new knives 1 Insert the round end of the dust shroud into the fan housing and rotate it down to lock it into place 2 Place the three wing nuts back into the shroud 3 Screw the top cover of the planer back onto the unit NOTE THE PLANER WILL NOT OPERATE IF THE TOP COVER IS NOT PLACED CORRECTLY FIG ...

Page 12: ...epth adjustment scale Measure the finished thickness of the workpiece If the thickness of the workpiece does not match the reading on the depth adjustment scale loosen the two screws W on the red indicator Adjust the pointer up or down until its reading matches the finished thickness of the workpiece Securely re tighten the screws Base Maintenance Keep the table clean and free from oil grease and ...

Page 13: ...safety read the tool instruction manual before attaching the tables Failure to heed these warnings may result in personal injury and serious damage to the planer and the accessory When servicing this tool use only identical replacement parts Have damaged cords replaced by an authorized service center Your DW7351 folding table box should FIG 25 include 2 folding tables 4 cap screws 4 springs 4 nuts...

Page 14: ...ical replacement parts TROUBLESHOOTING GUIDE IF THE UNIT DOES NOT RUN CHECK TO SEE if the unit is plugged in if the dust shroud is properly in place if the top cover is properly in place if the circuit breaker needs to be reset IF THE MATERIAL DOES NOT FEED PROPERLY CHECK FOR excess clogging in the dust shroud excess oil debris from feed rollers excessively twisted cupped or bowed material a broke...

Page 15: ......

Page 16: ...dewalt co nz JUN12 Part No N196494 DW735 XE Copyright 2012 DEWALT The following are trademarks for one or more DEWALT power tools the yellow and black color scheme the D shaped air intake grill the array of pyramids on the handgrip the kit box configuration and the array of lozenge shaped humps on the surface of the tool ...

Reviews: