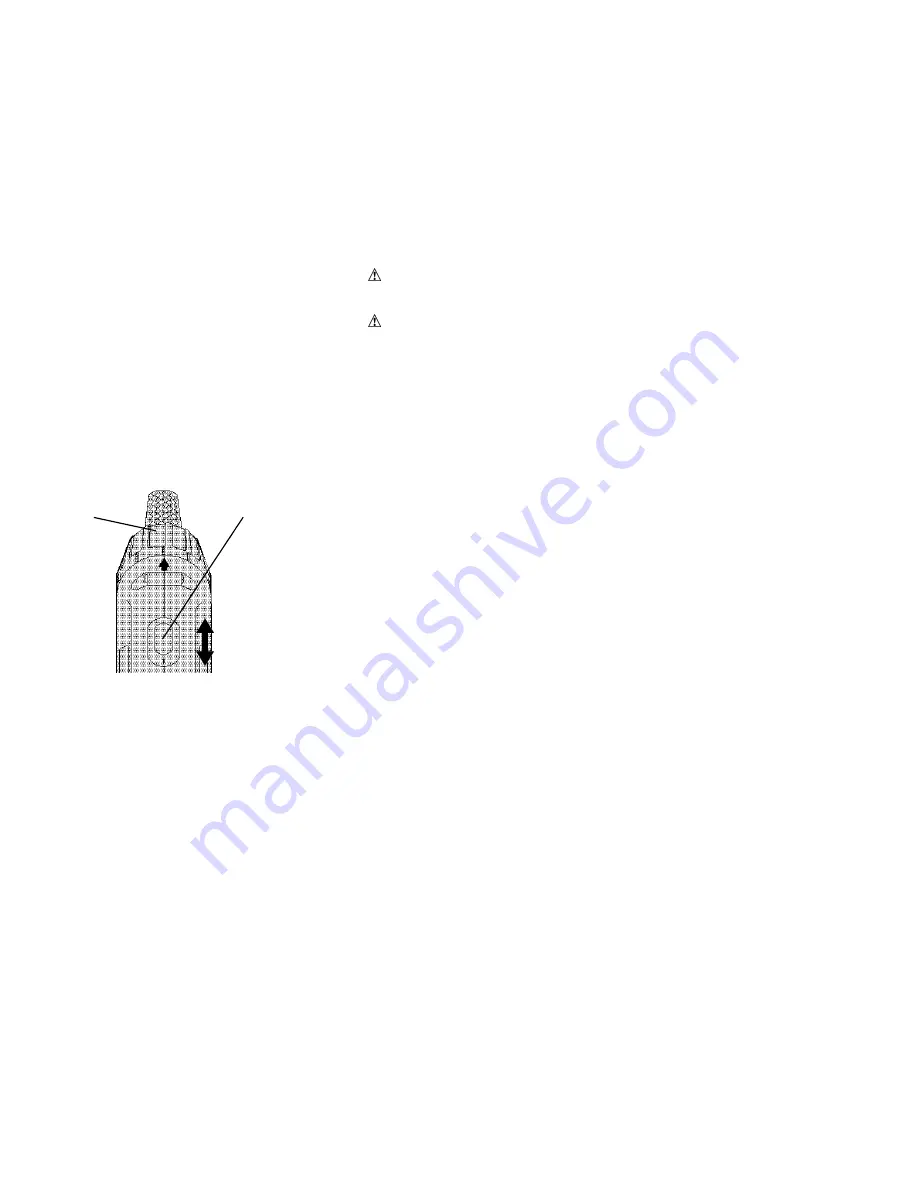
6
LOW SPEED/HIGH
TORQUE
0-450 rpm (position 1)
HIGH SPEED/LOW
TORQUE
0-1400 rpm (position 2)
DUAL RANGE
GEAR SHIFTER
FIG. 5
TORQUE
ADJUSTMENT
COLLAR
is important and will prevent serious damage to the battery pack.
2. The charger and battery pack may become warm to touch while
charging. This is a normal condition, and does not indicate a prob-
lem.
3. If the battery pack does not charge properly — (1) Check current
at receptacle by plugging in a lamp or other appliance, (2) Check
to see if receptacle is connected to a light switch which turns
power off when you turn out the lights. (3) Move charger and bat-
tery pack to a location where the surrounding air temperature is
approximately 65°F - 75°F (18°- 24°C). (4) If charging problems
persist, take or send the tool, battery pack and charger to your
local service center.
4. The battery pack should be recharged when it fails to produce suf-
ficient power on jobs which were easily done previously. DO NOT
CONTINUE to use under these conditions. Follow the charging
procedure. You may also charge a partially used pack whenever
you desire with no adverse affect on the battery pack.
6. Do not immerse charger in water or any other liquid.
WARNING: Don't allow any liquid to get inside charger. Electric
shock may result. To facilitate the cooling of the battery pack after
use, avoid placing the charger or battery pack in a warm
environment such as in a metal shed, or an uninsulated trailer.
CAUTION: Never attempt to open the battery pack for any
reason. If the plastic housing of the battery pack breaks or
cracks, return to a service center for recycling.
Operation
Forward/Reverse Control Button
A forward/reverse control button determines the direction of the
tool and also serves as a “lock off” button. To select forward
rotation, release the trigger switch and depress the
forward/reverse control button on the right side of the tool, as
shown in Figure 4.
To select reverse, depress the forward/reverse control button on
the left side of the tool as shown in Figure 4. The center position of
the control button locks the tool in the “OFF” position as shown in
Figure 4.
When changing the position of the forward/reverse control button,
be sure the trigger is released.
NOTE: The first time the tool is run after changing the direction of
rotation, you may hear a click on start up. This is normal and does
not indicate a problem. See Fig. 4.
Torque Adjustment Collar
Your driver/drill has an adjustable torque screwdriver mechanism
for driving and removing a wide array of fastener shapes and
sizes.
Circling the collar are numbers ranging from 0 to 5, and a drill bit
symbol. These numbers (and half numbers designated by dots on
the collar) are used to designate a torque range set within the tool.
The higher the number on the collar, the higher the torque and the
Summary of Contents for DW970
Page 1: ......


