background image

3

Fig. L

Fig. J

Fig. M

Fig. K

Fig. N

Fig. O

6

7

7

14

1

2

1

4

Summary of Contents for DWE314 DWE315

Page 1: ...DWE314 DWE315 Final Page size A5 148mm x 210mm ...

Page 2: ...B Copyright DeWALT English original instructions 5 ...

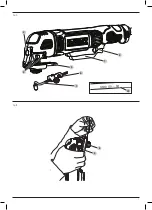
Page 3: ...1 Fig A Fig B 1 4 2 3 5 6 7 20 8 3 ...

Page 4: ...2 Fig C Fig E Fig G Fig D Fig F Fig H Fig I 10 9 12 7 6 5 13 15 6 16 7 14 11 ...

Page 5: ...3 Fig L Fig J Fig M Fig K Fig N Fig O 6 7 7 14 1 2 1 4 ...

Page 6: ...4 Fig P Fig Q Fig R 5 13 17 15 16 19 17 9 3 17 ...

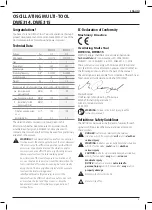
Page 7: ...on make DeWALT one of the most reliable partners for professional power tool users Technical Data DWE314 DWE315 Voltage VAC 230 230 UK Ireland VAC 230 115 230 115 Type 1 1 Power intput W 250 300 Power output W 170 170 Oscillating frequency min 1 0 22000 0 22000 Oscillating angle 1 6 1 6 Weight kg 1 5 1 5 Noise values and vibration values triax vector sum according to EN62841 LPA emission sound pre...

Page 8: ... switch is in the off position before connecting to power source and or battery pack picking up or carrying the tool Carrying power tools with your finger on the switch or energising power tools that have the switch on invites accidents d Remove any adjusting key or wrench before turning the power tool on A wrench or a key left attached to a rotating part of the power tool may result in personal i...

Page 9: ...on of the relevant safety regulations and the implementation of safety devices certain residual risks cannot be avoided These are Impairment of hearing Risk of personal injury due to flying particles Risk of burns due to accessories becoming hot during operation Risk of personal injury due to prolonged use Electrical Safety The electric motor has been designed for one voltage only Always check tha...

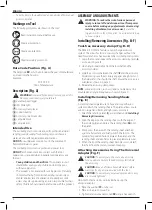
Page 10: ...g Removing Accessories Fig B F Tool free Accessory clamp Fig B D The DWE314 DWE315 features a quick change accessory system This allows for faster accessory changes without the need for wrenches or hex keys like other oscillating tool systems 1 Grasp the tool and squeeze the accessory clamping lever 3 as shown in figure B 2 Clean any residual debris from the tool shaft and the accessory holder 3 S...

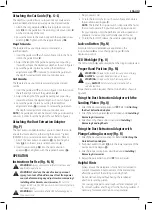
Page 11: ...wer source before making any adjustments or removing installing attachments or accessories Be sure the trigger switch is in the OFF position An accidental start up can cause injury WARNING Ensure switch is fully OFF before plugging in the power cord 1 Plug in power cord 2 To turn the tool ON hold it as shown in figure M and press the variable speed trigger 1 NOTE The further the trigger switch is ...

Page 12: ...ch accessories with this tool could be hazardous To reduce the risk of injury only DeWALT recommended accessories should be used with this product Consult your dealer for further information on the appropriate accessories Compatible accessories Oscillating sanding pad Oscillating wood w nails blade Wide titanium oscillating wood w nails blade Oscillating hardwood blade Oscillating fastcut wood bla...

Page 13: ......

Page 14: ......

Page 15: ......

Page 16: ...014353 39 039 9590200 Fax 39 039 9590311 www dewalt it Nederlands DeWALT Netherlands BVPostbus 83 6120 AB BORN Tel 31 164 283 063 Fax 31 164 283 200 www dewalt nl Norge DeWALT Postboks 4613 0405 Oslo Norge Tel 45 25 13 00 Fax 45 25 08 00 www dewalt no kundeservice no sbdinc com Österreich DeWALT Werkzeug Vertriebsges m b H Oberlaaerstrasse 248 A 1230 Wien Tel 01 66116 0 Fax 01 66116 614 www dewalt...

Reviews: