background image

8

English

OPERATING PROCEDURES

WARNING: Do not attempt to unclog (back flush) the spray gun  

by squeezing the trigger while holding your finger in front of  

the fluid nozzle.

CAUTION: Pressure may vary according to viscosity of material 

used. Maximum working pressure of the gun is 40 PSI. Do not 

exceed pressure  limit of gun or any other component in system!

CAUTION: Prior to daily operation, make certain that all 

connections and fittings are secure. Check hose and all  

connections for a weak or worn condition that could render system 

unsafe. All replacement components such as hose or fittings must 

have a working pressure equal to or greater than system pressure.

SIPHON FEED USE: 

1. Mix material according to the manufacturer’s instructions.  

    Mixture  should be smooth and easily pourable. Lumps or  

    foreign particles should be removed by straining through  

    a suitable paint filter.

noTe: When applying heavy bodied paints, the internal Mix Air 

Cap included is recommended.

noTe: If not using the siphon feed setting, see “Internal Pressure 

Feed” or “Remote Pressure Feed’ paragraphs.

2. Fill the 

material cup (e) ¾" full.

3. Attach 

material cup (e) to the gun securely.

4. Attach air supply line to the ¼" 

air inlet (G).

5. To adjust the spray pattern, loosen the 

air cap (a) and rotate  

    the 

horns (B) to achieve desired pattern. Then tighten  


air cap (a).

6. Turn the 

fluid control knob (J) clockwise until it stops, do  

    not force it. This will shut off the fluid flow. 

7. Adjust air pressure to 40 PSI at air compressor 

WARNING: DO NOT exceed 100 PSI. 

8. Turn the 

air volume control knob (h) counterclockwise until  

    the first thread is flush with the gun body.

WARNING: DO NOT turn air valve control knob the or fluid  

control knob out until  first thread is past the gun body. They are 

under pressure when the gun is triggered and could leave the gun 

with force.
noTe: Care should be exercised when handling spray gun to 
avoid damage to the orifice of the air cap and tip of fluid nozzle. 

Damage to these parts results in irregular spray patterns. 

9. Depress spray gun

 trigger (F) and gradually turn the  


fluid control knob (J) counterclockwise until desired fluid flow  

    is reached. Trigger gun quickly, one second on-off to test pattern.

WARNING: NEVER point spray gun at self or any other person. 

Accidental discharge of material may result in serious injury. 
noTe: If gun sprays too fast, decrease the air and fluid pressure.   

If too slow, increase the pressure. Turn 

fluid control knob (J)  

counterclockwise to increase, or clockwise to decrease, the fluid 

flow. Turn 

air volume control knob (h) counterclockwise to 

increase, or clockwise to decrease, the air flow.
noTe: When using the internal mix air cap, begin with the same 
air and fluid pressure.

Summary of Contents for DWMT70779

Page 1: ...sation Manual de instrucciones INSTRUCTIVO DE OPERACIÓN CENTROS DE SERVICIO Y PÓLIZA DE GARANTÍA ADVERTENCIA LÉASE ESTE INSTRUCTIVO ANTES DE USAR EL PRODUCTO If you have questions or comments contact us Pour toute question ou tout commentaire nous contacter Si tiene dudas o comentarios contáctenos 1 800 4 DeWALT www dewalt com ...

Page 2: ...2Oz 1000ML PATTERN LENGTH 6 5 165MM MIN WORKING PRESSURE 30PSI MAX WORKING PRESSURE 40PSI AVERAGE AIR CONSUMPTION 40PSI 11 5 SCFM 5 4 L s 3 8 CFM 1 8 L s NET WEIGHT 2 4 LBS 1 1Kg AIR INTLET SIZE 1 4 NPS M RECOMMENDED HOSE SIZE 3 8 10MM DWMT70779 SIPHON SPRAY GUN G Air Inlet H Air Volume Control Knob I Pattern Control Knob J Fluid Control Knob K Hook FIG 1 A B C D E F G H I J K ...

Page 3: ...REE AT 1 800 4 DeWALT 1 800 433 9258 IMPORTANT SAFETY INSTRUCTIONS WARNING This product contains chemicals known to the State of California to cause cancer and birth defects or other reproductive harm Wash hands after handling SAVE THESE INSTRUCTIONS WARNING Improper operation or maintenance of this product could result in serious injury and property damage Read and understand all warnings and ope...

Page 4: ...All persons in the work area must always wear approved eye and hearing protection and approved respiratory protection when this spray gun is in operation Never aim spray gun at anyone Do not spray near sparks open flame lit cigarettes pilot lights space heaters or any other potential ignition source DO NOT SMOKE IN WORK AREA Only persons well acquainted with these rules of safe operation should be...

Page 5: ...in amputation or other serious injury See a physician immediately Never place hands in front of nozzle Direct spray away from self and others Seek immediate medical attention if direct spray contacts exposed body parts WARNING RISK from flying objects What can happen How to prevent it Certain parts are under pressure whenever the gun is connected to a pressurized air line These parts may be propel...

Page 6: ...low two spray patterns FLUID CONTROL KNOB The fluid control knob J allows control of the material amount released the density of the fan spray AIR VOLUME CONTROL KNOB The air volume control knob H controls the air flow and allows for a MAX of 40 PSI to reduce over spray and efficient air consumption PATTERN CONTROL KNOB The pattern control knob I allows the width of the fan spray to be adjusted FI...

Page 7: ...ir line lubricators and air line filters is recommended to prevent water in the line that can damage the tool Drain the air tank daily Clean the air inlet filter screen on at least a weekly schedule to remove accumulated dirt or other matter that can restrict air flow The tool s air inlet used for connecting an air supply has standard 1 4 NPT American thread Safety Rules For Pneumatic Tools 1 Insp...

Page 8: ...ap A and rotate the horns B to achieve desired pattern Then tighten air cap A 6 Turn the fluid control knob J clockwise until it stops do not force it This will shut off the fluid flow 7 Adjust air pressure to 40 PSI at air compressor WARNING DO NOT exceed 100 PSI 8 Turn the air volume control knob H counterclockwise until the first thread is flush with the gun body WARNING DO NOT turn air valve c...

Page 9: ...en unscrewing the nozzle Lubrication Lubrication procedures must be observed after thoroughly cleaning the gun to ensure effective high quality performance of spray gun 1 Lubricate working points with straight mineral oil or castor oil 2 Periodically place a few drops of oil on tapered sections of the fluid nozzle to ensure easy operation of the air cap When spraying water base materials coat the ...

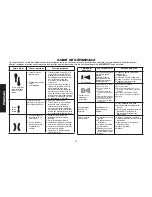
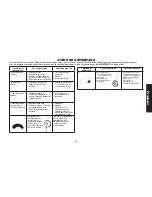
Page 10: ...d Remedy 1 Fluid nozzle cracked or worn 2 Leak at thread of fluid nozzle 3 Leak at fluid needle 4 Needle packing worn out 5 Insufficient fluid in cup 6 Vent hole in container cover clogged 1 Tighten or replace 2 Tighten fluid nozzle 3 Tighten compression nut assembly or replace needle packing 4 Replace packing 5 Fill cup with fluid 6 Clean out Air back pressuring into cup Excessive air blowing bac...

Page 11: ...1 Tighten and clean or replace it Material leaking from nozzle when trigger is released 1 Worn fluid needle 2 Dried material in tip of nozzle 3 Loose packing nut 1 Replace 2 Clean 3 Tighten needle packing nut by turning counterclockwise A Dried material is clogging side port A and causing side port B to blow spray towards the clogged side Soak side ports in thinner to clean clog DO NOT poke any op...

Page 12: ...OMPRIMÉPOURLARESPIRATION RÉGLEZ LAPRESSIONÀZÉROAVANTDERETIRERLEBOYAU RISQUEDECHOCÉLECTRIQUE VOLTAGEDANGEREUX DEBRANCHEZLAMACHINEAVANTD ENLEVERBOITIER N EXPOSEZPASLECOMPRESSEUR ÀLAPLUIE REMISEZ LEÀL INTÉRIEUR LISEZLEMANUELDEL UTILISATEURPOURDESINSTRUCTIONSCOMPLÈTESCONCERNANTLASÉCURITÉ L UTILISATIONETLESRÉPARATIONS INCORRECT USE CAN CAUSE HAZARDS FOLLOW THESE INSTRUCTIONS RISK OF BURSTING MAKE SURE ...

Page 13: ...SI PRESSION D UTILISATION MAXIMALE 275 kPa 40 PSI CONSOMMATION D AIR MOYENNE 275 KPA 40 PSI 5 4 l s 11 5 pieds cubes standard par minute 3 8 l s 1 8 pieds cubes standard par minute POIDS NET 1 1 kg 2 4 lb DIMENSION DE L ENTRÉE D AIR Filetage conique M 6 35 mm 1 4 po DWMT70779 PISTOLET DE PULVÉRISATION À SIPHON G Entrée d air 6 4 mm po H Bouton de commande de la valve à air I Bouton de contrôle du ...

Page 14: ...s en matière de sécurité Les définitions ci dessous décrivent le niveau de gravité pour chaque symbole Veuillez lire le mode d emploi et porter une attention particulière à ces symboles DANGER Indique une situation dangereuse imminente qui si elle n est pas évitée causera la mort ou des blessures graves AVERTISSEMENT Indique une situation potentiellement dangereuse qui si elle n est pas évitée pou...

Page 15: ...r en tout temps une protection pour les yeux et auditive appropriées ainsi qu un masque de protection approuvé lorsque le pistolet de pulvérisation est utilisé Ne jamais pointer le pistolet de pulvérisation vers quelqu un Ne pas pulvériser à proximité d étincelles de flammes nues de cigarettes allumées de veilleuses d appareils de chauffage ni de toute autre source d allumage potentielle NE PAS FU...

Page 16: ...ne amputation ou des blessures graves Consulter un médecin immédiatement Ne jamais placer les mains devant la buse Ne jamais diriger le jet vers vous ou vers quelqu un d autre Appeler une assistance médicale immédiate si un jet direct entre en contact avec une partie du corps non protégée AVERTISSEMENT RISQUE D ENVOL DES OBJETS Ce qui peut se produire Comment l éviter Certaines pièces sont sous pr...

Page 17: ...eux formes de jet BOUTON DE COMMANDE DE FLUIDE Le bouton de commande de fluide J permet de contrôler la quantité matérielle dégagée la densité de l éventail du jet BOUTON DE COMMANDE DE LA VALVE À AIR Le bouton de commande de la valve à air H contrôle le débit d air et permet un MAXIMUM de 2 8 bars 40 PSI afin de réduire la surpulvérisation et d assurer une consommation d air efficace BOUTON DE CO...

Page 18: ...urs et des filtres à air dans les conduits d air pour empêcher l eau de pénétrer dans le conduit et endommager l outil Vider le réservoir d air tous les jours Nettoyer le grillage du filtre du conduit d air au moins une fois par semaine pour supprimer la saleté accumulée ou autre débris qui peutrestreindre le débit d air L entrée d air de l outil utilisée pour raccorder l alimentation d air compor...

Page 19: ...ête sans le forcer Cela arrêtera le débit de fluide 7 Régler la pression d air du compresseur à air à 2 8 bars 40 PSI AVERTISSEMENT NE PAS excéder 2 1 bars 100 PSI 8 Tourner le bouton de la valve à air H dans le sens inverse des aiguilles d une montre jusqu à ce que le premier filet soit affleurant avec le corps du pistolet AVERTISSEMENT NE PAS faire tourner la manette de commande du robinet d air...

Page 20: ...ir à l aide d une brosse 4 Essuyer l intérieur du pistolet de pulvérisation à l aide d un chiffon imbibé de solvant ou utiliser une ou des brosses propres fournies afin d éliminer toute accumulation de matériau IMPORTANT S assurer que la tête d air et la buse soient propres en tout temps Si nécessaire retirer ces deux composantes et les tremper dans le solvant NE PAS utiliser d objets rigides pour...

Page 21: ... 800 4 DeWALT Cette garantie ne s applique pas aux accessoires ni aux dommages causés par des réparations réalisées ou tentées par des tiers Cette garantie vous accorde des droits légaux spécifiques et il est possible que vous ayez d autres droits qui varient d un État ou d une province à l autre Amérique latine cette garantie ne s applique pas aux produits vendus en Amérique latine Pour ceux ci v...

Page 22: ...re quelque part dans le flux de peinture Exemple Mêmes symptômes que si le récipient ne contenait plus de peinture 1 Check and tighten fluid needle packing nut 2 Tighten fluid tip 3 Check fluid tip seat for damage 4 Check for poor gun to cup seating 5 Check that cup is correctly fastened on the gun 1 Buse fissurée ou usée 2 Fuite de la buse 3 Fuite de l aiguille de liquide 4 Presse garniture de l ...

Page 23: ...Nettoyer 3 Visser l écrou de presse garniture de l aiguille en tournant dans le sens inverse des aiguilles d une montre A Des substances séchées bouchent le côté latéral A faisant en sorte que le côté latéral B pulvérise la substance vers le côté bouché Tremper les côtés latéraux dans le diluant pour déboucher les trous NE PAS débloquer les ouvertures à l aide d objets rigides GUIDE DE DÉPANNAGE C...

Page 24: ...SATION RISQUED INCENDIEOUD EXPLOSION NEPASVAPORISERUNLIQUIDEOUUNPEINTUREINFLAMMABLEOUCOMBUSTIBLEPRÈSD ÉTINCELLES DEFLAMMES DE VEILLEUSESNIDANSUNENDROITRESTREINTOURENFERMÉ L AIREDEVAPORISATIONDOITÊTREBIENAÉRÉE GARDEZLECOMPRESSEURÀUNEDISTANCED AUMOINS20PIEDSDELASURFACEÀ VAPORISER NEPORTEZPASLECOMPRESSEURETNEL UTILISEZPASNIAUCUNAUTREAPPAREILÉLECTRIQUEÀPROXIMITÉDEL AIREDEVAPORISATION NEFUMEZJAMAISQUAN...

Page 25: ...PATRÓN 6 5 165 mm PRESIÓN MÍNIMA DE TRABAJO 30 PSI PRESIÓN MÁXIMA DE TRABAJO 40 PSI CONSUMO DE AIRE PROMEDIO 40PSI 5 4 l s 11 5 SCFM 1 8 l s 3 8 CFM PESO NETO 1 1 kg 2 4 lb TAMAÑO DE LA ENTRADA DE AIRE 6 4 mm 1 4 NPS M TAMAÑO RECOMENDADO DE LA MANGUERA 10 mm 3 8 DWMT70779 PISTOLA PULVERIZADORA TIPO SIFÓN F Gatillo G Entrada de aire de 1 4 H Perilla de control de volumen de aire I Perilla de contro...

Page 26: ... sustancias químicas que según el conocimiento del estado de California causan cáncer y defectos congénitos u otros daños en los órganos reproductivos Lávese las manos después de manipular el producto GUARDE ESTAS INSTRUCCIONES ADVERTENCIA Laoperación o el mantenimiento inapropiados de este producto podrán resultar en Lesiones graves y daños a la propiedad Lea y comprenda todas las advertencias e ...

Page 27: ...el área de trabajo deben utilizar protección ocular auditiva y respiratoria aprobada cuando se utiliza la pistola pulverizadora Nunca apunte la pistola pulverizadora a una persona No pulverice cerca de chispas llamas cigarrillos encendidos luces piloto calefactores de espacios u otras fuentes potenciales de incendio NO FUME EN EL ÁREA DE TRABAJO El uso de esta herramienta neumática se debe permiti...

Page 28: ... médico inmediatamente Nunca coloque las manos en frente de la boquilla Dirija el material pulverizado lejos de usted y otras personas Busque atención médica de inmediato si la pulverización entra en contacto directo con partes expuestas del cuerpo Advertencia RIESGO de objetos expulsados Qué puede suceder Cómo evita rlo Algunas piezas están bajo presión siempre que la pistola esté conectada a una...

Page 29: ...alizar dos patrones de pulverización PERILLA DE CONTROL DE FLUIDO La perilla de control de fluido J permite controlar la cantidad de material liberado la densidad de la pulverización en abanico PERILLA DE CONTROL DE VOLUMEN DE AIRE La perilla de volumen de control de aire H controla el flujo de aire y permite una presión MÁXIMA de 40 PSI para reducir el exceso de pulverización y mantener un consum...

Page 30: ...manguera de aire y de filtros de aire en línea es recomendado para evitar que agua en la manguera dañe la herramienta Drene diariamente el tanque de aire Limpie el cedazo del filtro de entrada de aire por lo menos una vez por semana para remover la mugre acumulada u otras cosas que puedan restringir el flujo de aire La entrada de aire de la herramienta usada para conectar una fuente de aire tiene ...

Page 31: ... la derecha hasta que se detenga hacer no la fuerce Esto cerrará el flujo de fluido 7 Ajuste la presión de aire a 40 PSI en el compresor de aire ADVERTENCIA NO supere los 100 PSI 8 Gire la perilla de control de volumen H en el sentido contrario a las agujas del reloj hasta hasta que el primer hilo de la rosca quede a nivel con el cuerpo de la pistola ADVERTENCIA NO gire la perilla de control de la...

Page 32: ...e trabajo con aceite mineral o aceite de ricino 2 Coloque periódicamente varias gotas de aceite en las secciones cónicas de la boquilla de fluido para garantizar el funcionamiento fácil y correcto de la tapa de aire Cuando pulverice materiales a base de agua recubra la boquilla de fluido por dentro y por fuera con aceite mineral puro después de cada uso 3 El diámetro exterior de la manga de la agu...

Page 33: ...ido 3 Revise el asiento de la punta de fluido en busca de daños 4 Revise si el asiento del recipiente está deteriorado 5 Compruebe que el recipiente esté sujetado correctamente a la pistola Patrón superior o inferio viscoso Patrón dividido Astillamiento de la pistola Patrón defectuoso Posible causa Reparación recomendada 1 Boquilla de fluido rota o desgastada 2 Pérdida en la rosca de la boquilla d...

Page 34: ... la entrada de fluido del recipiente 1 Recipiente flojo o sustancias extrañas sobre entre la rosca de la tapa y la entrada de fluido 1 Ajústela y límpiela o reemplácela Pérdida de material desde la boquilla cuando se suelta el gatillo 1 Aguja de fluido desgastada 2 Material seco en la punta de la boquilla 3 Tuerca del envase floja 1 Reemplace 2 Limpie 3 Ajuste la tuerca del envase de la aguja movi...

Page 35: ...RVOIR ÀAIRAPRÈSCHAQUEUTILISATION RISQUED INCENDIEOUD EXPLOSION NEPASVAPORISERUNLIQUIDEOUUNPEINTUREINFLAMMABLEOUCOMBUSTIBLEPRÈSD ÉTINCELLES DEFLAMMES DE VEILLEUSESNIDANSUNENDROITRESTREINTOURENFERMÉ L AIREDEVAPORISATIONDOITÊTREBIENAÉRÉE GARDEZLECOMPRESSEURÀUNEDISTANCED AUMOINS20PIEDSDELASURFACEÀ VAPORISER NEPORTEZPASLECOMPRESSEURETNEL UTILISEZPASNIAUCUNAUTREAPPAREILÉLECTRIQUEÀPROXIMITÉDEL AIREDEVAPO...

Page 36: ...9 70100725 Copyright 2014 DeWALT The following are trademarks for one or more DeWALT power tools the yellow and black color scheme the D shaped air intake grill the array of pyramids on the handgrip the kit box configuration and the array of lozenge shaped humps on the surface of the tool ...

Reviews: