15
English
feet, if necessary.
9. After 30 minutes, turn the Auto/Off switch to the “Off” position.
10. Close the drain valve.
11. Turn the Auto/Off switch to the “Auto” position. The air receiver
will fill to “cut-out” pressure and the motor will stop.
The compressor is now ready for use.
Before Each Start-Up
1. Place Auto/Off switch to “Off”.
2. Close the drain valve
.
3. Visually inspect air lines and fittings for leaks.
4. Check safety valve. See
To Check Safety Valve
under
Maintenance
.
WARNING:
Risk of unsafe operation. Firmly grasp air hose in
hand when installing or disconnecting to prevent hose whip.
WARNING:
Risk of unsafe operation. Do not use damaged or
worn accessories.
NOTE:
A regulator MUST be installed when using accessories rated
at less than 135 psi.
NOTE:
The hose or accessory will require a quick connect plug if
the air outlet is equipped with a quick connect socket.
WARNING:
Risk of bursting. Too much air pressure causes a
hazardous risk of bursting. Check the manufacturer’s maximum
pressure rating for air tools and accessories. The regulator outlet
pressure must never exceed the maximum pressure rating.
CAUTION:
Risk of unsafe operation. Compressed air from the
unit may contain wa ter condensation and oil mist. Do not spray un fil-
tered air at an item that could be damaged by moisture. Some air
tools and accessories may require filtered air. Read the in struc tions
for the air tools and accessories.
How to Start
1. Turn the Auto/Off switch to “Auto” and allow tank pressure to
build. Motor will stop when tank pressure reaches “cut-out”
pressure.
2. When the tank pressure reaches "cut-out" pressure open the
globe valve/air discharge valve
.
IMPORTANT:
When using regulator and other accessories refer
to the manufacturers instructions.
WARNING:
Risk of bursting. If any unusual noise or vibration is
noticed, stop the compressor immediately and have it checked by
a trained service technician.
The compressor is ready for use.
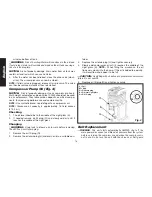
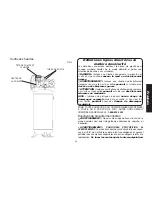
Shut-down (Fig. 1)
1. Move Auto/Off switch to the OFF position.
NOTE:
If finished
using compressor, follow Steps 2 - 5.
2. Remove hose and accessory.
WARNING:
Risk of unsafe operation. Firmly grasp air hose in
hand when installing or disconnecting to prevent hose whip.
3. Drain the air tank, see
Draining Air Tank
under
Maintenance
.
Ensure air tank pressure gauge reads 0 psi.
WARNING:
Risk of bursting. Drain air tank daily. Water will
condense in air tank. If not drained, water will corrode and weaken
the air tank causing a risk of air tank rupture.
4. Allow the compressor to cool down.
5. Wipe air compressor clean and store in a safe, non-freezing
area.
Summary of Contents for DXCMLA3706056
Page 87: ...87 Español NOTES ...


