background image

Model 

T1000 


Cat. No. 

DDF211001P    

T1000

5

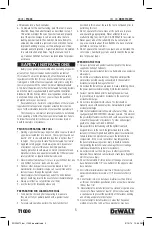
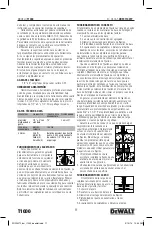
unfired loads into a trash container.
6.   To prepare for the next fastening, point the tool in a safe 

direction. Snap the barrel forward as described in step 1. 
This action will eject the spent powder load and properly 
reset the piston. Always insert a new fastener before 
loading powder load in the chamber. Do not attempt to 
unload or disassemble a jammed, stuck or broken tool as 
improper handling may cause it to discharge and strike 
operator and/or bystander. A jammed tool must be pointed 
in a safe direction at all times. Tag the tool and lock it 
up. Call your D

E

wALT fasteners representative for proper 

assistance. 

   Safety  InStructIonS                

  Safety is your primary responsibility when operating any powder 
actuated tool. You must read and understand the contents of 
this manual. You must be familiar with all functional and safety 
requirements of the tool. It is your responsibility to obtain proper 
training and a D

E

wALT fasteners operator card prior to using this 

tool in compliance with the current  American National Standard 
A10.3 Safety Requirements for Powder Actuated fastening Systems 
and the federal Occupational Safety and Health Administration 
Standards (OSHA). Existing state or local regulations should also 
be followed. when using this tool, you must have the qualified 
operators card in your possession. 
  Revocation of card - failure to comply with any of the rules and 
regulations for safe operation of powder actuated tools shall be 
cause for the immediate revocation of your qualified operator card.
  The following is a summary of safety precautions to be followed 
when operating a D

E

wALT fasteners powder actuated tool. failure 

to follow these safety instructions can result in serious injury or 
death to operators or bystanders. 

pRioR To opeRaTing The Tool

1.   warning signs should always be posted within the area in which 

a powder actuated tool is to be used. These signs should be at 
least 8” x 10” in size with boldface type that is not less than 1” 
in height.  The sign should state “Powder Actuated Tool In Use”.

2.   Approved safety goggles should always be worn by operator 

or bystander, to protect their eyes from flying particles. 
Hearing protection should always be worn by the operator and 
bystanders when using a powder actuated tool. Other personal 
safety protection as required should also be used.

3.   Never modify or fabricate parts for use in your D

E

wALT tool. Use 

only D

E

wALT fasteners, loads, and tool parts.

4.   Hands or other body parts must never be placed in front of 

muzzle/barrel. Accidental discharge can cause piston and/or 
fastener to pass through the operator’s hand.

5.   Never compress the tool against any part of the body. Serious 

injury or death may result in the event of an accidental discharge.

6.  Always point tool in a safe direction at all times.
7.  Use the tool for its intended purpose only. 

pRepaRaTion FoR loaDing The Tool

1.   Tools must be checked prior to operating to make sure  

they are not fully or partially loaded with a powder load or 
fastener.

2.   To insure safe operation, perform the daily function test 

described in this manual. be sure the tool is not loaded prior to 
performing this test.

3.   Do not operate this tool unless all its parts are in place 

and operating appropriately. Never attempt to use a 
malfunctioning tool. Call 1-800-4-DEwALT for assistance.

4.   Never guess about the suitability of a base material. If 

you are uncertain about the suitability of a base material, 
perform a center punch test.

5.   Do not operate the tool until you learn and understand the 

color code / numbering system used to identify the power 
level of powder loads. 

opeRaTing The Tool

1.  Only use fasteners and powder loads designed for this tool as 

supplied by D

E

wALT fasteners.

2.  Do not use pow der actuated tools in a flammable or an explosive 

atmosphere.

3.   Do not fire a tool without a fastener. The piston will impact the 

work surface possibly causing serious injury to the operator or 
bystanders along with damage to the tool.

4.  Do not load the tool until you are ready to make a fastening. Check 

the power load level before inserting it into the tool chamber.

5.  fastener must be loaded prior to loading the powder load, 

to prevent injury to operator or bystander in the event of an 
accidental discharge.

6.   Do not close tool against work surface. The tool should be 

manually closed, with hand away from muzzle/barrel to prevent 
accidental discharge.

7.   Hold the tool perpendicular to the work surface at all times.  Use a 

spall guard (part # DDf2211950) wherever possible.  This will limit 
the possibility of fastener ricochet which could cause serious injury 
or death to the operator or bystanders.  To order optional spall 
guard at no charge call 1-800-4-DEwALT.

8.   Always perform a test fastening with the lightest load level 

designed for use in the tool. If the lightest load fails to set the 
fastener, try the next highest load until the proper level is attained. 
failure to follow this procedure may cause the fastener to be 
overpowered.  If this occurs, the fastener may fully penetrate 
the base material causing serious injury or death to someone.  
Overpowering the fastener can also damage the tool, creating a 
safety hazard to both the operator or bystanders.

9.   Do not fasten into cast iron, tile, glass, or other types of brittle 

materials. These materials can shatter and create sharp fragments 
which may cause injury.

10.  Do not fire tool within 3” (three inches) of the edge of a concrete 

base material or within 1/2” (one-half inch) of the edge of a steel 
base material.

11.  Do not attempt to install a fastener closer than 3” (three inches) to another 

previously inserted fastener in concrete or 1-1/2” (one and one-half inch) in 
steel.

12.  Do not fasten into a concrete base material less than 3 times 

as thick as the fastener penetration or into a steel base material 
thinner than 1/8”. 

13.   Never attempt to install a fastener in a cracked or spalled area 

in concrete. Place fastener at least 3” (three inches) away from 
a spalled area to prevent the possibility of the fastener bending 
and striking an operator or bystander.

14.  Do not attempt to install fasteners in areas that have been 

welded or cut with a torch as these procedures may have 

POW2272_dw_t1000_booklet.indd   5

3/10/14   12:45 PM

Summary of Contents for T1000

Page 1: ...ue to faulty materials or workmanship for three years from the date of purchase This warranty does not cover part failure due to normal wear or tool abuse For further detail of warranty coverage and warranty repair information visit www dewalt com or call 1 800 4 DEWALT 1 800 433 9258 This warranty does not apply to accessories or damage caused where repairs have been made or attempted by others T...

Page 2: ...n the concrete base material A similar action occurs when fastening into block masonry Generally the performance of the fastener in a given concrete strength will increase with greater embedment depths in a certain range Depending on the fastener style and base material strength embedment depths range from 5 8 to 1 1 2 For depths greater than this range there is the possibility of the fastener ben...

Page 3: ...with the minimum spacing and edge distance requirements Failure to follow these requirements can result in an unsuccessful fastening and create a safety hazard Base Material Thickness Concrete base material should be at least three 3 times as thick as the fastener embedment penetration If the concrete is too thin the compressive forces forming at the fasteners point can cause the free face of the ...

Page 4: ...table below Use of a nut setter is recommended to reduce the possibility of over tightening the fasteners For critical applications perform a job site test Tool Operation Be sure to read and understand all of the safety precautions and training in this manual before attempting to operate the tool Check to be sure the tool is not loaded the piston moves freely within the barrel and no foreign objec...

Page 5: ...ner 2 To insure safe operation perform the daily function test described in this manual Be sure the tool is not loaded prior to performing this test 3 Do not operate this tool unless all its parts are in place and operating appropriately Never attempt to use a malfunctioning tool Call 1 800 4 DEWALT for assistance 4 Never guess about the suitability of a base material If you are uncertain about th...

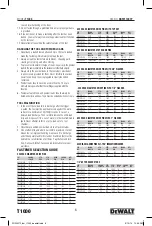
Page 6: ...DDF3001100 3 4 100 5000 300 143 5 DDF3001150 1 100 5000 300 143 6 DDF3001200 1 1 8 100 1000 300 143 7 DDF3001250 1 1 4 100 1000 300 143 8 DDF3001300 1 1 2 100 1000 300 143 9 DDF3001350 1 3 4 100 1000 300 143 1 1 DDF3001400 2 100 1000 300 143 1 2 DDF3001450 2 1 4 100 1000 300 143 1 2 DDF3001500 2 3 8 100 1000 300 143 1 3 DDF3001550 2 1 2 100 1000 300 143 1 4 DDF3001600 2 3 4 100 1000 300 143 1 6 DD...

Page 7: ...4121100 3 4 EMT 1 pin TH 100 500 300 143 3 4 DDF4121150 3 4 EMT 1 pin 100 1000 300 143 3 3 DDF4121200 1 EMT 1 pin TH 25 250 300 143 3 2 K Knurled TH Top Hat 300 Head Diameter Pin with Rebar Basket Clip Cat No description STD BOX STD CTN HEAD DIA SHANK DIA WT 100 DDF4251000 32mm w basket clip 100 100 8mm 143 4 0 DDF4251050 37mm w basket clip 100 100 8mm 143 4 1 DDF4251150 37mm w basket clip 100 100...

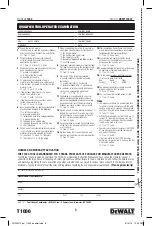
Page 8: ...r if the tool is discharged accidentally True False 13 Piston overdrive is caused by overpowering of the tool or by discharging the tool against a soft surface True False 14 Malfunctioning tools cannot be used and must be removed from service immediately True False 15 After conducting a Center Punch Test the best way to check the base material is to set several fasteners using the least powerful l...

Page 9: ...by qualified individuals Load will not fire when trigger is pulled Tool is not fully depressed Follow safety procedure for misfired load then attempt to fully depress tool before pulling trigger Load will not fire when tool is fully depressed and trigger is pulled Load is already fired Cycle tool Load misfire Follow safety procedure Broken firing pin Replace firing pin nut This should be performed...

Page 10: ...ales defectuosos o mano de obra durante tres años a partir de la fecha de compra Esta garantía no cubre fallas de las piezas causadas por su desgaste normal o abuso a la herramienta Para mayores detalles sobre la cobertura de la garantía e información de reparación en garantía visite www dewalt com o llame al 1 800 4 DEWALT 1 800 433 9258 Esta garantía no aplica a accesorios oa daños causados se h...

Page 11: ...tala en los materiales de base de hormigón o mampostería se basa en los siguientes factores 1 Fuerza del material de base 2 La dureza y la concentración del agregado 3 Diámetro del vástago del elemento de fijación 4 Profundidad de empotramiento en el material de base 5 Espaciamiento de sujetadores y distancia al borde Además de estos factores accesorios de la herramienta de instalación como por ej...

Page 12: ...provocar lesiones graves o la muerte del operador y o los espectadores de la herramienta Centro de pruebas de perforación Una prueba de punzón siempre se debe realizar para determinar la idoneidad del material de base para fijar por este medio Esta prueba es relativamente simple y puede ayudar a asegurar una de fijación seguro y exitoso Asegúrese de usar la protección adecuada para los ojos cuando...

Page 13: ... pins de acero primero determinar el espesor del elemento de fijación para ser fijado Para esto añadir el espesor del material de base de acero más un mínimo de 1 4 para permitir la penetración punto apropiado Este será el elemento de fijación longitud mínima requerida vástago No seleccione una longitud de sujeción mayor que el requerido para la aplicación Un excesivamente largo vástago puede bruñ...

Page 14: ...istemas de sujeción accionado y el Reglamento Federal de Seguridad Ocupacional y Estándares OSHA Regulaciones estatales o locales existentes también deben ser seguidas Al utilizar esta herramienta debe tener la tarjeta de operadores calificados en su posesión La revocación de la tarjeta El incumplimiento de cualquiera de las normas y reglamentos para el funcionamiento seguro de las herramientas ac...

Page 15: ...nstalar un cierre en una zona agrietada o astillado en el concreto Coloque sujetador al menos 3 tres pulgadas de distancia de un área astillada para evitar la posibilidad de que el cierre de la flexión y golpear a un operador oa un observador 14 No intente instalar sujetadores en áreas que han sido soldadas o cortadas con un soplete ya que estos procedimientos pueden haber provocado el endurecimie...

Page 16: ...ÁMETRO ESPIGA PESO 100 DDF3071000 1 1 4 100 1000 0 300 0 143 2 2 DDF3071050 1 1 2 100 1000 0 300 0 143 2 3 DDF3071250 2 100 1000 0 300 0 143 2 6 DDF3071150 2 1 2 100 1000 0 300 0 143 2 9 DDF3071200 3 100 1000 0 300 0 143 3 2 Pasadores de arrastre con cabeza de 0 300 de diámetro y arandela de 1 7 16 N DE CAT LONGITUD DE ESPIGA CAJA EST CARTÓN EST DIÁM DE CABEZA DIÁMETRO ESPIGA PESO 100 DDF3081000 1...

Page 17: ...ncia color de la carga tamaño CAJA EST CARTÓN EST maestro est PESO 100 DDF1111100 1 Gris 0 22A 100 1000 20000 0 33 DDF1111200 2 Marrón 0 22A 100 1000 20000 0 33 DDF1111300 3 Verde 0 22A 100 1000 20000 0 33 DDF1111400 4 Amarillo 0 22A 100 1000 20000 0 33 POW2272_dw_t1000_booklet indd 17 3 10 14 12 45 PM ...

Page 18: ... se aprieta La herramienta no está pisado a fondo Siga los procedimientos de seguridad para la carga de fallo de encendido y luego intente pise a fondo la herramienta antes de tirar del gatillo La carga no se disparará cuando la herramienta está completamente metido y se aprieta Carga ya se dispara herramienta Cycle fallo de encendido de carga Siga los procedimientos de seguridad Percutor Roto Vue...

Page 19: ...de carga correcto consiste en insertar primero el sujetador y luego la carga de pólvora El sujetador siempre debe ser colo cado en la herramienta antes que la carga Verdadero Falso 9 Cuál de los siguientes materiales generalmente es adecuado para las sujeciones accionadas por pólvora concreto vertido teja hueca superficie de acero cementado ladrillo vidriado 10 En concreto un sujetador debe ser co...

Page 20: ...ie ne couvre pas les défaillances de pièce dues à une usure normale ou abusive de l outil Pour plus de détails de la garantie et de l information de réparation sous garantie visitez www dewalt com ou composez le 1 800 4 DEWALT 1 800 433 9258 Cette garantie ne s applique pas aux accessoires ni aux dommages causés par des réparations ont été effectuées ou tentées par d autres Cette garantie vous don...

Page 21: ...Dans l activité Béton Les performances d un dispositif de fixation actionné en poudre lorsqu ils sont installés dans les matériaux de base de béton ou de maçonnerie est basée sur les facteurs suivants 1 Résistance du matériau de base 2 La dureté et la concentration de l agrégat 3 Diamètre de la tige de l attache 4 La profondeur de l encastrement dans le matériau de base 5 Espacement des fixations ...

Page 22: ...t Un test de poinçon central doit toujours être effectuée pour déterminer l aptitude d un matériau de base pour une poudre actionné fixation Ce test est relativement simple et peut aider à assurer un coffre fort fixation succès Soyez sûr de porter la protection appropriée pour les yeux lors de l exécution de ce test Pour commencer sélectionnez l élément de fixation à utiliser pour le travail Ensui...

Page 23: ...du point correspondant Ce sera la longueur de la tige de fixation minimale requise Ne pas sélectionner une longueur de fermeture à glissière plus longue que celle requise pour l application Une tige trop longue peut polir ou polir le trou créé dans l acier entraîne une réduction de la capacité de charge Pour les applications avec des goujons filetés amovibles la longueur de tige nécessaire est éga...

Page 24: ...s et règlements pour le fonctionnement en toute sécurité des outils à charge explosive doit être un motif de la révocation immédiate de votre carte de conducteur qualifié Ce qui suit est un résumé des mesures de sécurité à suivre lors de l utilisation d un outil actionné par poudre DEWALT attaches Le non respect de ces consignes de sécurité peut entraîner des blessures graves ou la mort à des opér...

Page 25: ...uces à partir d un secteur écaillé pour éviter la possibilité de la fermeture de flexion et de la suppression d un opérateur ou spectateur 14 Ne pas essayer d installer les fixations dans les zones qui ont été soudés ou coupés avec une torche comme ces procédures peuvent avoir causé un durcissement locale de l acier 15 Ne pas fixer dans un trou préalablement percé moins bon encadrement est fourni ...

Page 26: ...DF3061650 3 PO 100 1000 0 300 0 143 3 0 Clous à tête de 0 300 po avec rondelle de 1 po No DE CAT longueur de la tige boîte STD CARTON STD diamètre de la tête diamètre de la tige POIDS 100 DDF3071000 1 1 4 PO 100 1000 0 300 0 143 2 2 DDF3071050 1 1 2 PO 100 1000 0 300 0 143 2 3 DDF3071250 2 PO 100 1000 0 300 0 143 2 6 DDF3071150 2 1 2 PO 100 1000 0 300 0 143 2 9 DDF3071200 3 PO 100 1000 0 300 0 143...

Page 27: ...nier de clip 100 100 8mm 0 143 4 4 DDF4252000 37mm w panier de clip 100 100 8mm 0 143 4 6 DDF4252500 37mm w panier de clip 100 100 8mm 0 143 4 8 Guide de sélection des cartouches No DE CAT niveau de puissance couleur de charge taille boîte STD CARTON STD maître Std POIDS 100 DDF1111100 1 Gris 0 22A 100 1000 20000 0 33 DDF1111200 2 Brun 0 22A 100 1000 20000 0 33 DDF1111300 3 Vert 0 22A 100 1000 200...

Page 28: ...sque tire sur la gâchette Outil n est pas complètement enfoncée Suivre la procédure de sécurité pour la charge des ratés alors tenter de enfoncez complètement l outil avant de tirer la gâchette Charge ne se déclenche pas lorsque l outil est complètement enfoncé et tire sur la gâchette La charge est déjà tiré Outil de cycle charge ratés Suivre la procédure de sécurité Percuteur brisé Remplacer le p...

Page 29: ...fortement ou si l attache est éjectée de l outil en cas d une décharge accidentelle Vrai Faux 13 Un piston frappé trop fortement est dû à une charge trop forte ou à un déchargement de l outil contre une surface molle Vrai Faux 14 Les outils dysfonctionnels ne doivent pas être utilisés et doivent être immédiatement mis hors service Vrai Faux 15 Après avoir effectué un test au pointeau la meilleure ...

Page 30: ...T1000 Model T1000 Modelo T1000 ModÈlE T1000 30 POW2272_dw_t1000_booklet indd 30 3 10 14 12 45 PM ...

Page 31: ...T1000 Model T1000 Modelo T1000 ModÈlE T1000 31 POW2272_dw_t1000_booklet indd 31 3 10 14 12 45 PM ...

Page 32: ...T1000 Model T1000 Modelo T1000 ModÈlE T1000 32 POW2272_dw_t1000_booklet indd 32 3 10 14 12 45 PM ...

Reviews: