background image

INSTRUCTIONS FOR USE


    N°9220

Impressum

Diese Bedienungsanleitung ist eine Publikation der Firma df models, Drahthammer Strasse 22, D-92224 Amberg.
Alle Rechte einschließlich Übersetzung vorbehalten. Reproduktionen jeder Art, z. B. Fotokopie, Mikroverfilmung, 
oder die Erfassung in elektronischen Datenverarbeitungsanlagen, bedürfen der schriftlichen Genehmigung des 
Herausgebers. Nachdruck, auch auszugsweise, verboten. Diese Bedienungsanleitung entspricht dem technischen 
Stand bei Drucklegung. Änderung in Technik und Ausstattung vorbehalten.
© Copyright 2019 by df models


Konformitätserklärung gemäß Richtlinie Radio Equipment Directive (RED) 
2014/53/EU 

Declaration of Conformity in accordance with the Radio Equipment Directive (RED) 2014/53/EU 
Déclaration de conformitè CE (RED) 2014/53/EU 
 

Hiermit wird erklärt, dass das Produkt: 


I hereby declare that the product: 

SkyWatcher OPTICAL Flow 

dèclarons sous notre seule responsabilitè que le produit: 

 
Artikelnummer:  


Product number: 

9220 (EAN: 4250684192201)


Numèro d‘article: 

H4821


Bei bestimmungsgemäßer Verwendung den grundlegenden Anforderungen nach Artikel 3 und den 
übrigen einschlägigen Bestimmungen der Richtlinie (RED) 2014/53/EU entspricht. 

Complies with the essential requirements and the other relevant provisions of the Directive (RED) 
2014/53/EU, when used for it intended purpose. 
Est conforme aux exigences des directives et ordonnances suivantes (RED) 2014/53/EU. 

 
In Übereinstimmung mit den folgenden harmonisierten Normen gefertigt:    

Manufactured in accordance with the following harmonised standards: 
Et a ètè fabriquè conformèment aux norms harmonisèes suviantes:


EN 62479:2010 
Draft EN 301 489-1 V2.2.0 (2017-03) 
Final Draft EN 301 489-3 V2.1.1 (2017-3) 
EN 61000-6-3:2007 + A1:2011 +AC:2012 
EN 61000-6-1:2007 
EN 300 440 V2.1.1 (2017-03) 


Directive TSD 2009/48/EC Safety of Toys: 
EN71:Part 1:2014, clauses 1-7 
EN71:Part 2:2011+A1:2014 
EN71Part 3:2013+A2:2017 


EN 62115 ELECTRONIC TOYS  A2 + A11 + A12- PARTIAL 
EN 62115:2005 + A2: 2011 + A11: 2012 + A12: 2015 “Electric toys – Safety” 
 
Hersteller / verantwortliche Person: 

drive & fly models, Jürgen Kamm 

Manufacturer / responsible Person: 

Drahthammer Str. 22


Fabricant / personne responsable: 

92224 Amberg, Germany 


Jürgen Kamm 
Geschäftsführer 

/ managing director / directeur général


Ort/ Datum: 
place of issue/ date: 

Amberg (Germany), 01.02.2019 

Lieu de dèlivrance/ Date: 


EIRP Power (Max.):  2460MHz-2472MHz  |  4.38dBm (2.74mW) 
 
The source-based time-averaging power which is below the max permitted sending level of 20 mW, 
and then the EUT is not needed to conduct SAR measurement. 
 
Frequenzbereich: 2460-2472 MHz 

Summary of Contents for Sky Watcher 9220

Page 1: ...ial requirements and the other relevant provisions of the Directive RED 2014 53 EU when used for it intended purpose Est conforme aux exigences des directives et ordonnances suivantes RED 2014 53 EU I...

Page 2: ...aut bewahren Sie Akkus Batterien immer au erhalb der Reichweite von Kindern auf nicht wieder aufladbare Batterien d rfen nicht geladen werden aufladbare Batterien m ssen vor dem Laden aus der Fernsteu...

Page 3: ...n bei den ersten Flugversuchen den einen oder anderen Fehlversuch Fliegen Sie NIEMALS ohne Rotorsch tzer ACHTUNG 1 Behalten Sie das Flugger t immer in Sichtweite und unter Kontrolle 2 Benutzen Sie imm...

Page 4: ...Entnehmen Sie den Akku aus dem Copter und stecken Sie diesen an das Ladekabel Nur beiliegendes Kabel verwenden 3 Die LED leuchtet nun rot Ladevorgang l uft 4 Ist die LED erloschen ist der Akku voll g...

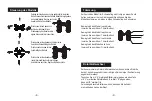
Page 5: ...ante 1 Landen Variante 1 Start Landung Variante 2 Variante 1 Dr cken Sie die Start Taste am Controller Die Rotoren beginnen zu laufen Dr cken Sie nun den linken Steuerkn ppel nach oben Das Modell star...

Page 6: ...hwebeflug nicht ruhig an einem Punkt halten und immer in eine Richtung abdriften k nnen Sie das Modell austrimmen um einen ruhigen Schwebeflug zu bekommen Bewegt sich das Modell nach hinten trimmen Si...

Page 7: ...inken leuchten die LEDs wieder dauerhaft ist die Kalibrierung abgeschlossen 5 6 7 8 7 Foto Um ein Foto aufzunehmen dr cken Sie die Taste 7 Die Kamera nimmt nun ein Foto auf und speichert dieses auf Ih...

Page 8: ...werden 2 Sobald der Sender zu piepen beginnt m ssen Sie umgehend Ihr Modell zum Startpunkt zur ck fliegen oder die Auto Return Home Taste dr cken Das Piepen des Senders ist ein Hinweis dass der Akku d...

Page 9: ...1 Ersatzakku 9222 Ersatzrotorbl tter 4 9223 Rotorsch tzer 4 9224 Ersatzmotor Kabelfarbe rot blau 9225 Ersatzmotor Kabelfarbe weiss schwarz 9226 Geh use Rahmen 9227 Ladekabel USB 9228 Hauptplatine 9229...

Page 10: ...LAN mit Ihrem Smartphone 3 Starten Sie die APP WOWITOYS und dr cken die Taste 4 Um die Stuerung per Phone zu aktivieren dr cken Sie den ON OFF Button und dann den Altitude hold Button 5 Das Modell ist...

Page 11: ...mAktivieren des Modells befindet sich die Drohne bei 30 Leistung Durch dr cken der Speed Taste k nnen Sie die Einstellung ndern 30 60 oder 100 Agilit t k nnen gew hlt werden Fliegen Sie im freien imme...

Page 12: ...ks Dr cken des rechten Buttons nach rechts l sst das Modell nach rechts fliegen durch dr cken nach links fliegt das modell nach links Steuerung Trimmung Sollte sich das Modell im Schwebeflug nicht ruh...

Page 13: ...e das Modell mit den rechten Trimm Buttons nach links Bewegt sich das Modell nach hinten trimmen Sie das Modell mit den rechten Trimm Buttons nach vorne Bewegt sich das Modell nach vorne trimmen Sie d...

Page 14: ...Hinweise 24...
Page 15: ...t Complies with the essential requirements and the other relevant provisions of the Directive RED 2014 53 EU when used for it intended purpose Est conforme aux exigences des directives et ordonnances...

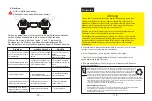
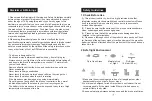
Page 16: ...all the propellers are undamaged and are installed in the right orientation 4 Please do a thorough check of the product before each use Check for firmness of the parts any signs of cracks and wear of...

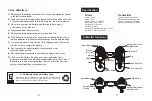
Page 17: ...ately and discontinue use 8 Don t connect the battery directly to wall outlets or car cigarette lighter sockets 7 It is recommended to only use the USB charging cable that comes with the drone to char...
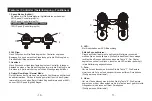
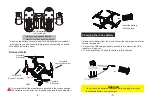
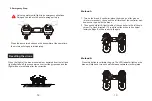
Page 18: ...larity as shown 2 Re attach the battery cover Propeller A Clockwise Propeller A Clockwise Propeller B Counter Clockwise Propeller B Counter Clockwise HEAD Camera Charging the drone battery insert the...

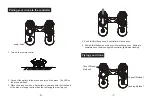
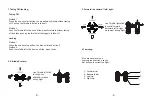
Page 19: ...throttle up once controller will beep once Flying your drone Take off Method 1 Landing Method 1 Take Off Landing Method 2 1 Turn on the remote control power swith 5 Pull left throttle down once contro...

Page 20: ...Landing Method 1 Press the one key stop button the drone will land by itself Method 2 Push the throttle left stick down until the drone lands Use throttle right stick to control forward backward left...

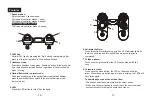
Page 21: ...the photo button the LED on the drone will blink once Press once the video button the LED on the drone will blink twice Press the same button again to stop recording the LEDs will blink twice again 8...

Page 22: ...t down corner 7 o clock direction This will reset the drone to its original factory settings will be ready to fly again Press the above two buttons on the transmitter at the same time the motors will...

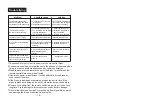
Page 23: ...cceleration sensor losed its balance after crashing Restart and re calibrate the drone The drone rotates upwards when pushing up the throttle lever or the drone sways The motor doesn t work properly R...

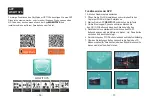
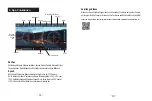
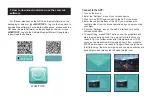
Page 24: ...APP of the drone 4 Enter the control interface of this APP you would see the real time video from the drone camera and you now can start your flight Connect to the APP 6 To begin flying press START bu...

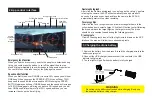
Page 25: ...beeps and the speed will increase to 100 Pressing again will bring you back to 30 speed and you will hear ONE beep Always learn to fly at 30 speed and then you can increase it as you get better at fly...

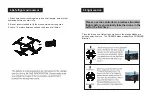
Page 26: ...drone outside in strong wind 3 Leave 1 5 meters between you and the drone at all times 5 Flight control Please use the controller to practise simulated flights before you actually take the drone in t...

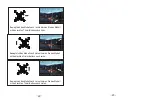
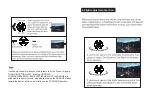
Page 27: ...ignore TURN RIGHT TURN LEFT by using UP DOWN FORWARD BACKWAD BANK LEFT BANK RIGHT the DRONE will still be able to fly everywhere also please keeping the ORANGE blades toward the front at all times it...

Page 28: ...You must always replace a A blade with a A blade and a B blade with a B blade 7 Replacing blades and fixing issues...

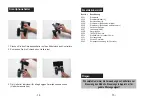
Page 29: ...affected 4 If the drone power is insufficient it will be difficult to fly the drone or even take off the drone 5 If the drone is damaged or deformed please repair it in time If the blade is broken or...

Page 30: ...ormen gefertigt Manufactured in accordance with the following harmonised standards Et a t fabriqu conform ment aux norms harmonis es suviantes EN 62479 2010 Draft EN 301 489 1 V2 2 0 2017 03 Final Dra...

Reviews: