background image


1260 Kempar

Madison Heights

, MI 

48071

, U.S.A.  Phone: 248-733-0400, Fax: 775-587-5352 

Email: info@dfgus.com   Website: www.dfgus.com 

 
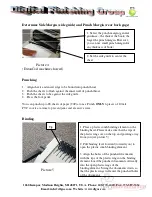
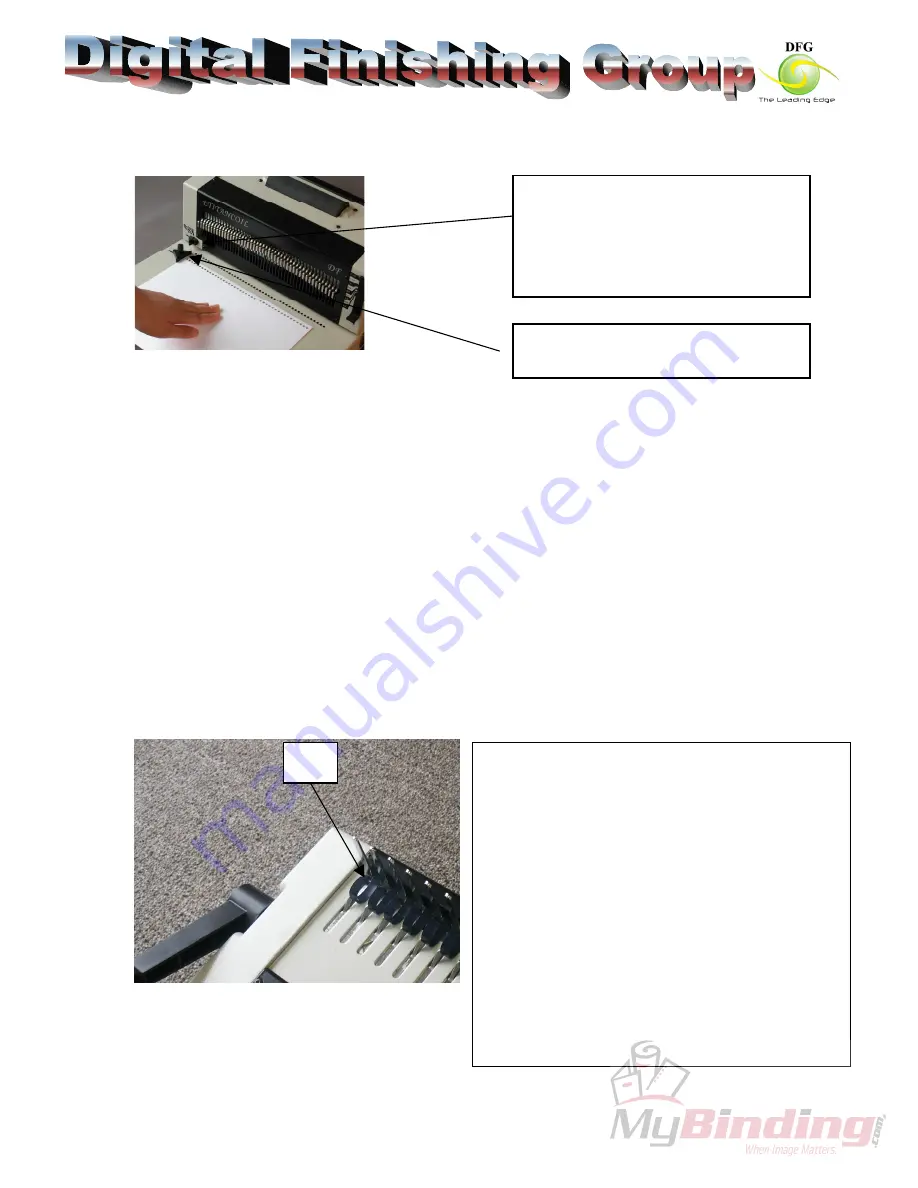
Determine Side Margin (side guide) and Punch Margin (rear back gage)  


                Picture 4 
(EtitanCoil machine showed) 

 
Punching 

 
1.  Align sheets and insert edge to be bound into punch throat  
2.  Push the sheets to flush against the inner wall of punch throat.  
3.  Push the sheets to be against the side guide 
4.  Press the foot pedal 
 
You can punch up to 28 sheets of paper (20#) at once. Punch 

ONLY

 6 pieces of 10 mil 

PVC covers at a time to prevent jams and excessive wear. 


Binding 


                      Picture 5


.  

1. Select the punch margin (general 
guidance – the thicker the book, the 
larger the punch margin. However, 
you can use small punch margin for 
any thickness of book) 

2. Set the side guide to center the 
sheet 

1. Place a plastic comb-binding element on the 
binding head. Please make sure that the tips of 
the plastic rings are on the top and pointing away 
from you (see picture 5) 
 
2. Pull binding lever forward (towards you) to 
open the plastic comb-binding element 
 
3. Align the holes of the punched documents 
with the tips of the plastic rings on the binding 
element. Load the punched documents vertically 
into the open plastic rings of the  
binding element. Swing the documents down so 
that the plastic rings will enter the punched holes 
of the documents. 

Tip 

Summary of Contents for E-TitanComb

Page 1: ...Instruction Manual Provided By http www MyBinding com http www MyBindingBlog com DFG E TitanComb Heavy Duty Binding Machine ...

Page 2: ...e articles away from moving parts 6 Do not place this product on an unstable stand cart or surface The product may fall and hurt you If you use a cart move the product and cart carefully 7 Do not insert objects or spill liquids into the product They may short out components that may result in fire 8 The power outlet shall be installed near this product and shall be easily accessible 9 Unplug the p...

Page 3: ...larger than book thickness 3 To use our coil size selector Please refer to the picture 3 EtitanCoil machine showed only comb size up to 1 1 2 are showed Picture 3 A B Installation 1 Remove a screw A from binding shaft see picture 1 by a Philip cross head screwdriver 2 Push binding handle B onto the binding shaft see picture 2 3 Install the screw back Put book on the table and under the Size Select...

Page 4: ... wear Binding Picture 5 1 Select the punch margin general guidance the thicker the book the larger the punch margin However you can use small punch margin for any thickness of book 2 Set the side guide to center the sheet 1 Place a plastic comb binding element on the binding head Please make sure that the tips of the plastic rings are on the top and pointing away from you see picture 5 2 Pull bind...

Page 5: ...tly to prevent machine jam Pull the drawer toward you to open Service For service or warranty please contact DFG at Phone 800 480 4334 Email info dfgus com Thank you for purchasing DFG EtitanComb machine 4 Pushed the binding lever to its original position The binding element will close and bind the documents 5 Remove bound documents by lifting it up from you binding head ...

Reviews: