GETTING STARTED
First time installation
After all the connections have been established, switch on your TV. If you are using
the PVR for the first time or you have restored it to factory default, channel search
will automatically commence and save all digital channels found.
When scanning is complete, all active digital channels found will be stored
automatically in the Channel List. The system will search for and store digital TV and
digital Radio Channels in separate lists. To view the lists use the
TV/RADIO
key on
the remote control to select either TV or Radio then press
OK
to display the list of
available digital channels.
To stop scanning at any stage press the
EXIT
key on the remote control, all
channels scanned to that point will be stored.
Now you are ready to watch digital TV.
Changing Channels
There are four methods for changing channels:
1. Press the
NUMERIC
keys
(0~9)
on the remote control to select the logical channel
number you wish to view.
2. Use the
▲
/
▼
keys on the remote control or the front panel to navigate through all
the available digital channels,
3. Press the
OK
key on the remote control or front panel to display the channel list
on screen, then use the
▲
/
▼
keys to navigate through the list. Press
OK
on the
remote control or front panel to display any channel highlighted on the list, or
4. Press the
RECALL
key to view the previous channel selected.
Volume control
Press the
◄
/
►
key on the remote control or front panel to adjust the volume.
Mute
1. Press the
MUTE
key to temporarily stop the sound.
2. To cancel mute, press the
MUTE
key again.
Freezing the picture
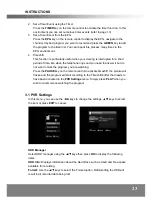
1. Press
FREEZE
key to freeze current program, the pause icon will appear on
screen. This function freezes the picture at that point in time only, it
is not
timeshift
. If you want to initiate
timeshift
make sure that the
timeshift
function is
active in the
PVR Settings
sub menu then press
PAUSE
on the remote control.
2. To cancel Freeze and continue watching TV, press the
FREEZE
key again, the
icon will disappear and the program will commence at the current time.
11
Summary of Contents for DG-HDPVR5009
Page 1: ......


