E-DWT-10000-AF OPERATION AND MAINTENANCE MANUAL
© 2008 DH Instruments, a Fluke Company
Page 96
Oil
operated piston gauge (deadweight tester), with the following characteristics:
•
Measurement uncertainty of ± 0.02 % of reading or better.
A standard with higher
measurement uncertainty may be used but RPM4-E-DWT measurement uncertainty may
be degraded proportionally from normal specifications.
•
Able to supply the recommended sequence of pressure points in the range to be
calibrated: See Section 5.3.4 for information on the recommended calibration point
sequence.
5.3.3
SET-UP AND PREPARATION
To set-up and prepare the RPM4-E-DWT for calibration of its Q-RPTs:
THE RPM4-E-DWT SHOULD NOT BE REMOVED FROM THE E-DWT BRACKET
FOR
CALIBRATION. THE RPM4-E-DWT ONLY BE REMOVED FROM THE E-DWT WHEN
DISASSEMBLY IS REQUIRED FOR MAINTENANCE OR REPAIR (see Section 5.5.1).
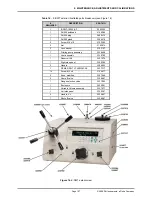
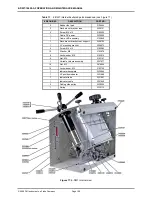
Set the E-DWT-10000-AF on a stable surface near the calibration standard with it’s reference
level (TEST port) as close as possible to the calibration standard’s reference level. Consider
the high pressure connection that needs to be made to the TEST port on the top of the E-DWT
and access to the front panel display, keypad and Lo Q-RPT shut off valve.
Connect the calibration standard output to the E-DWT top TEST
port. The TEST port connection
is DH500 F (DH500 F: gland and collar type fitting for coned and left hand threaded 1/4 in.
OD tube, equivalent to AE F250C, HIP HF4, etc.). The E-DWT TEST port connects to BOTH
of the RPM4-E-DWT A70M/A7M-AF reference pressure transducers (see Section 3.4).
Take care to avoid overpressure of the Lo Q-RPT (A7M with maximum pressure of 1 000 psi).
The E-DWT TEST port connects to both the A7M (1 000 psi) and the A70M (10 000 psi) Q-RPTs.
Use the Lo Q-RPT Shut off valve on the E-DWT front panel to isolate the Lo Q-RPT when applying
pressure to the Hi Q-RPT (see Section 3.4). If the RPM4-E-DWT is removed from the E-DWT, note
that the RPM4-E-DWT has separate Lo and Hi TEST(+) ports, one for each Q-RPT. Exposing the
Lo Q-RPT to pressure greater than 1 300 psi (9 MPa) may damage it beyond repair. The product
warranty does not cover Q-RPT damage due to overpressure.
5.3.4
RECOMMENDED CALIBRATION POINT SEQUENCE
Calibration adjustments to RPM4-E-DWT Q-RPTs are made by altering calibration
coefficients, PA and PM (see Section 5.3.1.1). To adjust these coefficients to optimum
values giving the best results over the Q-RPTs’ complete operating range, the specific
calibration point sequence defined in Table 15 is recommended.
Prior to running the calibration point sequence, the Q-RPT should be exercised:
a) Set full scale pressure.
b) Dwell at full scale pressure for 5 minutes.
c) Return to atmospheric pressure (vented).
d) Dwell for ten (10) minutes.
A dwell time of 60 seconds is recommended before taking data at each pressure increment.


