background image

NL 

FR 

DE 

A52 

DHOLLANDIA 


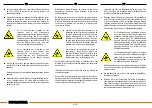
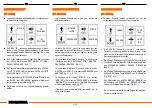
Die  DH-CH100...Serie  wird  mit  einer  4–  oder  einer  2-

Tasten-Fernbedienung  bedient  werden.  Diese    Wahl 
muss  bei  der  Montage  mithilfe  eines  Kippschalters  im 
Elektronikkasten bestätigt werden. 


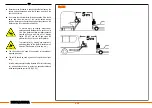
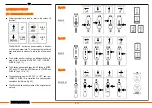
Die 4-Tasten-Fernbedienung hat einzelne Tasten für die 4 

Funktionen  über  die  folgende  Funktionen  gefahren  wer-
den:  AUSFAHREN  /  HEBEN  /  SENKEN  /  EINFAHREN 
[Abb. 6.1.1]. 


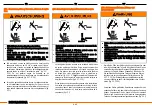
Die 2-Tasten-Fernbedienung nutzt die Taste HEBEN yum 
AUSFAHREN;  undie  Taste  SENKEN  zum  EINFAHREN  
[Fig. 6.1.2 - 6.1.3] 


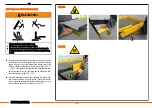
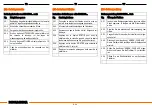
Das  Umschalten  von  „AUSFAHREN“  auf  „HEBEN“  und 

die  Änderung  von  „SENKEN“  auf  „EINFAHREN“  erfolgt 
durch ein Schalter auf dem Hubarm. [Fig. 4.3]. 


Der Lift darf ausschließlich mit den Originalbedienkompo-
nenten verwendet werden. 


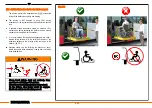
HEBEN 


SENKEN 


FAHR 

AUS 


FAHR  

EIN 


La  série  DH-CH100…  peut  être  commandée  par  une 

commande à distance 4 boutons ou 2 boutons. Ce choix 
se doit être confirmé lors du montage, par un dip-switch 

dans la boite électrique. 


La  commande  à  distance  4  boutons    a  des  boutons 

individuels  pour  les  4  fonctions  SORTIR  /  MONTER  / 

DESCENDRE / RENTRER. [fig. 6.1.1] 


La  commande  à  distance  2  boutons  utilise  le  bouton 

MONTER pour SORTIR; et le bouton DESCENDRE pour 

RENTRER. [fig. 6.1.2 - 6.1.3] 


Le  passage  de  la  fonction  "SORTIR"  à  la  fonction 

"MONTER" et de la fonction "DESCENDRE" à la fonction 

"RENTRER"  est  contrôlé  par  un  système  d'interrupteur 

monté sur les bras de levage [fig. 4.3]. 


L’élévateur  peut  seulement  être  commandé  par  la 
commande d’origine. 

6) BEDIENING VAN DE LIFT 


§6.1 - Inleiding 


Volgende symbolen worden gebruikt om te verwijzen naar 

de verschillende lift functies: 


STIJGEN 


DALEN 


UIT- 

SCHUIVEN 


IN- 

SCHUIVEN 


De  DH-CH100…  reeks  kan  bediend  worden  met  een  4-

knops  of  een  2-knops  afstandsbediening.  Deze  keuze 
moet  bevestigd  worden  tijdens  de  montage,  d.m.v.  een 

dip-switch in de elektrokast. 


De 4-knops afstandsbediening heeft individuele knoppen 

voor  elk  van  de  4  functies  UITSCHIJVEN  /  STIJGEN  /

DALEN / INSCHUIVEN. [fig. 6.1.1] 


De 2-knops afstandsbediening gebruikt de knop STIJGEN 

om  UIT  TE  SCHUIVEN;  en  de  knop  DALEN  om  IN  TE 

SCHUIVEN. [fig. 6.1.2 - 6.1.3] 


Het omschakelen van “UITSCHUIVEN” naar “STIJGEN” en 

van “DALEN” naar “INSCHUIVEN” gebeurt met behulp van 
een schakelaar op de hefarmen [fig. 4.3] 


De  lift  mag  enkel  met  een  originele  bediening  gebruikt 
worden.  

6) UTILISATION DE L’ÉLÉVATEUR 


§6.1 - Introduction 


Les  symboles  suivants  sont  utilises  pour  référer  aux 

différentes fonctions: 


MONTER 

LEVER 


DESCENDRE 


SORTIR 


RENTRER 

6) BEDIENUNG DES LIFTS 


§6.1 - Einleitung 


Folgende  Symbole  werden  verwendet,  um  auf  die 

verschiedenen Funktionen des Lifts hin zu weisen. 

Summary of Contents for CH100 Series

Page 1: ...doit toujours tre conserv proximit imm diate de l l vateur pour pouvoir servir de r f rence au chauffeur du v hicule et l op rateur de l l vateur Tous les travaux d entretien et de r para tion ainsi...

Page 2: ...rschuwingssymbolen begrijpen A8 Hoofdstuk A GEBRUIKERSHANDLEIDING 1 Beoogd gebruik A12 2 Identificatie A14 3 Beschrijving A14 4 Veiligheidsinrichtingen A24 5 Veiligheidsinstructies voor het gebruik va...

Page 3: ...nd Warnsymbole verstehen A9 Kapitel A BEDIENUNGSANLEITUNG 1 Bestimmungsgem e Verwendung A13 2 Identifikation A15 3 Beschreibung A15 4 Sicherheitseinrichtungen A24 5 Sicherheitshinweise f r die Verwend...

Page 4: ...d l vateurs pr par s pour des pays roulant droite RU Irlande Afrique du Sud Australie etc doivent consid rer que leur quipement s il a t command avec le bon nombre d options est ex cut dans l autre se...

Page 5: ...euerung europ isches Festland Die Bediener von Liften f r L nder mit Rechtssteuerung Gro britannien Irland S dafrika Australien nehmen zur Kenntnis dass ihre Ausr stung falls sie mit der korrekten Art...

Page 6: ...enten of onderdelen worden gebruikt bij het onderhouden of herstellen van de lift Ce manuel doit toujours accompagner l l vateur et servir de guide de r f rence pour les op rateurs et le personnel du...

Page 7: ...lift Dieses Handbuch muss als Nachschlagewerk f r den Bediener und das technische und Wartungspersonal jederzeit in unmittelbarer N he des Lifts aufbewahrt werden Um die Sicherheit des Bedieners der...

Page 8: ...of de locatie van veiligheidsuitrusting witte letters op groene achtergrond VEILIGHEIDS INSTRUCTIES BERICHT COMPR HENSION DES SYMBOLES DE S CURIT ET D AVERTISSEMENT Un grand nombre des symboles de s...

Page 9: ...eser Anleitung verwendeten Sicherheitssymbole basieren auf internationalen Normen andere wurden speziell entwickelt um auf besondere Situationen oder Handlungen verweisen zu k nnen Eine bersicht der b...

Page 10: ...DHOLLANDIA A10...
Page 11: ...de l un des sujets du pr sent chapitre arr tez imm diatement le travail et demandez conseil DHOLLANDIA avant de le poursuivre Unterbrechen Sie im Zweifel einer der Punkte dieses Kapitels unverz glich...

Page 12: ...eerde goederen DHOLLANDIA rolstoelliften DH CH100 serie zijn bestemd om te worden gemonteerd op monovolumes minibussen en ambulances bussen en autocars en mogen uitsluitend worden gebruikt om rolstoel...

Page 13: ...ung von Fahrzeugen f r den Personentransport Minibussen und Krankenwagen Bussen und Reisebussen entwickelt und d rfen ausschlie lich zur Unterst tzung des Ein und Aussteigens von Rollstuhlpassagieren...

Page 14: ...ropese CE veiligheidsreglementeringen zoals vermeld in het gelijkvormigheidsattest tenzij anders overeengekomen bij de bestelling export buiten de CE zone In onderstaande tabellen behoren de items in...

Page 15: ...ts and comply with the European CE safety regulations mentioned in the Declaration of Conformity unless agreed otherwise upon ordering export outside CE region In the tables below the items marked in...

Page 16: ...verrouiller manuellement en position verticale avant d acc der la plateforme et replier manuellement apr s utilisation de l l vateur Elles offrent un appui l occupant de la plateforme 6 Arr t de faute...

Page 17: ...o be restored manually when ending the use They provide a hand hold for the platform occupant 6 Automatic roll stop at the rear edge of the platform Is lowered automatically when the platform touches...

Page 18: ...ontage assurant la liaison entre la cassette et le ch ssis ou le plancher du v hicule 14 Groupe hydraulique commandant toutes les fonctions Comprend le moteur lectrique et sa pompe hydraulique ainsi q...

Page 19: ...le chassis of luggage floor 14 Hydraulic pump unit steering all functions Contains the electric motor driving the hydraulic pump and the control valves 15 Electric box contains the main electric board...

Page 20: ...n cas de panne lectrique 19 Bouton de sortie de secours bouton pour l op ration manuelle de l lectrovanne permettant l op rateur de DESCENDRE la plateforme en cas de panne 20 EMR Emergency Motor Relea...

Page 21: ...the electrovalve enabling the operator to LOWER the platform in case of electric failure 20 EMR Emergency Motor Release Button for manual operation of the retraction enabling the operator to SLIDE th...

Page 22: ...moeten worden Pour tous les mod les d l vateur susmentionn s le bo tier de commande lectrique et le groupe hydraulique sont connect s la batterie du v hicule ou la batterie auxiliaire pendant le monta...

Page 23: ...pgrading Bei allen oben genannten Liftmodellen werden der elektrische Bedienungskasten und das Hydraulikaggregat bei der Montage an die Fahrzeugbatterie oder Zusatzbatterie ange schlossen gem den Mont...

Page 24: ...resse automatiquement lorsque la plateforme se l ve du sol Cette s curit emp che la marchandise ou le fauteuil de rouler lentement et de fa on inattendue puis de chuter de la plateforme pendant la mon...

Page 25: ...utomatically when the platform is lifted off the ground Prevents wheeled goods or the wheelchair from slow unexpected rolling off the platform during the lifting lowering 3 Safety rails to be manually...

Page 26: ...f OWE005 01 9 Levier interrupteur r glant la bonne hauteur pour la rentr e sortie Pour commande 2 boutons au d but de l utilisation lors de sa sortie la plateforme commence automatiquement monter lor...

Page 27: ...for sliding in out For 2 button wander leads when starting the use when sliding out the platform automatically starts to go up when the work position is reached When ending the use when lowering the...

Page 28: ...anne lectrique dysfonctionnement de la batterie fusible endommag 16 Bouton de sortie de secours bouton pour l op ration manuelle de l lectrovanne permettant l op rateur de DESCENDRE la plateforme en c...

Page 29: ...rical failure battery deficiency damaged fuse damaged electrical controls 16 Emergency exit button allows to LOWER the platform in case of electrical failure battery deficiency damaged fuse damaged el...

Page 30: ...nder d autres informations D calcomanies d avertissement elles ont pour but d avertir l op rateur et le passager en fauteuil roulant des dangers sp cifiques 20 Visibilit et marquage de la plateforme s...

Page 31: ...rning decals mean to warn to the operator and the wheelchair passenger for specific hazards 20 Platform visibility and marking if in operating position the platform protrudes beyond the extremities of...

Page 32: ...bungen die Bezug auf seine Arbeitssituati on haben z B Gesundheits Sicherheitsrilinien am Ar beitsplatz Verkehrsregeln Betriebsprozesse fortw hren de Ausbildung der Busfahrer gem 2003 59 CE etc Folge...

Page 33: ...ed the minimum age of 18 years These safety instructions are of general nature applicable for the whole range of lifts Some images might show deviating products but the principles apply In order to en...

Page 34: ...t verkeer te waarborgen Verwijder alle voorwerpen ui de werkzone die het vrij bewegen van de lift kunnen belemmeren Zorg ervoor dat het platform duidelijk zichtbaar is in alle naderingsrichtingen knip...

Page 35: ...s that could potentially impede the movements of the lift Make sure the platform is visible from all approach directions flashing lights platform flags traffic cones etc and that the working area is s...

Page 36: ...bediener De bediener mag bij het openen sluiten van de lift niemand in de buurt van het bewegende platform laten Bij het stijgen en dalen moet de bediener erop toezien dat er zich niemand behalve hijz...

Page 37: ...r When opening closing the lift the operator should not permit anyone to stand near the moving platform When lifting lowering the operator should not permit anybody but himself and the wheelchair pass...

Page 38: ...gebruik de lift dan NIET en maak het platform eerst schoon Loop niet snel op het platform van een laadklep Om te voorkomen dat u struikelt en zich verwondt moet u altijd uitkijken voor uitstekende voo...

Page 39: ...good non slip sole If the platform surface is slippery because covered with snow mud and dirt or slippery liquids DO NOT use the lift and clean the platform first Do not run on a tail lift platform T...

Page 40: ...d Zerdr ckungsrisiko Arme Beine F e oder Kleidung d rfen sich nie zwischen oder in der N he beweglicher Teile des Lifts befinden Seien Sie sich zu jeder Zeit des m glichen Risikos auf Quetschung oder...

Page 41: ...r passen ger should take hold of no other parts but the safety rails fore seen for this purpose fig 5 3 7 5 3 8 Avoid the hazardous crushing zone between the raising plat form and the rear frame of th...

Page 42: ...die Platt form nicht verlassen ehe sie entweder auf Bodenebene oder auf der Ebene des Ladeflurs des Fahrzeugs ihre endg ltige Position erreicht hat Dritte die beauftragt wurden beim Ein und Aussteigen...

Page 43: ...igned to help the wheelchair passenger embark or disembark should stay out reach of the platform until its has reached its final parking position and has come to a complete stop Fig 5 3 3 Fig 5 3 4 NO...

Page 44: ...best met het gezicht naar de looprichting dus naar het voertuig bij het instappen en weg van het voertuig bij het uitstappen 5 4 Zus tzliche Hinweise f r Rollstuhlinsassen Die Abrollsicherung verhind...

Page 45: ...be pushed manually onto the platform by the operator It is recommended that wheelchair passengers are lifted lowered facing outward with the small front wheels of the wheelchair adjacent to the roll...

Page 46: ...Plattform treten Begeben Sie sich immer mit dem Gesicht nach au en auf die Plattform vergewissern Sie sich dass sie sich sicher auf der Ebene des Ladeflurs des Fahrzeugs befindet dass die seitlichen S...

Page 47: ...air brakes are less effective if the platform and or wheels of the wheelchair are wet or dirty Ensure the passengers take a central position between the lift arms fig 5 4 2 If available the platform o...

Page 48: ...orm getra gen werden kann Folgende Bedingungen Fig 5 5 1 1 In Plattforml ngsrichtung der Rollstuhl oder die La dung muss so nah wie m glich am Fahrzeugboden auf der Plattform platziert werden 2 In Pla...

Page 49: ...under the following conditions fig 5 5 1 1 In longitudinal direction the load or wheelchair is placed as close as possible to the floor of the vehicle 2 In lateral direction the load or wheelchair is...

Page 50: ...ies van de lift uitvoerig werden getest Avant toute utilisation contr lez l l vateur afin de vous assurer que tous les syst mes de s curit et toutes les fonctions marchent correctement et qu aucun ent...

Page 51: ...ssicherheit und die Sicherheit des Bedieners und von zuf lligen Umstehenden im Verkehr u erst wichtig S mtliche Wartungs und Reparaturarbeiten m ssen von einem autorisierten DHOLLANDIA Servicepartner...

Page 52: ...1 3 Le passage de la fonction SORTIR la fonction MONTER et de la fonction DESCENDRE la fonction RENTRER est contr l par un syst me d interrupteur mont sur les bras de levage fig 4 3 L l vateur peut s...

Page 53: ...s of a dip switch in the electric box The 4 button wander lead has an individual button for each of the 4 functions SLIDE OUT LIFT LOWER SLIDE IN fig 6 1 1 The 2 button wander lead uses the UP button...

Page 54: ...urit 6 2 2 Allumez l alimentation lectrique de l l vateur 6 2 3 Assurez vous que le bouton d arr t d urgence soit d bray 6 2 4 Appuyez sur le bouton SORTIR pour sortir la plateforme de la cassette jus...

Page 55: ...power to the lift 6 2 3 Ensure the emergency button is disengaged 6 2 4 Press the button SLIDE OUT to slide the platform out of the cassette until it hits the end stops at the work position 6 2 5 Pre...

Page 56: ...du v hicule 6 2 8 6 2 9 Lors de la DESCENTE la rampe de passage s l vera automatiquement d s que la plateforme s loigne du plancher du v hicule Lors de la MONTEE la rampe de passage s abaissera automa...

Page 57: ...tomatically raise upon departure of the platform off the loading floor When going UP the bridge plate will automatically drop down upon arrival of the platform at the loading floor 6 2 10 When going D...

Page 58: ...rales sur la surface de la plateforme 6 1 13 Repliez la rampe de passage sur les rambardes de s curit 6 2 14 Appuyez sur le bouton DESCENDRE pour faire descendre la plateforme jusqu au point o elle s...

Page 59: ...13 Fold the bridge plate back on top of the safety rails 6 2 14 Press the button DOWN to lower the platform until it stops automatically at the level of the cassette 6 2 15 Press the button SLIDE IN...

Page 60: ...ning te starten Blijft altijd buiten het zwenkbereik van het platform Houd handen en voeten altijd vrij van klemzones en bewegende delen van de lift Om de noodbediening uit te voeren volg daartoe de s...

Page 61: ...ack up system 6 3 Notfallbedienung Bei einer elektronischen St rung Batterie funktioniert nicht Sicherung ist besch digt elektrische Bedienung ist besch digt k nnen die verschiedenen Funktionen des Ro...

Page 62: ...door de automatische cassette vergrendeling Na gebruik draai de EMR schakelaar terug in zijn originele stand om de motor terug in automatisch vergrendelde stand te schakelen Commande d urgence pour RE...

Page 63: ...witch back in its original position to put the motor back in auto block mode EMR Emergency Motor Release NL Noodbediening Vrijloop Motor FR D brayage Secours du moteur DE Notentkupplung des Motors Fig...

Page 64: ...ue le bouton est rel ch la plateforme s arr te Commande d urgence pour faire descendre l arr t de fauteuil sur le bord arri re de la plateforme Fig Op ration manuelle ARR T FAUTEUIL EN BAS 6 3 5 Trouv...

Page 65: ...ency operation to lower the roll stop at the outboard platform edge Fig Manual operation ROLL STOP DOWN 6 3 5 Locate the electrovalve on lift frame 6 3 5 Under the nut sits a button that can be turned...

Page 66: ...andpomp op het deksel van de hydraulische groep Schuif hem over de pomparm van de handpump 6 3 7 Pomp de hendel op en neer om het platform te laten STIJGEN 6 3 7 Het platform stopt zodra de pompbewegi...

Page 67: ...e maintenance and inspection of the device Consult your national DHOLLANDIA distributor to obtain a copy of the local conditions In order to put any of the emergency systems out of service again proce...

Page 68: ...Slipgevaar 1g Struikelgevaar 1h Gevaar door kantelende voorwerpen Blijf altijd uit het zwenkbereik van het platform 1i Gevaar voor vallen vanop hoogtes 2a Contacteer uw nationale DHOLLANDIA verdeler 2...

Page 69: ...g hazard 1g Tripping hazard 1h Hazard caused by tilting objects Always stand clear off the platform work area 1i Hazard of falling from heights 2a Contact your national DHOLLANDIA distributor 2b Downl...

Page 70: ...de lading op het toepasselijke zwaartepunt Volg de laadinstructies 4e Noodstop Zal de lift onmiddellijk doen stoppen 4f Nooduitgang Voorziening handel ventiel die een nooduitgang cre ert 4g Ontgrendel...

Page 71: ...ow the load instructions 4e Emergency stop Will cause an immediate stop of the lift 4f Emergency exit provision lever valve creating an emergency exit 4g Unlock Disengage the mechanical locking system...

Reviews: