OPERATING
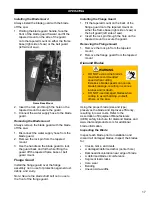
Installing the Blade Guard
Always install the blade guard with the blade
off the saw.
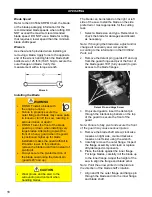
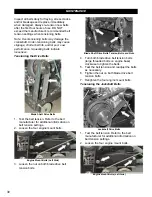
1. Holding the blade guard handle, face the
front of the blade guard forward and fit the
tapered mount on the side of the guard
onto the tapered mount on either the frame
base (right side of saw) or the belt guard
(left side of saw).
Frame Base Mount
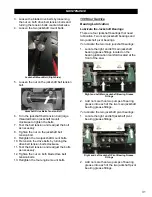
2. Insert the lock pin through the hole on the
tapered mount to secure the guard.
3. Connect the water supply hose to the blade
guard.
Removing the Blade Guard
Always remove the blade guard with the blade
off the saw.
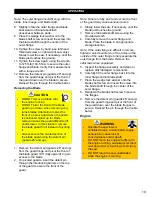
1. Disconnect the water supply hose from the
blade guard.
2. Remove the lock pin from the tapered
mount.
3. Use the handle on the blade guard to rock
the guard back and forth while lifting the
guard off the tapered frame base or belt
guard mount.
Flange Guard
Install the flange guard over the flange
assembly not in use for protection against dust,
debris, and slurry.
Note: Secure the blade shaft bolt not in use to
the front of the flange guard.
Installing the Flange Guard
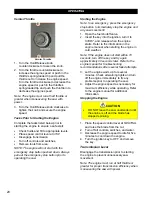
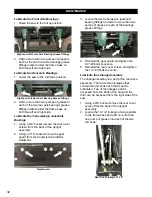
1. Fit the tapered mount on the back of the
flange guard onto the tapered mount on
either the frame base (right side of saw) or
the belt guard (left side of saw).
2. Insert the lock pin through the hole on the
tapered mount to secure the guard.
Removing the Flange Guard
1. Remove the lock pin from the tapered
mount.
2. Remove the flange guard from the tapered
mount.
Diamond Blades
WARNING
•
DO NOT exceed the blade’s
maximum recommended
speed when cutting.
Excessive blade speeds can cause
blade breakage, resulting in serious
injuries and/or death.
•
DO NOT use damaged blades when
cutting to avoid harming yourself,
others, or the saw.
Using the proper blade (size and type)
preserves the blade and improves efficiency,
resulting in lower costs. Refer to the
Association of Equipment Manufacturers
(AEM) safety brochure for diamond blades and
www.diamondproducts.com for additional
blade information.
Inspecting the Blade
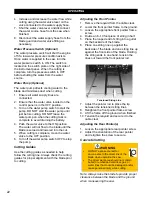
Inspect each blade prior to installation and
discard all damaged blades. Inspect the blades
for:
•
Cracks, nicks, and dents
•
A damaged/deformed arbor (center hole)
•
Darkness/discoloration near edge of blade
•
A deformed blade circumference
•
Segment loss/cracks
•
Core wear
•
Bending
•
Uneven side-widths
17
Summary of Contents for CC3538JK Series
Page 1: ...CORE CUT OPERATOR S MANUAL CC3538JK Electronic Fuel Injection May 2020 Rev 20 00 Part 1802723...
Page 2: ......
Page 47: ...REFERENCES 47...
Page 48: ...REFERENCES 48...
Page 49: ...REFERENCES 49...
Page 51: ...REFERENCES...

