MAINTENANCE
4. Remove the 1/4” pipe plug from the end of
the drain hose and allow the oil to drain
completely.
5. Remove the oil filter located on the right
side of the engine.
6. Wipe the filter head area clean with a lint
free cloth.
7. Fill the new filter with oil and allow two
minutes for the oil to be absorbed by the
filter material.
8. Apply a thin film of oil to the rubber gasket
of the new filter.
9. Install the new filter and hand tighten to
secure.
10. Remove the oil fill cap from the front of the
engine.
11. Fill the engine crankcase with oil in
accordance with the engine manufacturer’s
specifications and capacities.
12. Replace the oil fill cap and reinstall the
engine dipstick.
13. Start the engine and check for leaks. Stop
the engine, correct the leaks and recheck
the oil level using the dipstick.
14. Dispose of the used oil and filter in
accordance with city, state and federal
regulations.
150 Hour Service
Clean the Air Cleaner Filter Element
WARNING
DO NOT operate the saw without the air
filter installed.
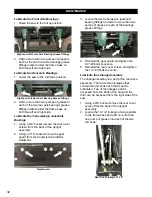
1. Unhook the retaining clips and remove the
end caps.
Air Filter Assembly
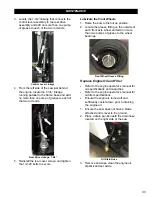
2. Check and clean the inlet screen.
Air Filter Inlet Screen
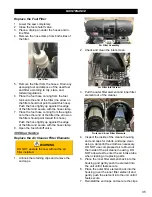
3. Pull the outer filter element out of the
cleaner and inspect for damages. Replace
as necessary. To protect the engine, DO
NOT pull out the inner filter element.
Outer Filter Element
4. Move away from the saw and clean the
filter from the inside out. Use dry
compressed air to clean the filter (a
maximum of 30 psi or 2.1 bar) and rotate it
while cleaning.
5. Inspect the inside of the cleaner housing
and end caps for debris, and wipe clean
using a damp lint free cloth as necessary.
DO NOT use compressed air to blow out
the inside of the air cleaner housing. DO
NOT allow dust to enter the air intake tube
when cleaning or replacing parts.
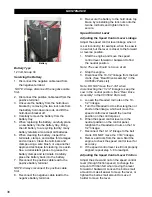
6. Place the outer filter element back into the
housing (over the inner filter element) and
gently push the element into the unit until it
feels secure.
7. Reinstall the end caps and secure the clips.
34
Summary of Contents for CC3538JK Series
Page 1: ...CORE CUT OPERATOR S MANUAL CC3538JK Electronic Fuel Injection May 2020 Rev 20 00 Part 1802723...
Page 2: ......
Page 47: ...REFERENCES 47...
Page 48: ...REFERENCES 48...
Page 49: ...REFERENCES 49...
Page 51: ...REFERENCES...

