OPERATING
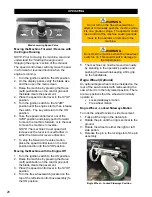
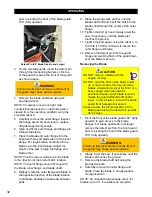
Handlebar, Operating Position
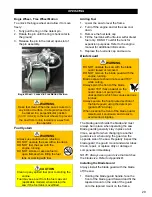
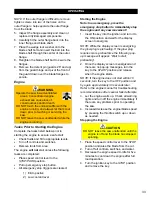
Free Wheel Switch
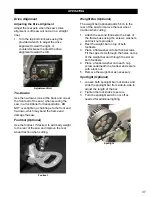
Manually Adjusting the Handlebars
1. Loosen both handle lock knobs.
2. Hold the handlebar grip and place the first
handlebar into the handlebar opening
below the handle lock knob. The handlebar
fits through three different adjustment
angles inside the handlebar opening (0°,
15°, and 30°). Place the handlebar at the
desired angle.
3.
Tighten the handle lock knob to secure the
handlebar.
4. Repeat steps 2–3 to secure the second
handlebar.
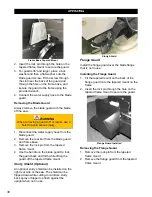
Adjusting the Power Tilt Handlebars
(Optional)
1. Loosen the handlebar adjusting lever.
2. Move the handlebar forward or backward to
adjust the length and retighten the
adjusting lever to secure.
NOTE: Maintain a minimum of 6” of handlebar
into the handlebar tube at all times.
3. Press the
Tilt Handlebar
pushbutton,
located on the side of the control grip, and
move the handlebar up or down to adjust
the angle.
NOTE: The button only works with the ignition
key at the ON position.
4. To reposition adjustment lever, pull out and
move to desired lever position.
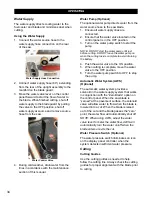
Speed Control Lever
The speed control lever is a part of an electro-
hydraulic assembly that allows the operator to
raise and lower the machine, move the
machine in a forward or reverse direction, or
place the machine in
STOP/PARK.
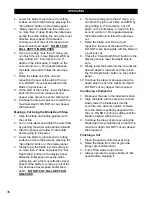
Control Grip Pushbuttons
The control grip pushbuttons only work with the
ignition key at the
ON
position.
Control Grip Pushbuttons
1. Press the
Raise
(left) pushbutton to raise
the saw and blade, and release to stop.
NOTE: Always raise the blade when
maneuvering the saw to provide proper
clearance between the blade and the ground.
2. Press the
Lower
(right) pushbutton to lower
the saw and blade, and release to stop.
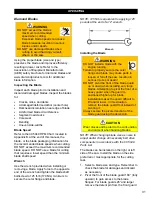
Blade Lowering Speed
Turn the
Blade Lowering Speed
valve
counterclockwise to increase the blade’s
lowering speed and clockwise to decrease the
blade’s lowering speed.
NOTE: The valve does not adjust the blade’s
raising speed which is not adjustable
.
27
Summary of Contents for CC5049D
Page 1: ...CORE CUT OPERATOR S MANUAL CC5049D Rev 21 00 Part 1802721...
Page 2: ......
Page 8: ...INTRODUCTION CC5049D Controls 8...
Page 11: ...INTRODUCTION CC5049D Specifications 11...
Page 58: ...REFERENCES 58...
Page 59: ...REFERENCES 59...
Page 60: ...REFERENCES 60...
Page 67: ......

