OPERATING
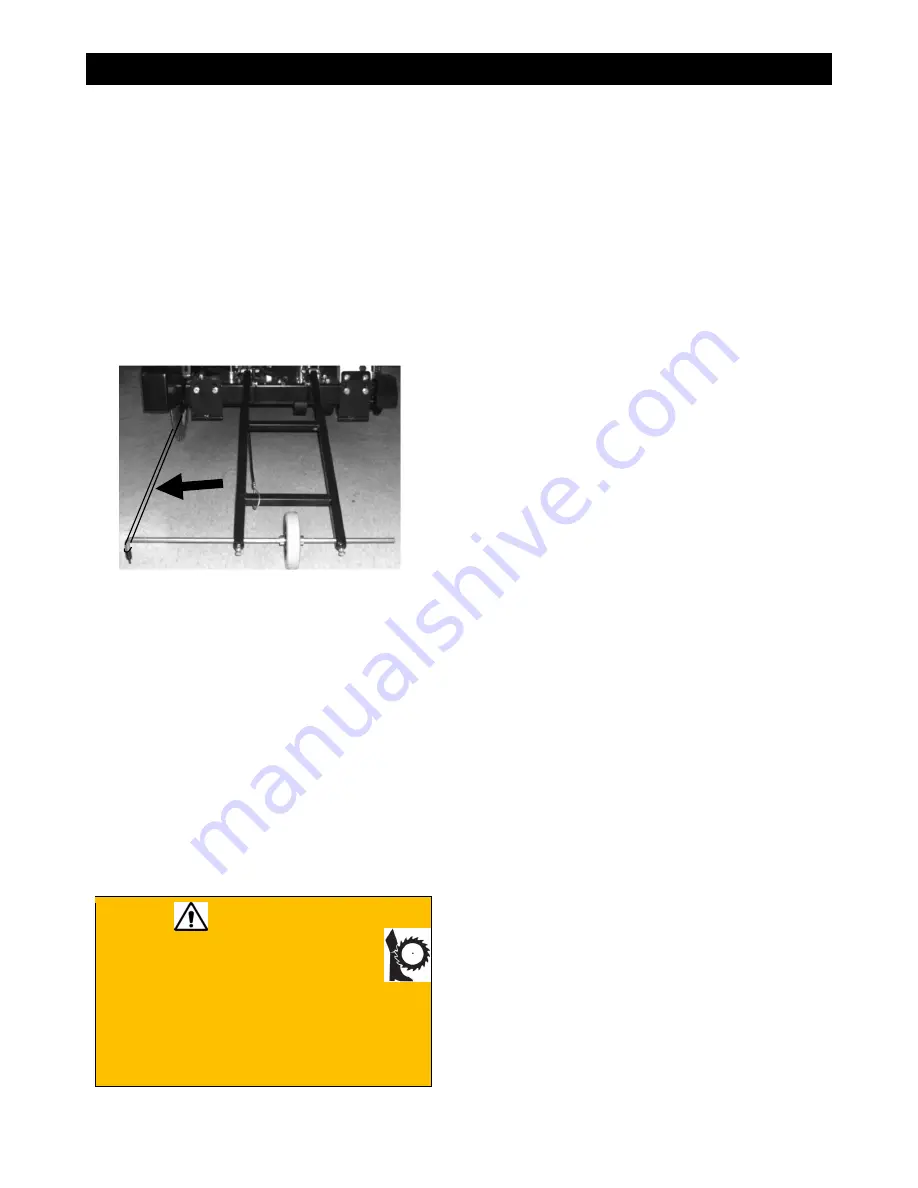
Adjusting the Front Pointer
1. Remove the lanyard from the cable cleat.
2. Lower the front pointer frame to the ground.
3. Loosen both front pointer frame screws.
4. Divide an 8–10 ft. piece of string in half.
5. Place the looped end of string into a gullet
on the backside of the blade.
6. Place one string line up against the
backside of the blade and one string line up
against the front side of the blade. Holding
the string ends in one hand, tension the
lines out toward the front pointer rod.
Tensioned String Line
7. Adjust the pointer rod to place the tip
between the tensioned string lines.
8. Retighten both front pointer frame screws.
9. Lift the frame off the ground when finished.
10. Tension the lanyard and secure it to the
cable cleat.
Adjusting the Rear Pointer(s)
1. Loosen the rear pointer nut and screw on
the back of the frame base.
2. Adjust the orientation/extension of the rear
pointer rod and retighten the screw and nut
to secure.
Straight Line Cutting
WARNING
DO NOT expose yourself or anyone
else to the direct line of the
blade when operating the saw.
The direct work area should not contain
buried or embedded electrical, gas, or
water lines that could be damaged
and/or cause personal injury while
cutting.
NOTE: Always raise the blade to provide
proper clearance between the blade and the
pavement when maneuvering the saw.
Helpful Hints Prior to Cutting
Keep the following in mind for better efficiency
while cutting:
•
Use just enough handle pressure to guide
the saw down the cutting line. DO NOT
forcibly direct (twist) the saw from side to
side when cutting. DO NOT jam, cock, or
wedge the blade in a cut.
•
Moving too quickly when cutting may stall
the saw, or may cause the blade to climb
out from the cut. If the saw stalls while
cutting, put the saw in neutral and raise the
blade from the cut to restart the engine.
•
Avoid sawing excessively deep to preserve
the blade and reduce sawing costs.
•
DO NOT lower the blade too quickly or
move the saw forward too quickly when
finishing a partial-cut to avoid forcing the
blade into the concrete.
•
Always have a proper water flow when
cutting for maximum blade efficiency. Using
too much water when cutting will make the
slurry look clear. Not using enough water
will make the slurry look thick and pasty.
•
Refer to the Diamond Products’ Guide for
Professional Concrete Cutters for
additional cutting tips and information.
Tasks Prior to Cutting
Complete the following tasks prior to cutting:
•
Ensure the blade size is correct for the belt
drive configuration.
•
Align the cutting guide(s) with the blade.
•
•
Clearly mark the cutting line.
•
Turn off all electricity, gas, and water
around the direct work area.
Making a Cut without Using the Blade
Depth Stop
1. Align the blade and cutting guide(s) with
the cut line.
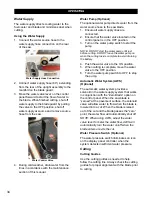
2. Turn on the water and adjust the water flow
by pushing the water valve handle forward.
3. Start the engine and allow to idle briefly
before going to full power.
35
Summary of Contents for CC5049D
Page 1: ...CORE CUT OPERATOR S MANUAL CC5049D Rev 21 00 Part 1802721...
Page 2: ......
Page 8: ...INTRODUCTION CC5049D Controls 8...
Page 11: ...INTRODUCTION CC5049D Specifications 11...
Page 58: ...REFERENCES 58...
Page 59: ...REFERENCES 59...
Page 60: ...REFERENCES 60...
Page 67: ......


