OPERATING
4.
Lower the blade to just above the cutting
surface and zero the blade by pressing the
“Zero Blade” button on the display panel.
5.
Slowly lower the blade into the surface to
no more than 2” deep. Make the initial pass
across the entire cutting line using the most
effective travel speed. If the blade is
coming up out of the cut, decrease travel
speed and/or feed depth.
DO NOT CUT
FULL DEPTH IN ONE PASS
.
6.
If you are cutting more than 2” deep, you
can finish the job in less time and effort by
step cutting in 2” increments. Cut a 2”
depth on the initial pass, 4” depth on the
second and so on. On repeated passes,
the blade will tend to follow the previous
cut.
7. Raise the blade out of the cut and
reposition the saw at the start of the cut
line. DO NOT move backwards with the
blade in a previous cut.
8. At the start of the cut line, lower the blade
back into the cut and make a second,
deeper pass across the entire cutting line.
9. Continue the step-cut process to reach the
maximum depth. DO NOT cut any deeper
than required.
Making a Cut Using the Blade Depth Stop
1. Align the blade and cutting guide(s) with
the cut line.
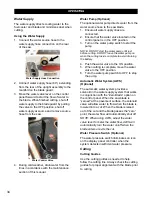
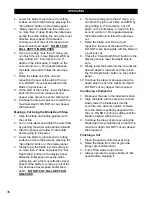
2. Turn on the water and adjust the water flow
by pushing the water valve handle forward.
3. Start the engine and allow to idle briefly
before going to full power.
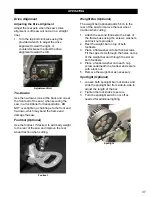
4. Lower the blade to just above the cutting
surface and zero the blade by pressing the
“Zero Blade” button on the display panel.
5.
Slowly lower the blade into the surface to
no more than 2” deep and press the “Set
Depth Stop” button on the display panel.
Make the initial pass across the entire
cutting line using the most effective travel
speed. If the blade is coming up out of the
cut, decrease travel speed and/or feed
depth.
DO NOT CUT FULL DEPTH IN
ONE PASS
.
6.
If you are cutting more than 2” deep, you
can finish the job in less time and effort by
step cutting in 2” increments. Cut a 2”
depth on the initial pass, 4” depth on the
second and so on. On repeated passes,
the blade will tend to follow the previous
cut.
7.
Raise the blade out of the cut and
reposition the saw at the start of the cut.
DO NOT move backwards with the blade in
a previous cut.
8. Press the “Clear Depth Stop” button on the
display panel to reset the depth stop to
zero.
9. Slowly lower the blade into the cut until the
desired depth is reached and then press
the “Set Depth Stop” button on the control
panel.
10. Continue the step-cut process using the
depth stop to reach the maximum depth.
DO NOT cut any deeper than required.
Continuing a Partial-Cut
1. Maneuver the saw to the desired location.
2. Align the blade with the previous cut and
slowly lower the blade back into the
concrete. Use extreme caution to make
sure the blade is perfectly aligned within
the cut. DO NOT continue cutting until the
blade is aligned within the cut!
3. Continue the step-cut process (using the
blade depth stop if preferred) to reach the
maximum depth. DO NOT cut any deeper
than required.
Finishing a Cut
1. Place the speed control lever at
Stop
.
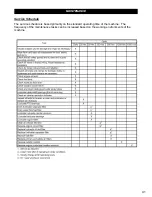
2. Raise the blade from the cut (provide
proper ground clearance).
3. Turn off the water control valve.
4. Always operate the engine briefly at idle
speed before stopping it.
36
Summary of Contents for CC5049D
Page 1: ...CORE CUT OPERATOR S MANUAL CC5049D Rev 21 00 Part 1802721...
Page 2: ......
Page 8: ...INTRODUCTION CC5049D Controls 8...
Page 11: ...INTRODUCTION CC5049D Specifications 11...
Page 58: ...REFERENCES 58...
Page 59: ...REFERENCES 59...
Page 60: ...REFERENCES 60...
Page 67: ......


