MAINTENANCE
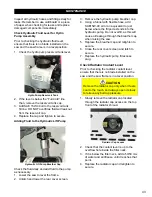
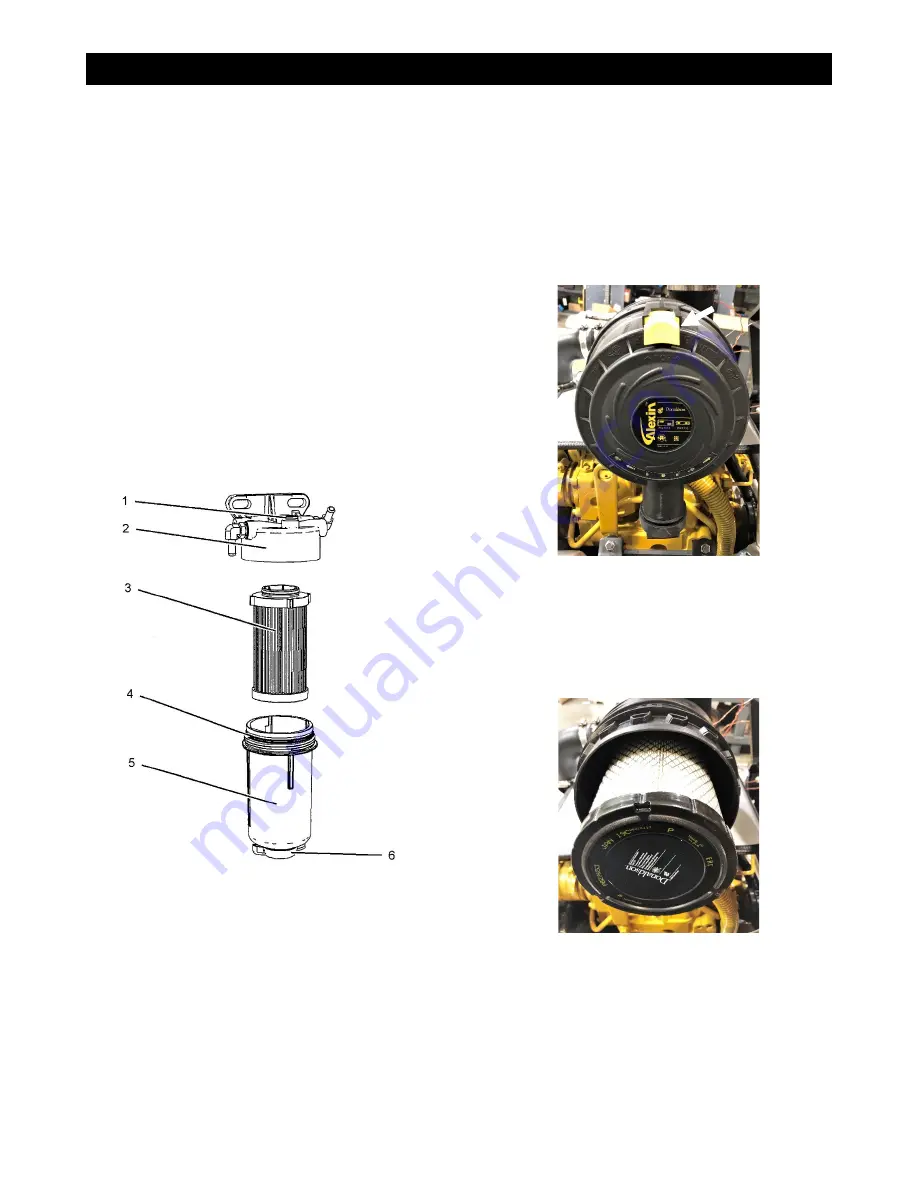
3. Open the drain valve (6) and open vent
screw (1) and drain the filter. Close drain
screw and vent screw when completed.
NOTE: Use only hand pressure to tighten the
drain and vent screws.
4. Remove the filter bowl (5) from the filter
base (2) and remove the filter element (3)
and discard the filter element.
5. Remove the O-ring seal (4) and discard.
6. Ensure all components are clean and dry.
7. Install a new O-ring seal (4) and filter
element (3).
8. Reinstall the filter bowl (5) to the filter base
(2) and tighten to 88 Lbs.-in (10 Nm).
Replace the Fuel Filter
1. Ensure the engine is turned OFF and the
saw frame is level.
2. Place a container under the fuel filter.
Fuel Filter
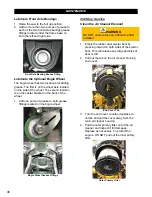
3. Open the drain valve (6) and if necessary,
open the vent screw (1). Allow fuel to drain
from the filter. Tighten the vent screw and
close the drain valve.
4. Remove the filter bowl (5) from the filter
base (2) using a suitable strap wrench.
5. Remove the filter element (3) and discard.
6. Remove the O-Ring seal (4) from the filter
bowl and discard.
7. Ensure the filter bowl is clean and free from
dirt.
8. Install a new O-ring seal (4) and filter
element (3).
9. Reinstall the filter bowl (5) to the filter base
(2) and hand tighten only.
Replacing the Outer Primary and Inner
Safety Filters
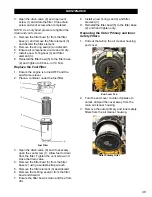
1. Pull out the tab on the air cleaner housing
end cover.
End Cover Tab
2. Turn the end cover counter-clockwise to
unlock and pull the cover away from the
main air cleaner housing.
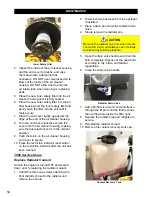
3. Remove the outer primary and inner safety
filters from the air cleaner housing.
Outer Primary Filter
49
Summary of Contents for CC5049D
Page 1: ...CORE CUT OPERATOR S MANUAL CC5049D Rev 21 00 Part 1802721...
Page 2: ......
Page 8: ...INTRODUCTION CC5049D Controls 8...
Page 11: ...INTRODUCTION CC5049D Specifications 11...
Page 58: ...REFERENCES 58...
Page 59: ...REFERENCES 59...
Page 60: ...REFERENCES 60...
Page 67: ......


