E
E
N
N
• suitable for use with food-making machinery
• not harmful to the materials and components of this appliance
For the directions for use and concentrations, please refer to those shown on the packaging and recommended by the
manufacturer. We recommend using the solution at the temperature of 25°C.
1.
empty water basin
2.
fill water basin with a with sanitizing solution. Raise without forcing the floating valve with a non-metallic stick
3.
switch on the appliance and let it run, topping up the level of the solution in the basin until at least 2 litres of solution has been
used
4.
switch off appliance and
disconnect from power supply mains
5.
remove all ice from bin
6.
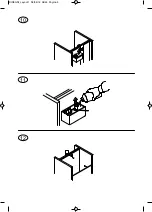
wipe ice outlet (1 in Fig. 11), bin and door with sanitizing solution, using a sponge and a soft brush
7.
rinse ice outlet, bin and door thoroughly with cold water
8.
remove the stick that holds the floating valve
9.
connect appliance to mains electricity supply, and switch on
10.
rinse evaporator leaving appliance running for at least 10 minutes
11.
close lid of water basin
12.
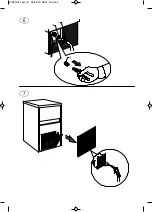
refit rear panel
13.
reposition top, securing it to rear panel with the screw
The ice flaker can now be reactivated as specified in the instruction book.
IMPORTANT:
All the ice produced during the first 30 minutes after cleaning and sanitizing operations must be discarded.
12 PERIODS AT A STANDSTILL
If you do not intend to use the appliance for a certain period of time, proceed as follows:
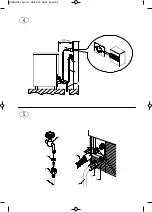
• switch off the electric power source by means of the switch (7 in Fig. 4), and remove the plug (if any) of the appliance from its
socket
• shut off the water supply by turning off the water supply tap (8 in Fig. 4)
• carry out all the operations envisaged for scheduled maintenance of the appliance (see chapter 9)
• clean filter of water supply solenoid valve as described in chapter 9.1
• clean filter of air condenser (if any) as described in chapter 9.2
Summary of Contents for ICE115AS-R2
Page 1: ...Mod ICE115AS R2 Production code GB903A HC 08 2018 ...
Page 15: ...DISEGNI_Layout 1 06 04 18 08 44 Pagina 1 ...
Page 16: ...DISEGNI_Layout 1 06 04 18 08 44 Pagina 2 ...
Page 17: ...DISEGNI_Layout 1 06 04 18 08 44 Pagina 3 ...
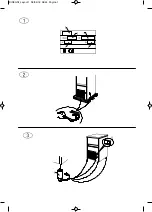
Page 18: ...8 9 DISEGNI_Layout 1 06 04 18 08 44 Pagina 4 ...
Page 19: ...10 11 12 DISEGNI_Layout 1 06 04 18 08 44 Pagina 5 ...


