background image

MEMO

-49- 

3000영어  2003.6.23 3:48 PM  페이지52 (1,1)

Summary of Contents for DDR-3032

Page 1: ...m DIASONIC TECHNOLOGY CO LTD Before use read through the User s Manual carefully We advise you to keep this user s manual to avoid possible technical difficulties DIGITAL VOICE RECORDER AUDIO PLAYER MODEL DDR 3032 DDR 3064 DDR 3128 DDR 3256 DDR 3032R DDR 3064R DDR 3128R DDR 3256R ...

Page 2: ...mpany To improve the quality and function of the product the content of manual can be modified without any advance notice Our company does not take any responsibility for the loss or damage by the modification of the manual MP3 files should not be used for the purpose of commercial use or service other than personnel use It is in conflict with the domestic copyright law in case of below It is proh...

Page 3: ...7 12 Deleting and Organizing Data 19 13 TIMER REC ALARM PLAY Function 20 14 How to Connect with External Appliances 24 15 FM Signal Receiving Function 26 2 DDR 3000 Series Software Mail Manager 1 DDR 3000 Series software mail manager 27 2 Connecting DDR 3000 SERIES and set up 28 3 Composition of Software 30 4 Spectrum screen and sound effect 33 5 Transferring MP3 34 6 Sending DVF files to computer...

Page 4: ...duct or reparation for injury by a third party or individuals DIASONIC TECHNOLOGY CO LTD does not accept any responsibility for the loss of data in the memory Users should not repair remodel or take the product apart by themselves Do not use the device on such places where the use of electrical machines is prohibited While operating one function of the product do not try other functions Applying h...

Page 5: ...ize Solid Exterior DDR 3000 SERIES adopted the function of SAMPLING with high quality of sound such as SHQ HQ SP so that it supports high quality voice recording and playback technology We guarantee that additional MP3 technology satisfies consumers demands Extension of Additional MP3 HD Function Voice recorder together with various function of MP3 player equalizer repeat function can correspond t...

Page 6: ... and downloading Display of time on LCD screen Saved calendars up to year of 2099 Thin slim design for portable and convenient use Hidden high quality microphone inside of the device Total 396 messages with 4 separate files 99 messages in each file ARS Automatic Recording System prevents unnecessary recording when there is no sound or voice so that maximizes the time of recording A B OFF KEY HOLD ...

Page 7: ...e Mode and DDR 3000 with FM Radio SEARCH PLAY FUNCTION searches forward backward the part that you want to listen fast and easily SPEED CONTROL 3Steps Playback Speed Control Fast Normal Slow by pressing FILE SPEED button MONITOR FUNCTION you can listen to the contents with earphones while recording H D 32M 64M 128M 256M FUNCTION can substitute for portable hard disks Digital output Volume control ...

Page 8: ...ADIO ERASE FILE FF PLAY REW REC STOP VOL VOL C MIC Ext C MIC JACK NECK STRAP USB JACK USE OF PORTABLE SAVING DEVICE REC MODE FILE EARPHONE JACK HOLD ON OFF REC TIME PLAY TIME Mhz ARS EL CONT TIMER VOLUME TIME REC PLAY USB DISK BATTERY MESSAGE NO REPEAT EQ HOLD ...

Page 9: ...or REC button Battery Full Battery partially consumed Battery mostly consumed Battery completely consumed 6 Use of Battery and Components in Package OPEN Caution If LCD screen does not work even with new batteries check polarity of batteries immediately In the case that LCD screen does not work in spite of appropriate setting of polarity remove the batteries and ask for repair Note If you leave ba...

Page 10: ...tion of a battery and or a charger carefully before use 6 Components of Package STEREO EARPHONE TELEPHONE ADAPTER INSTALL CD LINE IN CABLE USB CABLE EXTERNAL MIC BATTERY 2 AAA LR 03type NECK STRAP AC ADAPTOR OPTION REMOTE CONTROLLER OPTION 7 Battery in use Recording Playback through earphone Level of Volume Medium Alkaline Battery Size AAA LR 03 About 15 hr About 9 hr About 15 hr Playback through ...

Page 11: ...insure recording or when you want to lock all buttons Before use check the HOLD switch and slide it downward and then turn on the power HOLD HOLD ON OFF All buttons will be locked out 8 Basic Directions for Use We recommend that you to set up the time right after inserting the supplied batteries If you do not set time you cannot access certain functions such as ALARM PLAY TIMER REC and etc With on...

Page 12: ... index Set menu Turn up the volume Turn down the volume X X Erase index Delete indexes of all files Change of sections A B C D MP3 HD Receive FM radio signals Power OFF WHEN PLAYER IS PLAYING Stop playing index Stop playing index Start playing next index Current index search consecutive search Stop playing current index Stop playing current index X Turn up the volume Turn down the volume Repetitiv...

Page 13: ...FM radio broadcast Set menu Change to FM memory channel mode and release Turn up the volume Turn down the volume X X X Stop receiving FM signals WHEN RECORDING FM RADIO BROADCAST X X Increase index Stop recording FM radio broadcast and start receiving FM signals X X Turn up the volume Turn down the volume X X X X KEY ACTION Note Earphone works as an antenna The longer straighter the line of earpho...

Page 14: ...sections A B C D MP3 HD Receive FM radio signals WHEN PLAYER IS PLAYING Stop playing track Stop playing track Start playing the next track Current track search consecutive track search Playing previous track in case less than 5 seconds Playing the first track in case over 5 seconds Playing from the beginning after searching current track contrariwise and return to the beginning Stop playing curren...

Page 15: ...oose the part that you want by moving PLAYBACK button upward and or downward then press the button in to save it in the memory REM REMAIN NOR NORMAL ARS CONT SET YEAR MONTH DAY HOUR MINUTE ARM ALARM ON OFF DAT DATE MONTH DAY HOUR MINUTE SUN SAT HOUR MINUTE DLY DAILY HOUR MINUTE TMR TIMER MONTH DAY HOUR MINUTE SUN SAT HOUR MINUTE HOUR MINUTE EL BACK LIGHT ON OFF DSP DISPLAY ON OFF DAT DATE DLY DAIL...

Page 16: ...fter you choose the section that you want by moving PLAYBACK button upward and or downward then press the button in to save it in memory REM REMAIN NOR NORMAL ARM ALARM DAT DATE MONTH DAY HOUR MINUTE SUN SAT HOUR MINUTE DLY DAILY HOUR MINUTE EL BACK LIGHT EQ NOR CLA LIV POP ROC ON OFF DSP DISPLAY MENU ON OFF ...

Page 17: ...you need to set date and time first Press MENU button It will show you MODE sign Move PLAYBACK dial up and or down and choose SET mode then press PLAYBACK dial in Number of year will flash Choose each number of year and press PLAYBACK dial in Repeat the procedure to set month day and time SET DATE MODE When you finish setting time and date press MENU button and go back to first stage Press PLAYBAC...

Page 18: ...ess STOP button When you press REC STOP button the content of recording will be saved as the last taken number so that you don t have to search for unrecorded parts as done with tape recorders Don t forget to change the batteries to new ones when you want to record for a long time Check the remaining battery icon before you start recording Caution For successful recording conduct mock recordings a...

Page 19: ...ontent or sound during the recording process Adjusting volume of a player cannot control volume of recording Separating Files While Recording As for user s demand files can be separated from each file By pressing FF KEY you can record in the next index continuously so that you can easily distinguish from one index after another Caution Do not take out batteries during the process Details of record...

Page 20: ...ically after warning Then change batteries and start the player again At first stage you can listen to every message in the recorder from the first to the last one by pressing PLAYBACK button If you want to listen to just one of messages and stop press MENU button when the player does not work And then if MODE appears on screen choose OFF by selecting CONT with PLAYBACK dial Playback of MP3 Conver...

Page 21: ...RACK ALL TRACK RANDOM NORMAL Playback of all songs and stop 1 TRACK RPT repetitive playback of one song ALL TRACK Repetitive playback of all songs RANDOM Playback of all songs by random choice A B Repeat Playback A B sign shows up when you press REPEAT button for more than 1 second whenever you want to repeat the playback If you press REPEAT button again A B sign shows up and the part that you cho...

Page 22: ...elled Caution You can never restore deleted messages Deleting All Files and Messages Select the file that you want to delete To press ERASE button and FILE button together for 1 second erases selected file and FL ER sign All files are deleted by pressing ERASE button again VOICE FILES ALL ERASE AL ER sign appears by pushing ERASE button for 5 seconds If you push ERASE button again when AL ER sign ...

Page 23: ...dial in the same way of 4 END sign is on LCD now and end time for TIMER REC will flicker Then do it in the same way of 5 Finally if you press MENU button again a small picture of watch will be on LCD screen In case that you want to record weekly at same time Recall DATE of TIMER REC on the LCD screen Move PLAYBACK dial upward and downward and select day SUN Sunday MON Monday TUE Tuesday WED Wednes...

Page 24: ...ng If selected files are filled with 99 recorded messages already and memory is full TIMER REC cannot operate its function appropriately TIMER REC should be set for less than 24 hours If the start time of recording is before 23 59 and the ending time is later than 00 00 the ending time is set as the next day If TIMER REC starts its process while ALARM PLAY function is working press the stop button...

Page 25: ...y to set time when TIME sign appear on screen By pressing MENU button alarm sign will be in sight on LCD screen Play the selected message when time has come When the player stops playing it stops its whole function automatically and go back to the beginning part of the message If you want to listen to the message again press PLAYBACK dial If you want to play the same message at the same time once ...

Page 26: ...nd TIMER REC function are set to start at the same time LCD screen displays RESET and ALARM PLAY function will not operate correctly If requested time of ALARM PLAY plays during the normal recording process ALARM PLAY function will start to work after all the normal recording process is completed When requested time of ALARM PLAY functions plays while the player is in the MENU mode MENU mode disap...

Page 27: ...rough this player How to Connect with Record Players When you want to record in VOICE RECORDER through external appliances Connect audio cable with the earphone terminal of stereo components and with the microphone terminal of VOICE RECORDER together When you want to record in external appliances through VOICE RECORDER Connect audio cable with the microphone terminal of external appliances and wit...

Page 28: ...er Telephone Connect audio cable to the microphone connector of VOICE RECORDER and to the distributor of a component equipment Connect telephone cable of component equipment to the distributor Attach a cord which connects the receiver and telephone to the distributor Connect one side of telephone wire to main body of telephone If you press REC button of VOICE RECORDER you can record conversation o...

Page 29: ...using the FF REW button If you press PLAY button 01 sign will flash on the screen where FM sign appeared Then choose the channel that you want to save to 1 10 by using the FF REW button and press PLAY button FM sign shows up as the channel is saved In the same way you can save up to 10 channels Confirming saved channels If you press MENU button for 1 second saved channels and signals will show up ...

Page 30: ...0 Series MP3 DVF and normal data files Similar structure as Window Explorer r for file managing Plays MP3 MP2 WAV Audio CD playlist DVF WAV two way convert Convenient transfer of file using transfer list Various spectrum equalizer effect support CDDB feature Convenient instruction manual Minimum System Requirement for the DDR 3000 Series software Pentium 200MHz 64MB Memory 20MB Empty Hard Disk Spa...

Page 31: ...lied USB Cable connect the USB port terminal on the DDR 3000 Series to USB port on the Computer PC ONLY Then New Hardware detected will execute and end automatically Restart System to complete the software setup 3 Connect DDR 3000 SERIES to the PC using the USB cable New Hardware Detected will run automatically then click on NEXT button 4 Select Search suitable drive for device and click on NEXT b...

Page 32: ...tton 7 Click on NEXT button to finish wizard 8 Once USB drive setup is completed check for setup progress from device manager at My Computer If DDR 3000 SERIES is not after software is opened Check for USB device on PC and for proper connection of Cable ...

Page 33: ...and title scrolls right to left and you can see two kind of magnificence spectrum window Play and stop files through control panel on the right side of the screen Adjust volume by using button Click on red position bar to move the position of current playing music 30 Composition of software File Manage Window Play Manage Window Flash Memory Manage Window Folder Manage Window Transfer list Manage W...

Page 34: ...0 Series is properly connected it will display a red light with a phrase stating Voice Bank is Working just like the picture at the top The MP3 files files which the user sends to the flash memory on the DDR 3000 Series will appear on bottom right window and file size and remaining space of the memory will be marked on the Memory used screen Default setting is set to show all types of files on the...

Page 35: ...memory then press this button to delete the file Choose the files to be move to flash memory for file manage window then click this button to transfer download selected file to flash memory It is used to move file to computer from flash memory 32 Button Function print reload delete Transfer to flash memory Transfer to computer Button Function Select voice folder Select MP3 folder Select HD folder ...

Page 36: ...eries software 4 Spectrum screen of DDR 3000 series software 5 Various Equalizer and Sound Effects can be use to listen to the music voice file The equalizer presets for the DDR 3000 Series are normal rock pop jazz classic and vocal by clicking on the left mouse button on the red words next to EQ EFT preset configuration change them in order The Effect presents are as follows normal room reverb bi...

Page 37: ...d drop files to flash memory manage window Also click on icon from flash memory managing section for same reaction Transferring MP3file as following Select from folder manage window Select MP3 file from file manage window Click downlod to flash memory Selected MP3files are being downlod to flash memory of DDR 3000 SERIES 34 Transferring MP3 downlod to flash memory ...

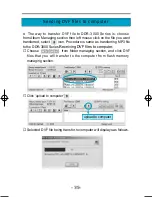
Page 38: ... is same as transferring MP3 file to the DDR 3000 Series Receiving DVF files to computer Choose from folder managing section and click DVF files that you will transfer to the computer from flash memory managing section Click upload to computer Selected DVF file being transfer to computer will displays as follows 35 Sending DVF files to computer upload to computer ...

Page 39: ...u can easily transfer DVF or MP3 files in the flash memory Once the transfer is over status bar displays the size of the transferred file and use of memory To transfer multiple file at once use button or drag and drop to place files in transfer list It s convenient when sending files from different folders to the DDR 3000 Series Transferring files from transfer list is shown below 36 Transfer all ...

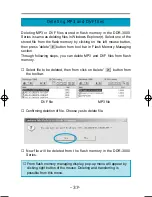
Page 40: ...tion Through following steps you can delete MP3 and DVF files from flash memory Select file to be deleted then from click on delete button from the tool bar DVF file MP3 file Confirming deletion of file Choose yes to delete file Now file will be deleted from the flash memory in the DDR 3000 Series 37 Deleting MP3 and DVF files From flash memory managing display pop up menu will appear by clicking ...

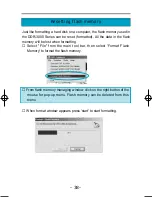
Page 41: ...mory will be lost when formatting Select File from the main tool bar then select Format Flash Memory to format the flash memory From flash memory managing window click on the right button of the mouse for pop up menu Flash memory can be deleted from this menu When format window appears press start to start formatting 38 Resetting flash memory ...

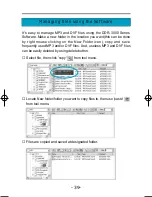
Page 42: ... on the New Folder icon copy and save frequently used MP3 and or DVF files And useless MP3 and DVF files can be easily deleted by using delete button Select file then click copy from tool menu Locate New folder folder you want to copy files to then use paste from tool menu Files are copied and saved at designated folder 39 Managing files using the Software ...

Page 43: ...ayed through the DDR 3000 Series Mail Manager supports mail programs like Exchange Internet mail Outlook Outlook Express and Netscape r by using drag and drop cut and past sending voice mail through other mail program and network program is possible Mail Manager can create small sized files that combine voice data and player in a executable exe file format voice mail can be sent and heard even whe...

Page 44: ...cord and play Adjust wave volume from control volume of window to set play volume and adjust option properties record from volume adjust window select microphone for microphone record volume 3 Production of self play function Createsa small executable file combined with voice file and player If self player formed mail is sent receiver can listen to it even without mail manager From save as save in...

Page 45: ...By simple edit function deleting of front and rear part of recorded massages are possible and after recording if mis record is found delete the error and just record that part again delete front part of current position delete rear part of current position 7 Supported mail program Exchange Internet mail Outlook Outlook express Netscape manual attack of voice mail 42 Voice file player exe Deleting ...

Page 46: ...0dbuV Max 80mW speaker 8ohm World Standards 87 5 108MHz Japanese Standards 76 90MHz 32Kbps 320Kbps MPEG 1 2 LAYER 3 85db up 1KHz input 0db 0 3 0 05 1KHz input 0db 20Hz 20Khz Maximum5mW 16ohm EQ NORMAL ROCK POP CLASSIC LIVE Playback of each track for 10 seconds 43 GENERAL SPECIFICATIONS DDR 3000 R DDR 3032 3032R VOICE RECORD SHQ 136min SHQ 272min SHQ 544min SHQ 1088min HQ 272min HQ 544min HQ 1088mi...

Page 47: ... LR03 Alkaline Battery x2EA AAA size or UM 4 About 15 hrs with medium level of volume through earphones About 15 hrs with medium level of volume through earphones About 9 hrs with medium level of volume through speaker About 12 hrs with medium level of volume through earphones About 8 hrs with medium level of volume through speaker Connecting cable with external appliances 1 Installation CD 1 Adap...

Page 48: ...uct refer to customer service at DIASONIC TECHNOLOGY CO LTD This warranty will not be reissued so keep it safely Free repair regulation 1 Our product has gone through strict quality control and inspection If breakdown occurs from normal condition during warranty period you may receive free repair from our customer service department 2 Even during warranty period following situation will not grant ...

Page 49: ...ease beware of following when mailing 1 Contact our customer service department to receive a RMA before mailing in the product 2 Please enclose warranty card with the product when mailing during warranty period Please wrap in shock absorb material and put in box mailing fee wrapping fee and any damage caused during mailing will be charge to a customer 3 To prevent loss please use registered mail ...

Page 50: ...MEMO 47 ...

Page 51: ...MEMO 48 ...

Page 52: ...MEMO 49 ...

Page 53: ... refund and parts keeping period is depended on regulation of customer protection Any questions or if you want to know more information about the product please contact DIASONIC TECHNOLOGY CO LTD DIASONIC TECHNOLOGY CO LTD 321 43 Suksu Dong Manan Gu Anyang City Gyeonggi Do Korea Telephone No Representative No 82 31 474 0852 5 FAX No 82 31 474 0856 Homepage http www diasonic com 50 PURCHASER SELLER...

Reviews: